Monday 28 February 2022

Make it simple Monday Daffodil Daydream

 This last weekend the weather has been so beautiful here in my corner of the world.  The skies have been clear and bright blue. The sun has shone brightly with a little warmth in it too!! As I've been out and about  bright splashes of colour have come from the gorgeous daffodils.  These beautiful flowers inspired me to teach for a stamp set called Daffodil Daydream

Daffodil daydream stampin up simple stamping easy card making


This set is perfect for this time of year. With sentiments for both Easter and Mothers day,  which here in the UK take place in early spring. I  love to see these bright bold beauties as they remind me that the weather is improving and the day's are getting longer.

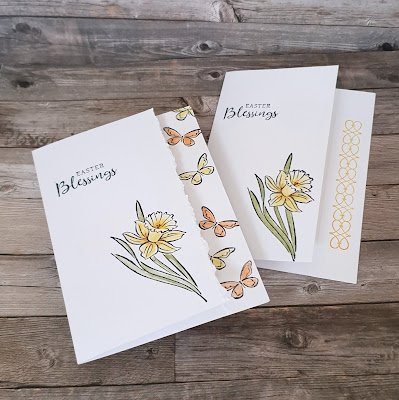
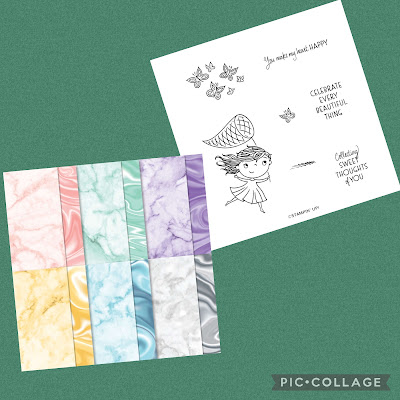
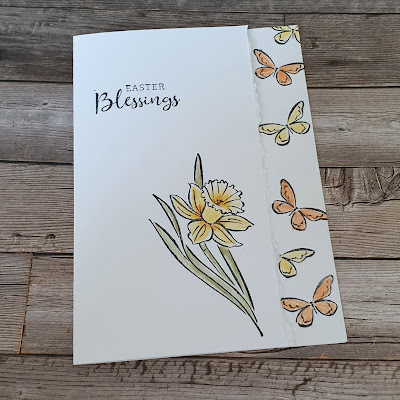
My #makeitsimplemonday cards for today are made using just stamps,  ink , paper and coloured in with pencils.

There are slight differences in the designs of these 2 cards. One has a torn edge and butterflies....

Daffodil daydream stampin up simple stamping easy card making

 ... and the other has a cut edge and a filigree stamped pattern.....

Daffodil daydream stampin up simple stamping easy card making

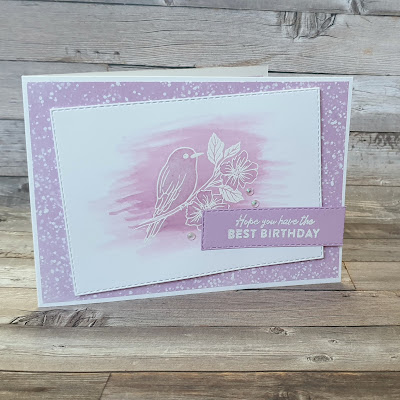
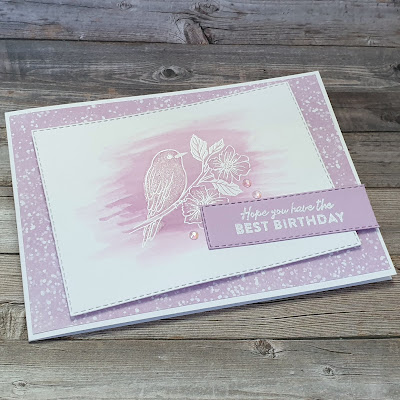
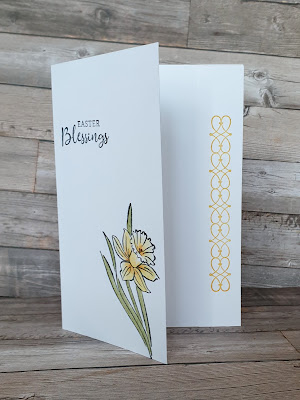
The cards are very simple in design and require little in the way of tools or skills. For the cut edge version I simply cut a strip off the right-hand side of my card base. I then stamped on it and adhered it onto the right-hand side of thw back of my card base.

Daffodil daydream stampin up simple stamping easy card making

For the second version I simply held the  straight edge of a ruler part way in from the right-hand side of the front of my card base the tore it along. I then stamped the bustterly stamp randomly down the strip, coloured them in and adhered it to the right-hand side of the back of the card base. 


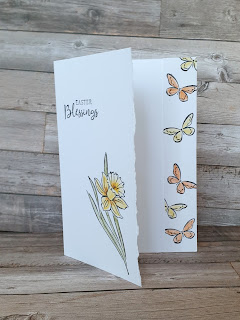
Which do you prefer ? Gill would chose the cut edge as she doesn't like torn, frayed anything 😉 Me , I like the soft look of the torn edge!

This fun, simple technique give the cards an interesting feature that everyone can achieve.  

I'll be demoing these 2 ways to add a little something extra to a card in my Facebook Live this afternoon over on our page  here.

Have a great Monday and Happy Birthday wishes to all those who have a Leap Year Birthday 🎂.

Daffodil daydream stampin up simple stamping easy card making


Friday 25 February 2022

Fun Fold Friday - Awesome Otters

For my final card this week with the Awesome Otters, I have made a C6 card go into a square card. This time with using all of the otter images, I have stamped and coloured them in using blends, fussy cut some and I added a little heart to the last otter. 

I started by taking a C6 card base and cutting it in half so I was left with a piece of Thick White card 10.5cm by 14.85cm. I then took another piece of white and cut it to 10cm by 15.85cm. This piece, I scored at 1cm, 5.5cm and 11.5cm. I used another piece of Thick White card 6cm by 10cm for the panel on the front of the card. I used a piece of  Pool Party card cut at 10cm by 14.4cm and scored this using the Animal Print Embossing Folder. I then added adhesive to the 1cm strip of the long piece and added that to the Thick White card. I added the embossed Pool Party card fixing it with Tombow multipurpose glue over the 1cm strip that had been glued on previously. I took some of the Simply Marbleous papers and added then to the small panels on the scored card piece. In the centre of the side panels is the reverse of the sheets either side of it. Then I had fun stamping and colouring in the otters. 

I added 2 to the front of the card and stamped a little more of the splashes of water to fill the piece of card out. The other 3 images were fussy cut out and added as you can see. I had used the Give It A Whirl Dies a few days ago and they were still on the table so I die cut a few of the different hearts and added them over the card. 

I used the Love and Happiness stamp set for the this card. This set is another set full of sentiments for couples, partners, friends. Basically all sorts!


This week has come to a close very quickly but now it's time for me to go. Lots to do in preparation for the 2 Big Girls Crafting Annual Retreat in March. As one of our ladies said today, just over 3 weeks to go!!!

Thank you so very much in taking time to pop by this week and see what's going on here. Cary will return on Monday and share with you some of her creations for the week. Until I return, 

TAKE CARE, STAY SAFE and KEEP WELL please but more importantly as I say every week....

😍😍😍 KEEP ON CRAFTING 😍😍😍

Gill xxxxx
 

Thursday 24 February 2022

Throwback Thursday - Awesome Otters

Hello again on this Thursday's post. My card today with the Awesome Otters has taken me back to my simpler days of card making. Using the standing Otter this time, I used a gorgeous green mat in Shaded Spruce and taken a piece of the beautiful papers from the Expressions in Ink range of DSP. These papers are stunning. They look like wet paint which have gold paint thrown into them. Before glueing the paper to the green mat, I added a piece of the white ribbon from the Flowers from Every Season combo pack. I used my Shaded Spruce marker pen to colour the ribbon. Then made a bow and added it to the centre. I love the fact that Stampin' Up! ribbon can be coloured as a general rule to match any card you have. 

I used the Hippo and Friends dies to cut the image out and the additional mats for the sentiments. The dies are also brilliant because not only do they have the dies for the Hippo and Friends images, there are a few different shaded label sets in it too.


Wednesday 23 February 2022

Watercolour Wednesday - Awesome Otters

Today I wanted to use the Awesome Otters and the Layering Diorama Dies. I love the way the shape of the dies just roll around, just like a pond. I die cut 2 of the dies in white card and then stamped the otters onto the smaller mat. Using my Watercolour pencils and water brush, I coloured in and washed the colour over the whole image.

 Adding the white die cut behind the coloured mat, makes the top mat pop I think. I used a piece of the FREE Saleabration papers called Simply Marbleous. I did tell you there were lots of FREE items to chose from! These papers blend so well with the dies and the otters. Then a simple message completes today's card. 


Tuesday 22 February 2022

Time is running out .....


 Time is running out to take advantage of the great joining offer available until February 28th  you get to chose 2 Free stamp sets in addition to your £130's woth of product's of your choice and a great business bundle for just £99!!!

As a part of our crafting community you will find a great group full of fun and laughter and who are a great suport network as well as all the crafty inspiration you could want!. 

So if you're in the UK or France,  Germany, Austria or the Netherlands we'd love to have you join our Larger Than Life Stampers community .

Feel free to message for more details or visit https://www.stampinup.uk/join?demoid=5001003


Tips, Tricks and Techniques Tuesday - Awesome Otters

My tip for Tuesday this week is add some texture. With the Awesome Otters and Special Moments (also a FREE stamp set from Saleabration) I used and embossing folder called Tasteful Textures to emboss the soft green mat of Pool Party card. It seems to add a litle ripple in the water behind the circular mat with the otter on. I'm really pleased that they coordinate really well. I had a previously die cut scalloped circle from the Layering Circle Dies and then stamped the little otter in the water so decided to die cut the image from another circle. I used the Label Me Fancy punch for the sentiment and mats.

A little colouring, this time using my Stampin' Blends pens and its completed.


Monday 21 February 2022

Make It SImple Monday - Awesome Otters

Welcome back on this windy and wet Monday! We've been battled by storms over the last few days and it's blown all of the cobwebs away! This week I am using one of the FREE stamp sets from Saleabration from Stampin' Up! Using the Awesome Otters stamps I made a very simple card with the addition of a splash of colour in the mat. 

As both Cary and I have mentioned over the last few months, Saleabration is a few months of the year that Stampin' Up! offer special items for FREE when you place an order of £45 GBP or more. Now, tell me, who doesn't like a free gift every now and then? I used my granddaughters colouring pencils once again and made a simple background after stamping the 3 images onto the card mat. 


Friday 18 February 2022

Fun fold Friday Sale-A-Bration Jan to Feb 2022

For the fun fold today I've also decided to use may absolute favourite Sale-A-Bration offering. Called Sunshine and Rainbows  it is the most gorgeous pattern paper 😍

Sunshine and rainbows Stampin up fun fold


Doesn't it just make you want to smile ☺? I  love the  bright bold vibrant colours and fun cheerful patterns.  I like them so much that I have used it to create todays fun fold inspiration. 
 The card was inspired by one I saw created by a crafter who's name I wrote down but have now lost 🤪 I'm so sorry my brain is just fritzed at the moment!.
Anyway here are the measurements for my version of this fun layered pop out card.
I  have used thick basic white cardstock for the base of my card. I cut 3 panels. 1 measuring 10.5cm x 24cm then a 2nd one measuring 10cm x 11.5cm and a 3rd measuring 7.5cm x 20cm.
Starting with the largest  piece score at 2.5cm, 5cm, 7.5cm and 10cm.  Repeat this with the 3rd piece. 
Now with piece number 1 I have adhered a piece of pattern paper measuring 10cm x 13.5cm onto the largest section leaving a small border all around. Next fold the score lines to create a tube that ends ontop of the bottom of the pattern paper. The scores are all valley folds. Adhere the final panel in place on the pattern paper. 
Next adhere a piece of pattern paper measuring 9.5cm x11cm on to the 2nd piece of card . This piece is then adhered to the  front of the pop out on piece 1.
Now I folded the score lines on piece 3 and adhered them the same as piece 1 but this time the pattern paper goes on the other side. The pattern paper  measures 7cm x 9.5cm. The pop out piece is the adhered to the bottom of piece 2.

Sunshine and rainbows Stampin up fun layered pop up card

To decorate the card I fussy cut images from the great Sunshine and Rainbows paper. The sentiment I used was from the Special Moments stamp set also a great Sale-A-Bration offering.

Sunshine and rainbows stampin up fun fold card

The  other great thing about this fun fold is that it folds flat!!

Sunshine and rainbows Stampin up fun fold card


All together this is a great card that brings a smile to you with its bright colours and fun images just right for a very wild and windy Friday. 
Please join me next week when Gill will be sharing her inspiration with us.
Ohh and don't forget if you like any of the products I've  shared this week please visit my shop HERE
Have fun and stay safe
Cary x

Sunshine and rainbows Stampin up fun fold


Thursday 17 February 2022

Throwback Thursday Sale-A-Bration Jan to Feb 2022

I don't know about you but sometimes I find myself looking for inspiration and going to Pinterest and several hours later still haven't made anything! Yet other times you see one picture and boom you know what you're going to do!! Well that was the case when I went looking for inspiration for a card featuring the Catching Butterflies stamp set and Simply Marbleous dsp from the Sale-A-Bration offering.

Catching Butterflies simply Marbleous Stampin Up

The card that inspired me didn't use either the stamps nor pattern paper it was the layout that caught my attention.

The layout was quite simple a splash of colour behind an image stamped on to a circle and a line of smaller images down one edge.
 Sadly when I went back to find the inspiration  to make a note of the talented person who created it so that I could givebthem credit I couldn't find it 😪 So if you recognise the layout or the know the person please let me know so that I can edit this post and give them all due credit.

My first card also uses the gorgeous colour palette that the original used. A soft pink, white and a hint of kraft. The pink I used is called blushing bride and the kraft is called crumb cake.
I stamped the little girl image but masked off the net. I coloured her hair and skin with some of the new Natural Tones alcohol markers from Stampin' Up! These are a fab new colour palette to our collection of alcohol markersm

Natural tones blends stamin up

I the die cut around her with a circle die and added a scalloped edge created with a piece of crumb cake cardstock. I then stamped her again and coloured and fussy cut out her hair. I stamped her dress onto a piece of the pink simply marbleous pattern paper and fussy cut that out. I then adhered them ontop of the first stamped image. 
For the base I used a mat of white and blended a simple circle of colour slightly to one side. I then stamped some of the butterflies in crumb cake ink down one side. 
A little bakers twine, a few white enamel dots and a sentiment and I was happy.

Catching Butterflies stampin up cute card


I was so happy with my card I decided to recreate it using a different colour palette.  This time I went for a turquoise colour palette.  


Catching Butterflies stampin up cute card


The colours I chose are called costal cabana and pool party. I  love how this card turned out. The change in colours gives it a very different feel much fresher and bright. The soft and gentle pink and kraft version is much more subtle.

So which is your favourite 🤔  the pink ? Or the blue? Me I just can't  decide 😁


Wednesday 16 February 2022

Watercolour Wednesday Sale-A-Bration Jan to Feb 2022

 Just a quick post today using a quick way to use watercolour.  I have also chosen to use a great bundle only available as a free item!!! Called Friendly Hello this bundle consists of stamps and beautiful pattern paper. This means you're set to create beautiful coordinating projects from the get go!! Which was perfect for my speedy project for today no worries about coordination.

Friendly hello Stampin up Sale-A-Bration 2022
 
Inspired by the gorgeous papers I chose a simple colour palette of a lovely shade of lilac called fresh freesia. I cut a mat of the speckles fresh freesia pattern paper and placed it onto a white card base.

Next for the watercolour portion of the project . I die cut a rectangle from some thick white cardstock. Then I stamped the image of the bird on the branch in versamark ink and heat embossed it with white embossing powder.

By choosing to heat emboss the image I didn't have to worry about the ink of thenimage smudging or running. It ment that I could just apply the watercolour wash over the top. All I had to do was gently rub the wash of the embossed areas.

Whilst I had the tools out to heat emboss I stamped and embossed a sentiment in white onto a piece of coloured cardstock. I then die cut the sentiment with a small stitched rectangle die.


Friendly Hello Stampin up watercolour wash card
 

To add a little something something to the inside I also heat embossed some of the sprig images onto a white mat in one corner and watercolour washed over it. I then placed the mat onto a mat of fresh freesia cardstock and adhered it to the inside of my project.

Friendly hello stampin up watercolour wash card

To give my card a little sparkle I got my trusty clear wink of stella pen out and coloured over thw flowers and bird. The effect is a lovely subtle shimmer which is quite difficult to capture in a photo but is beautiful in real life.

Friendly hello Stampin up watercolour wash card

I also added a few of the gorgeous iridescent rhinestones just because they look great and I like them 😉

All in all a quick card with lots of style and a beautiful monochromatic palette. 

Friendly hello Stampin up watercolour wash card


Tuesday 15 February 2022

Tips tricks and techniques Tuesday Sale-A-Bration Jan to Feb 2022

 For today's inspiration I started with a blended panel that I'd made from another day and that's one tip straight off the bat 😁. When you're making messy backgrounds make spares for future projects. Now I looked at the background and wondered which Sale-A-Bration stamp set to pair it with 🤔 Well I decided to go with the Island Vibes . This fun set just felt right and as it has no sentiments in it I decided to use the fantastic Special Moments.  

Special Moments island vibes stampin up Sale-A-Bration

To make the most of my blended background I decided to cut it into 3 narrow panels for the front of the card. Next I layed the 3 panels side by side but slightly off set.

I then used the potted palm stamp  and stamped in black onto each panel. I kept them in line with each other. To make sure they come out with a strong black colour I used a Stamparatus which is a stamp positioning tool. This means that I can stamp the image several times in exactly the same place to get a really solid colour.

I then used an embossing folder to add texture to the 3 panels and a white mat. I placed the mat onto a card base and then used 3d foam to place the 3 panels on the front. I stamped a sentiment onto a white banner and popped it on top.

Island vibes special Moments Stampin up

Now I had some bits of the blended background left over sooooo first I decorated the inside of the card...

Island vibes Stampin Up Sale-A-Bration 2022

I stamped onto a white mat first in black with the leaf stamp. I then stamped it onto a leftover strip of the background.  I adhered the blended strip onto the mat so that it lined up.

Then I found 2 small strips of the blended background and thought ummmm what shall I do with them 🤔....

Island vibes Sale-A-Bration jan to feb 2022 Stampin up

.... A co coordinating envelope of course 😁 i used the final image from the Island Vibes set a cute pineapple. I stuck  the 2 leftover strips down securely.  Then stamped over the 2 strips in black to continue the coordinating effect .

So there you have it no space left undecorated all from 1 10.5cm x 14.85cm piece of ready blended background! I love how this card and envelope look really coordinated and if I do say so my self rather stricking. I love the vibrant colours and stylish black stamped images. So my top tip don't throw the scraps away use them to complete the look and create beautiful cards and envelopes. 

Island vibes special Moments stampin up coordinating card and envelope