Pages

Friday, 29 April 2022

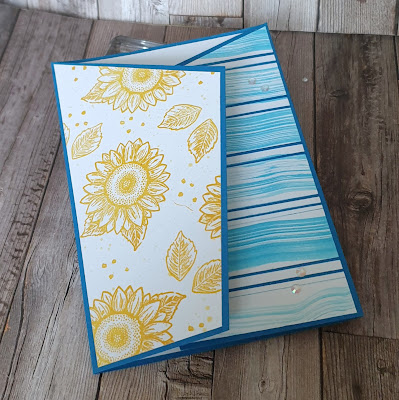
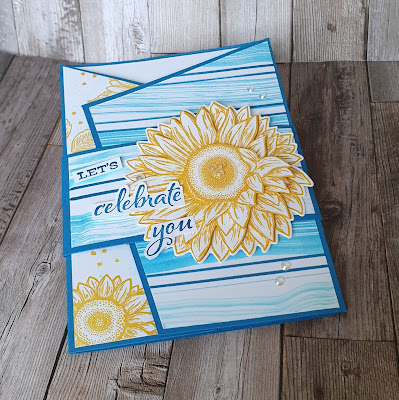
Fun fold Friday Celebrate Sunflowers

 I have to say I've been enjoying creating with the Celebrate Sunflowers this week. It wasn't a stamp set that jumped out at me . I knew it was pretty and would be useful for my daughters cards. What surprised me was how once I changed the colours how much I enjoyed creating it.

But for today's inspiration I thought I'd loop back to the colour pallette that started this weeks inspiration my daughters birthday card. Her favourite colours are bright yellow and a bold shade of blue. So starting with this colour combo I made 2 backgrounds.

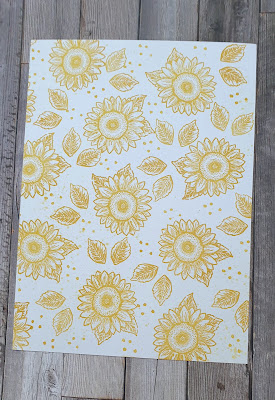
The first I made was all in the yellow colour. I stamped the images randomly adding a small spots stamp from another set. I then splattered the same yellow colour alcohol marker all over too.

Celebrate Sunflowers stampin up fun fold card

I then created a background using the blue colour. I used a wide water brush to pick up some ink that I'd added a few drops of water too. Then just painted it across a piece of white cardstock in stripes. Once this was done and dry I took a marker pen in the same colour and a ruler and draw stripes on top. 

Celebrate Sunflowers stampin up fun fold card


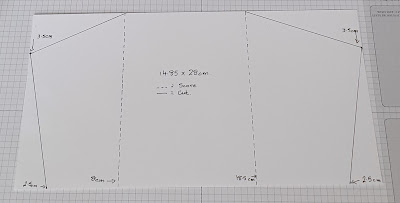
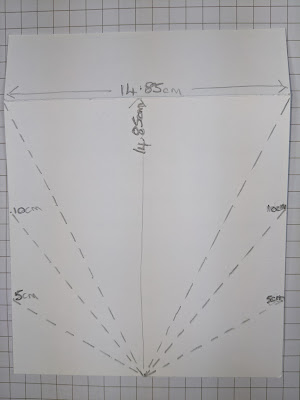
Now onto the fun fold it's self.  For this you will need a piece of cardstock measuring 14.85cm x 28cm. Score the card at 8cm and 18.5cm. Burnish the folds. 

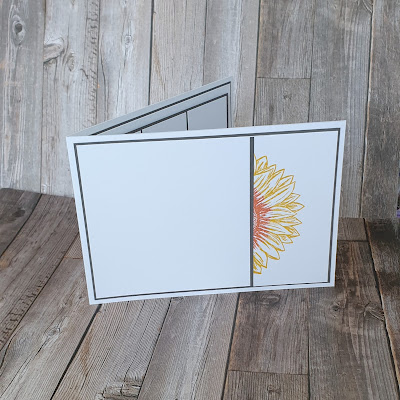
Now mark 3.5cm down from the top left and right hand side. Then mark 2.5cm in from the bottom left and right hand side as per the photo below. Now cut the corners off as per the picture below.

Celebrate Sunflowers stampin up fun fold card

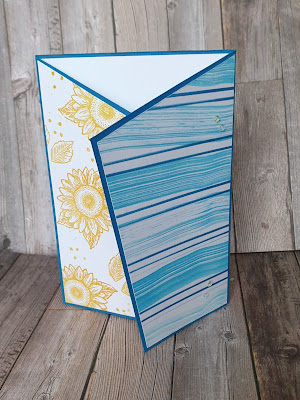
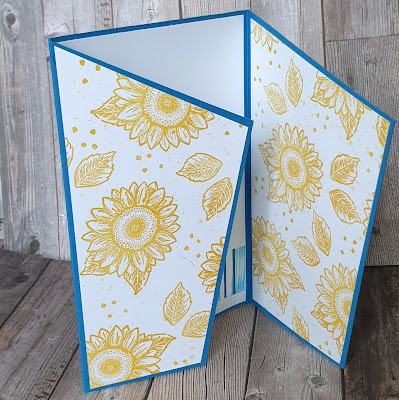
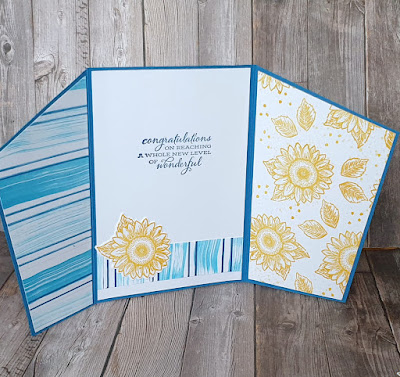
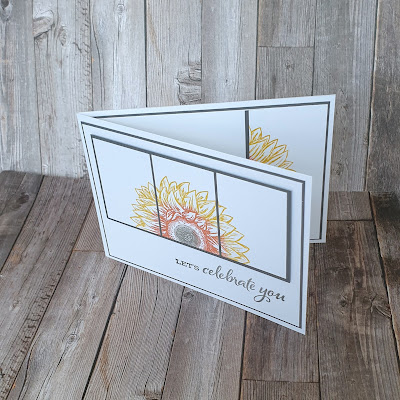
When you have removed the corners fold along the score lines so that the sides fold one on top of the other. The fold is a type of gatefold but I'm not sure what it's really called. I just call it a wrap around gatefold.

Once the card base was made it was time to reach for the backgrounds and use them to decorate my card. 

Celebrate Sunflowers stampin up fun fold card


Celebrate Sunflowers stampin up fun fold card

Celebrate Sunflowers stampin up fun fold card


I cut a panel of white cardstock for the center and decorated it.

Celebrate Sunflowers stampin up fun fold card


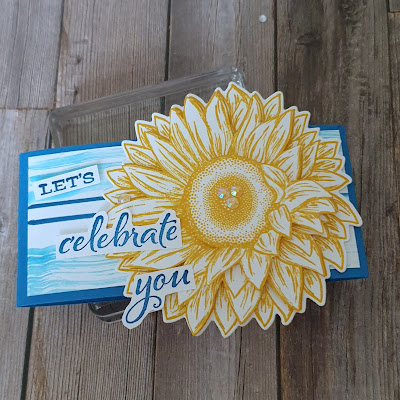
I then created a belly band to act as a closure.

Celebrate Sunflowers stampin up fun fold card


All together this is quite a simple fun fold. There are lots of surfaces to decorate so you can let your creativity run wild or not just as you desire!
Well that's it for this week from me. Next week Gill will be sharing her inspiration here with us all.
I hope you all have a great weekend 😊 
Have fun 
Cary xx

Celebrate Sunflowers stampin up fun fold card


Thursday, 28 April 2022

Throwback Thursday Celebrate Sunflowers

 Happy Throwback Thursday 🙂 Today I'm sharing a card that features a technique that I haven't used in ages. I'm not sure what it's really called but it uses ink and sponge daubers direct to the stamp. I thought it would be a great way to add colour to the large sunflower in the Celebrate Sunflowers stamp set with out colouring it in.

It's  a very simple technique.  I took 3 ink colours. A yellow, an orange and a grey and a dauber for the grey and orange.

I then inked the stamp up in the yellow ink and took a small piece of kitchen paper and dabbed the ink off in the center.

Next I added orange ink to the dauber and dabbed it around the bottom of the petals. I used the grey ink and dauber to add ink to the very center of the flower.

Once it was all inked up I stamped it centrally onto a piece of white cardstock measuring 12cm x 10cm.  Now the hard part cutting it up!!

First I cut 4.5cm off from the bottom and popped it to one side. Then I took the remaining 12cm x 5.5cm piece and cut it in to 3 pieces. Each piece now measures 4cm x 5.5cm.

I then mounted the 3 pieces onto a piece of grey cardstock measuring 6cm x 12.75cm. I left nice equal boarders all around.

To finish the front I matted a white layer onto a grey one and stamped the sentiment onto the bottom right side. I then used 3d foam to adhere this layer onto the card base 

I used 3d foam to mount the flower onto the card as well. This card has a clean and elegant look that can take the dimension that 3d foam offers.

Celebrate Sunflowers stampin up clean and elegant card

I then took the smaller panel and trimmed the width to 9.5cm. Next I mounted it onto a piece of grey cardstock measuring 5cm x 10cm. I then created a white mat measuring 9.5cm x 13.85cm and placed it onto a mat of grey cardstock measuring 10cm x 14.4cm. I adhered this to the inside of my card and the placed the stamped layer onto the right hand side so that the grey edges lined up.

Celebrate Sunflowers stampin up sponge dauber inked clean and elegant card

I am really pleased with this clean and elegant card. I have used more subtle colours for my flower but I can see it being done with bright and bold tones to create a real burst of colour!

Celebrate Sunflowers stampin up clean and elegant card


Wednesday, 27 April 2022

Watercolour Wednesday Celebrate Sunflowers

 Today I'm sharing a new to me fun watercolour technique.  I must first give credit to Barry and Jay over at Mitosu Crafts for sharing this fab way to mix things up a bit! When I saw this technique I knew I wanted to use it with the Celebrate Sunflowers stamp.

So what am I going on about I hear you say... well let me explain. You'll need your watercolour pencils, a stamp and a spritzer with water, oh and cardstock of course!

Celebrate Sunflowers stampin up watercolour pencil direct to stamp technique


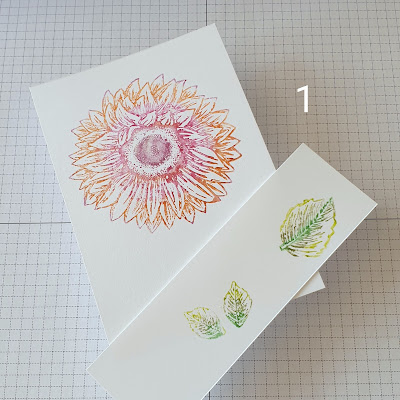
First you're going to lightly mist your stamp with water. Then you're going to colour it in with the watercolour pencils. Then another mist of water and stamp!

The effect is fabulous...

Celebrate Sunflowers stampin up watercolour pencil direct to stamp technique

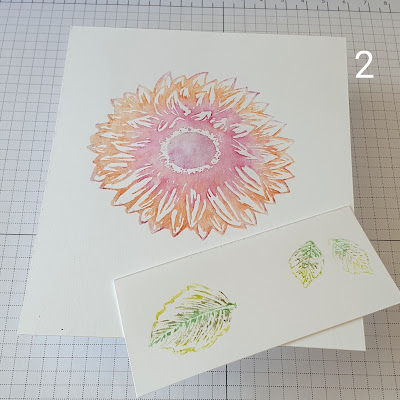
Above is the first impression.  I then re-spritzed the stamp with another mist of water and stamped again....

Celebrate Sunflowers stampin up watercolour pencil direct to stamp technique

And then again....

Celebrate Sunflowers stampin up watercolour pencil direct to stamp technique

And finally....

Celebrate Sunflowers stampin up watercolour pencil direct to stamp technique

I love how these turned out so much I had to create 3 cards with them. The first I created a simple card.

Celebrate Sunflowers stampin up watercolour pencil direct to stamp technique card

For the 2nd impression I wanted to make a card that was a little more stepped up...

Celebrate Sunflowers stampin up watercolour pencil direct to stamp technique card

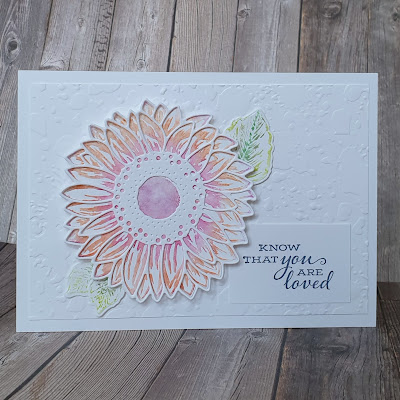
And for the final card I went all out using dies and bling.

Celebrate Sunflowers stampin up watercolour pencil direct to stamp technique card

I love how these simple images can create gorgeous card at all levels of style and skill.

I think this new tequnique will fast become a go to one in my arsenal. What about you? Will you give it a go?


Tuesday, 26 April 2022

Tips tricks and techniques Tuesday Celebrate Sunflowers

 We all know that sometimes good things have to come to and end. For me one of the sad things about a new annual catalogue is that not everything carries over. One such product this time is the chalk marker. I used this for many things so what am I going to do ? As I sat looking at the Celebrate Sunflowers stamps my mind thinking about the loss of a fav tool I decided I just had to find an alternative way to do one of my favourite techniques. 

In days gone by this technique would be achieved by  stamping onto darker coloured cardstock and then colouring in with the chalk pen.

So this time I thought what could I use instead 🤔  So I chose a piece of basic grey cardstock and stamped randomly all over using the same colour ink as cardstock.  

Next I took out my trusty Blender pens and a White ink pad . I then dabbed ink onto an acrylic block,  you can of course use a silicon mat or a cello bag. Next I used the blender pen to collect some of the white ink and used it to colour the flower tips and leaves.

I'm  really happy with the way it turned out. I think the effect is just right and just as easy as my old friend the chalk marker.

Celebrate Sunflowers stampin up white ink technique card

The sentiment was heat embossed in white onto basic grey cardstock then moynted onto white .
Don't forget to clean your block with a good wash as the ink stays wet for quite a while and you don't want to make a mess with your arm going in it by accident... say's  the voicenof experience 😉. 

Celebrate Sunflowers stampin up white ink  colouring technique

I'd  definitely be  happy to use this way going forward.

Celebrate Sunflowers stampin up white ink colouring technique


Monday, 25 April 2022

Make it simple Monday Celebrate Sunflowers

 Sometimes it can be hard to decide what stamps to use for the weeks inspiration. The choice can be decided by many things new purchases, celebrations or even challenges. But this weeks decision was made by my daughter! It was her birthday and her favourite flowers are sunflowers 🌻 so I reached for the Celebrate Sunflowers stamp set my yellow ink and got creative.

Celebrate Sunflowers stampin up simple stamping easy card making

Here's a peek at the card I made for my daughter that sparked my imagination for this weeks inspiration. 


Celebrate Sunflowers stampin up birthday card

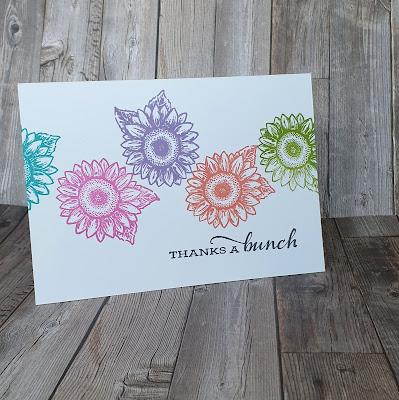
As it's Monday and therefore #makeitsimplemonday I decided to start the week with some simple stamping in a selection of bright colours.

I had in my mind a version of a rainbow using the small flower. 

Celebrate Sunflowers stampin up fun simple stamping easy card

I love the colourful card so much I didn't stop at 1....
This version has a ombre vibe.

Celebrate Sunflowers stampin up easy card making simple stamping

This time I used just 3 different inks and used a simple technique called generational stamping. 
This is where you ink the stamp once and stamp 2, 3 or even 4 times without reinking!

Celebrate Sunflowers stampin up easy card making simple stamping

The third version is using the same tequnique as I was just having fun stamping!

If you'd like to see how I made these card's I'll be demoing them in my regular Facebook live on our page here today at 4pn BST. 
If you can join me that would be great 🙂 especially as I'll be sharing the upcoming 2022-24 In-Colors!!!
If you can't make it I'll share the link to the video here later.


Friday, 22 April 2022

Fun Fold Friday - Whale Done

For my last card this week using Whale Done stamp set I have used a style of card that I love to make. It's an arrow fold card within a square card base. I started by cutting a piece of Night of Navy A4 card lengthways to 14.85cm by the full length of 29.7cm. I then scored it in half at 14.85cm. That has now given me a 6" by 6" card base. I took another piece of card, Basic White this time and cut it at 14.4cm by 16cm then scored it at 14.4cm. That gave me another square of card.
I marked the centre lowest edge at 7.2cm with a pencil and along both sides at 5cm and 10cm. Using my trimmer and score tool, I lined up the centre mark with the top scored corners and then scored between them both. see picture 2 for the diagram. The fold at the top will be concealed behind another white mat of 14.4cm by 14.4cm when it is adhered to the card base. 
 
 
For the paper to coordinate on this card I used some pieces from The New Horizons Designer Series Papers. Most of what you see above is the image on the paper itself. I have added a few plants, fish and birds as well as the 2 whales to the paper. The sentiment is from Peaceful Sayings stamp set. 
 
As you look to the side, you can see the inner flap of the Arrow Fold card which will show more interest to the recipient.
 
 
I would often decorate the upper triangle on the card too to add another feature to it. 
Well, that's it from me for this week. Cary will be back again next Monday with some more of her creations to inspire you. 
Until I get back, 
STAY SAFE, BE WELL but most of all 
KEEP ON CRAFTING.
xxx Gill xxx

Thursday, 21 April 2022

Throwback Thursday - Whale Done

 My Throwback Thursday card this week is one that I like to often do. I started with a plain basic white mat and started with stamping the plants from Whale Done across the lower part before I die cut the oval from the centre. I added another mat of the same size beneath the card and embossed the 2 at the same time using the lovely Seashells embossing folder. Using some plain paper, I stamped several more of the plants in different colours and then fussy cut them out. I did the same with the whale, jelly fish and turtle. I adhered the plants and used Dimensionals between the 2 layers and for the creatures too. Although there seems to be lots on the card, it was a very quick card to make. Surprisingly!


Wednesday, 20 April 2022

Watercolour Wednesday - Whale Done

Hello on this cool watercolour Wednesday. Today's card is obviously a watercolour card which took a wee while as there was lots to colour in. I started by colouring the water. My preferred way is to pick up ink with a clear block and then adding a few drops of water to it. I started with Coastal Cabana ink and once I had washed the water into the ink, I used a large water brush and picked up some ink and brushed it several times across the lower half of the card. Once it was well covered and dry, I stamped the fish from Whale Done across the water and then inked the mountains stamp from Mountain Air in Smoky Slate (light gray) ink and stamped it above the water level but I left a small gap between the 2 levels for a grassy area. 

I continued to add ink in different colours across the sky, mountains, grass and beach. I stamped the reverse of the mountain stamp onto the water in a light Smoky Slate ink. Some birds, a small boat and a few shadows later with a few ripples on the water and the card is completed.


Tuesday, 19 April 2022

Technique Tuesday - - Whale Done

 For technique Tuesday today my card is a simple technique that I like to call a spy hole. I'm sure there is a proper name for it but I like mine! Using Whale Done today I started by taking a C6 mat of Basic White card 10cm by 14.4cm and started stamping the plants, fish etc all over it. Then the fun began! I taped the 2 pieces together so that neither would move. Then taking one of the Layering Circle dies, approximately 5cm or 2" in diameter, I cut out the circle through both mats. I peeled the tape off and placed another slightly larger die over the aperture of  only the top, stamped mat and cut it once again. This was then fixed to the card base  and lined up the holes nicely for a good border. 

I then proceded to stamp the turtle and a few more fish so that they would show through at different angles. A few simple sentiments and the card is completed.