Monday 31 October 2022

Make It SImple Monday - #simplestamping - Santa's Delivery

 Well it's only around the corner now so I hope you are all getting ready for Christmas too? This week I will be showing you some cards that I have been making using the Santa's Delivery stamp set and occasionally, the Santa's Delivery Memories and More cards here and there. Today's one of course is a very quick and simple card. I literally stamped the Christmas tree all around the edges of the card mat and added a few Candy Canes in too. Something aimed at a beginner crafter or one that the children can replicate too. I was going to add some more on the front but remembered that it is a simple stamping card.

I have added a card made with the Memories and More cards. This centre card is only C7 or 3" by 4" to start with and on their own make a lovely card in itself. This one, all I did was cut around the border of the card and mounted it using dimensionals. It was that simple!



   
Here is the Memories and More version


Friday 28 October 2022

Fun fold Friday Snowman Magic

 And for my final project of the week I have made a card that is also a gift. The fun fold is a simple reverse easel. I used the Snowman Magic Bundle. For the colour palette I took inspiration from a suggestion made in a comment left on our Facebook page.

The colour I chose is a gorgeous dark blue called starry sky.  This blue is deep and rich and works so well with many colours. But for this project I decide to go monochromatic.  I used white glimmer paper and starry sky ombre glimmer paper a well as white and starry sky cardstock.

First I created the gift portion of the project. I took the large snowflake frame die from the set and die cut it using the white glimmer papet. I then used a piece of acetate,  3d foam and 2 pieces of cardstock to create a shaker ornament. I used the lovely sparkle and shine sequins to fill it with.

Snowman magic stampin up fun fold Christmas ornament and card

I also added a few of the effervescent elements as they create a great sound as well as shimmer.


Isn't it fun? Next I made a simple easle card to attatch it to. I decorated the card so that when the ornament was removed there was still something to see 🙂

Snowman magic stampin up fun fold Christmas ornament and card

Isn't the little snowman cute? I cut him out in the white glimmer paper then added a starry sky glimmer hat and heart. The tree and snowflakes are all cut from the white glimmer.


Snowman magic stampin up fun fold Christmas ornament and card

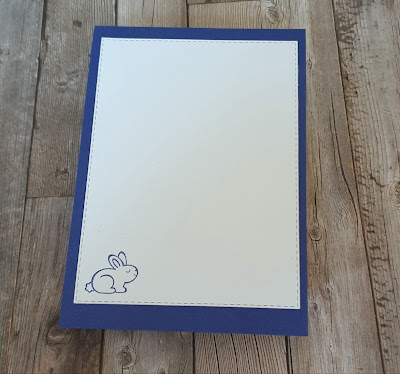
I die cut a stitched rectangle in white cardstock stamped the cute bunny in one corner and adhered it to the reverse of the card base so that you can write your message.

Snowman magic stampin up fun fold Christmas ornament and card

The easle is very to create all you need is a piece of card measuring 10.5cm x 29.7cm scored at 7.4cm and 14.85cm.  Fold the score lines as mountains and use a bone folder to reinforce  them . You then decorate as desired but remember to place something as a stopper for the front panel.
I used a glue dot that I detacked on my top to attach the ornament to the front panel of the card.
Well that's it from me this week. Please join me here next week when Gill will be sharing her talents with us all.
Have a good weekend and maybe find a little time to spend crafting 😉
Have fun
Cary xx

Snowman magic stampin up fun fold Christmas ornament and card


Thursday 27 October 2022

This or That Thursday Snowman Magic

 No I can definitely confirm there is a recurring theme to this weeks inspiration.... Squares 🤣🤣🤣 I have no idea why but there you have it! That's beside the fact that I am showcaseing the Snowman Magic bundle of stamps and dies.

One thing that is a little different about my projects today is that I've  used coloured card bases.  Now that is something I don't do very often and rarely with bold cards. And I'm  still not sure if I like the finished cards. So can you help me decide Red (A) or green (B)?

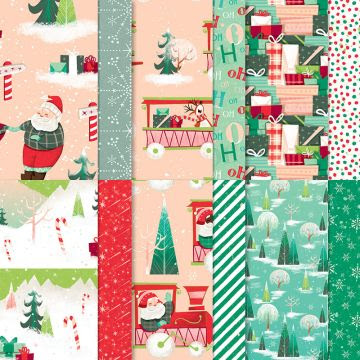
The red card is made exactly the same as the green. I used pattern papers from the Santa's Express pack. 

Snowman magic stampin up floating effect Christmas card

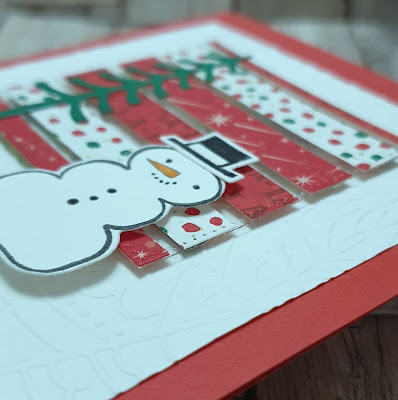
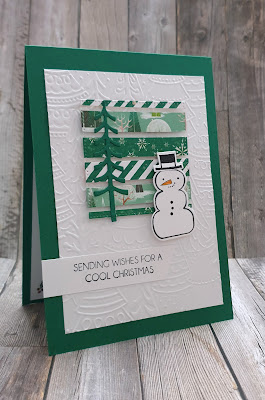
I used the paper to cut stips and place them onto a piece of acetate . I then die cut it into a square. I hid 3d foam behind the stipes so that the panel appears to float. 

Snowman magic stampin up floating effect Christmas card

To finish my card I embossed a white panel. I also die cut a green tree and stamped and die cut a snowman with his top hat.

Snowman magic stampin up floating effect Christmas card

A simple sentiment and the card was finished.  I then recreated it using a green card base and green coloured pattern papers.

Snowman magic stampin up floating effect Christmas card

So what do I think of the finished cards? Well I love the layout and the floating panel especially.  Do I love the bold coloured card bases I'm not sure. Which colour do I like the best well I think the red is jolly but the green is quite elegant even if the card is a cute one. 
So which do you like best and why? Red (A) or Green (B)?


Snowman magic stampin up floating effect Christmas card


Wednesday 26 October 2022

Watercolour Wednesday Snowman Magic

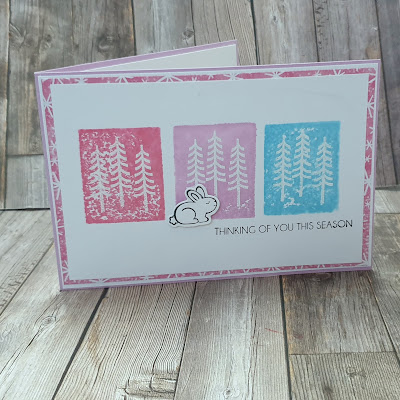
 Watercolour doesn't have to be tricky. It doesn't have to be messy.  I doesn't have to be difficult. And my card for today proves it!! I wanted to create a card using the Snowman Magic stamps with out using the snowman stamp! 

So an easy, tidy and simple watercolour card using any stamp but the snowman....

Snowman magic stampin up easy clean watercolour Christmas card

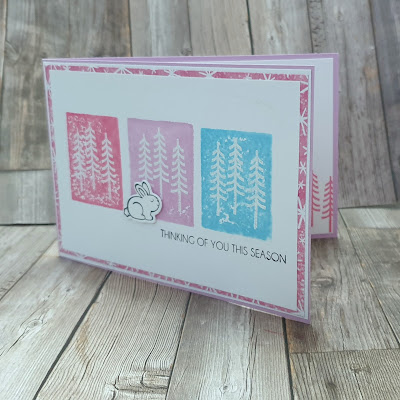
The watercolour part is the colour blocks on the card. They are created by chosing an acrylic block that fits your project then gently tapling it onto a water based ink pad. You then gently spritz it with water. Next taking a piece of basic white card flip the block over so the ink goes on the card. Watch as the ink is absorbed into the cardstock.  Now take the block off and you have a unique block of colour waiting to be used!

Snowman magic stampin up easy clean watercolour Christmas card

I chose to stamp the tree in versamark and heat emboss the image with white embossing powder.  I love the way it turned out.
I then couldn't resist stamping the trees on a mat for the inside of the card.

Snowman magic stampin up easy clean watercolour Christmas card
 
I then took the front panel and matted it onto a piece of pattern paper. I  also just had to stamp and die cut the cute bunny 🐰.  A clean cut sentiment stamped in black just finished the card nicely.

Snowman magic stampin up easy clean watercolour Christmas card

I'm  Certainly still on a squareish kick today that's  for sure 🤣

Snowman magic stampin up easy clean watercolour Christmas card


Tuesday 25 October 2022

Tips tricks and techniques Tuesday Snowman Magic

 I'm in a square kind of mood this week 🙃 For today's inspiration I'm  sharing a technique where you split your image/ layout . This all looks  you to elongate and / or layer the images. I've  used the fun Snowman Magic bundle

Snowman magic stampin up fun Christmas card

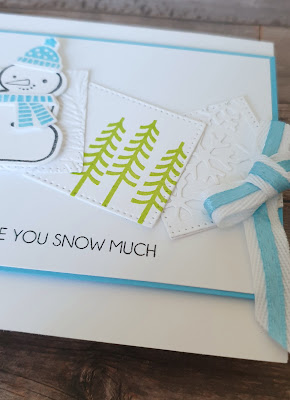
I love the dies that coordinate with the stamps. The main die is the beautiful snowflake frame. I also used the square dies from the Stylish Shapes dies

Stylish shapes dies Stampin up

So this is a very simple idea you die cut a few squares and play with your layout. You could use any shape. They don’t  have to be die cut. You could use punches or just cut out squares or rectangles with your trimmer.

I  wanted to keep the colour palette  very clean and crisp so chose white with pops of bright green and blue.  As I wanted a lot of white I made sure to include some texture. I used an embossing folder for 1 square.

 For 2 other squares I die cut the oh so pretty  snowflake frame in white. I then die cut it with a square die in different places. I then adhered these on to white die cut squares.


Snowman magic stampin up fun clean and crisp Christmas card


So a clean and crisp card doesn't have to be plain or sedate....

Snowman magic stampin up clean crisp Christmas card

I just love the uber cute snowman. I especially love that the stamps allow you to customise them. 

Snowman magic stampin up clean crisp Christmas card

I added a touch of ribbon following on from my Facebook live yesterday where I shared simple ways with ribbon. If you'd  like to see ot the click here.


Monday 24 October 2022

Make it simple Monday Snowman Magic

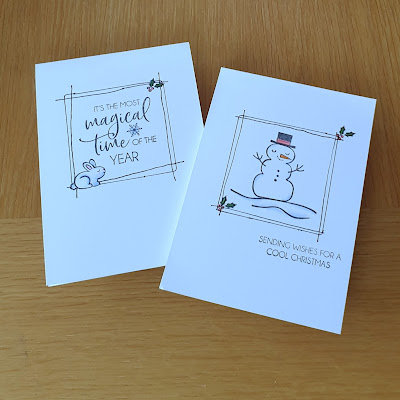
 Today I have 2 #simplestamping projects to share with you. Each of these cards uses one stamp set, a black ink and white cardstock.  The stamps are called Snowman Magic.  They're super cute and great fun to play with.  You can build all sorts of different cute scenes with them.

Snowman magic stampin up simple stamping easy Christmas card

As it's  #makeitsimplemonday I used just black ink and my watercolour pencils to add little pops of colour to my images. I started with the snowman and gave him features, arms and a lovely top hat.
I used the squiggly lines underneath the snowman to create the idea of snow at his base. 
I then took a square die, any square shape that fits would work, and using a black pen drew around him.
I then added some freehand lines in the square too. I didn't want it to be perfect as I was going for the hand drawn look.
I finished it off by stamping and colouring the holly leaves and berries in 2 opposite corners. 
All of this was done directly onto my basic  white card base. Super simple and quick as well 😉


Snowman magic stampin up simple stamping easy Christmas card

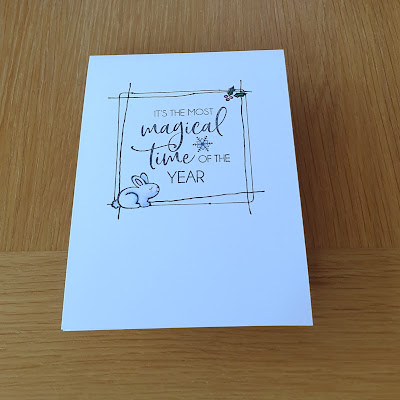
The set also has fun sentiments in it that make projects even better. I  luked one so much I decided to make it the focal point of my second #simplestamping project for today. 
I stamped the greeting, the uber cute bunny and a holly sprig. Next I took the square die and drew around it again. This time I made sure to not draw over the bunny and holly. 
Again I then drew a freehand square that went inside and outside the first square also missing the bunny and holly.
A little colour on the holly, bunny and snowflake and the card was finished!

Snowman magic stampin up simple stamping easy Christmas card

These 2 cards came together quickly and with minimal surplies. I like the clean look of them. They are perfect for beginners, those in a rush and those crafters who have to create a whole bunch of cards!!

Snowman magic stampin up simple stamping easy Christmas card


Saturday 22 October 2022

#sudifferencemaker day of service 2022

Today Gill and I went shopping... with other peoples money!!!! 
It was so much fun. We raided a supermarket for lots of shelf stable food and goodies. 
Why am I telling you this? Because every year Stampin' Up! Hold a day of service and we are always inspired to do the same.
 Stampin# Up! Chose to work with and donate to charities that help food poverty. 

Day of service 2022 #sudifferencemaker


This year the day was one of our regular classes. We decided that we would ask our attendees to pay in food rather than money. We would then donate all the food to a local food bank. 
Well lots of our lovely attendees gave us the money and asked us to go shopping for them!
So here we are with a very large receipt and a huge trolley, plus several bags you cant see, full of food to donate to our local food bank.

Day of service #sudifferencemaker

Day of service #sudifferencemaker


Crafters are the best kinds of people so a great big thank you to all who attended our Horsham class on September 22 2022. 💖💖💖
 #sudifferencemaker

Friday 21 October 2022

Fun Fold Driday - Joyful Flurry

My fun fold this week is one that I was recently asked to make for a class. This is a version of the one that is for the class but for now I have made a Bay Window fold card with the Joyful Flurry stamp set. I started with a White card base 29.7cm by 105cm and scored it in half at 14.85cm. Basically half a sheet of A4 cut in half lengthwise. Once scored in half, I scored from the outside edge at 0.8cm, 5.3cm, 9.6cm and 13.9cm. I know they are silly measurements but it just works out that way. I added tear and Tape adhesive tape on the narrow scored edge in the centre and gave the card a 'book fold'. I have used the lovely soft green of Soft Succulent card for the mats of 4 x 10cm, and the Designer Series Paper is from the Santa's Express papers at 3.6 by 9.6cm. it leaves just a tiny border around the paper. 

Using some of the White Glimmer paper again, I die cut some of the various snowflakes from the Frosted Flurry dies and added a few basic Rhinestones to add a little more sparkle. The band on the inside right of the card was adhered using Dimensionals so that the small lip on the front, slides under it to make the Bay Window.


Thank you for stopping by this week.
 
Cary will be back with her stunning creations on Monday. 
Please join her to see what she makes. 

I will be back the week after as always so until I return, 

Please take care, stay safe but most of all...
 
😍😍 KEEP ON CRAFTING. 😍😍
 
 xx Gill xx


Thursday 20 October 2022

This or That Thursday! - Joyful Flurry

 Cary and I have changed the Throwback Thursday to This and That Thursday. I rather think it's fun! So for this and that today, using the Joyful Flurry stamps and 2 dies from the Frosted Flurry dies, I made a card similar to one that I made several years ago. I used a piece of  White Glimmer paper and embossed it with the Wintry embossing folder. I found a piece of Window Sheet or acetate and cut it to a C6 sized mat and after wiping the embossing buddy across it, I used 1 of the snowflakes to stamp in Versamark ink along one edge and poured Silver Embossing Powder over it before heat setting it with the heat tool. You have to be careful with acetate, you don't want to make it too hot! I added the piece to white glimmer paper from the Real Red and White glimmer paper pack and embossed it using the Wintry Snowflakes folder. Then I added it to the Sweet Sorbet card base, I die cut a snowflake out of the Silver Foil Speciality pack, popped the spikes up and added that using Dimensionals. A sentiment or two and that is complete. 

Then as sit's This and That Thursday, I made another. Exactly in the same way but this time in Tahitian Tide, the gorgeous bright turquoise blue and instead of silver powder, I used the Copper embossing powder and copper foiled paper. 

Ok, so now it's a case of which do you all prefer? Please let me know?

First the Sweet Sorbet  


Now for the second card.


Now the side by side


So the question is ......Red with silver or Blue with copper???