Tuesday 31 January 2023

Tips tricks and techniques Tuesday Playing in the Rain

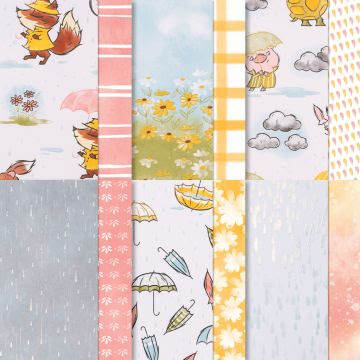
 Today's card features a fun technique.  I'm calling it a split panel card. I've no idea if thats the right name but it's the one I'm going with 😁. I am of course using the Playing in the Rain stamps and dies. But I'm  also using some of the pattern paper that coordinates with the stamps. Called Rain or shine it is bright and crisp and you can use the dies to cut characters from the paper !!

Rain and shine stampin up

So with stamps, dies and paper in hand I knew I need a card to showcase it all!! So this is what I came up with.

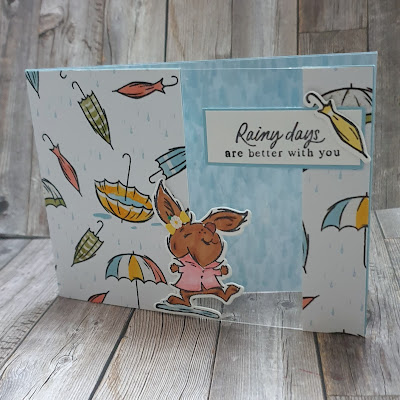
Playing in the Rain stampin up split panel card

It starts as a standard A6 tent fold card and I cut 7.5cm off the front. I then trimmed the excess I cut off to a strip 10.5cm x 2.5cm. I then took a piece of acetate measuring 7cm x 10.5cm. 
The acetate works as the window panel that hold the card front together.  I decided to emboss the acetate using a folder called raindrops  now sadly it doesn't show up well on the photos but in real life it's lovely.

Playing in the Rain stampin up split panel card

I covered the 2 front panels and the inside of the card in pattern papers. They're just too nice not to use!
I also cut a white panel and stamped and coloured it for a space to write a message on.

Playing in the Rain stampin up split panel card

I added a bow with a little flower attatched to the bunny and a sentiment with a yellow brolly on it to the card front and I was done.

Playing in the Rain stampin up split panel card


Monday 30 January 2023

Make it simple Monday Playing in the Rain

 Hello and welcome. Sometimes it's hard to decide what to showcase in my posts. So on Saturday just gone at a class Gill and I were hosting I asked the lovely crafters what would they lile me to play with. After some discussion they decided they'd like to see a weeks worth of inspiration using the Playing in the Rain stamps, dies and pattern paper.

Now I have to say that this set didn't jump out at me when I first saw the mini catalogue that it's from. I  don't really know why but hey why do we like  one thing but not another 🤷 ? Anyway back to the job in hand....

Playing in the Rain stampin up simple stamping easy card making

The set is a mix of images and sentiments. The images are great for colouring in. With that in mind I have 3 #simplestamping cards to share. I have used my watercolour pencils to colour the critters in.

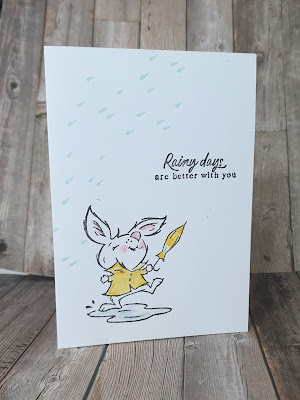
The first card features the rabbit....

Playing in the Rain stampin up simple stamping easy card making

Keeping it simple doesn't mean you can't be bold. The bright yellow of the rabbit's raincoat and umbrella sure do pop 💛 
For card number two I used the turtle...or is it a tortoise?  

Playing in the Rain stampin up simple stamping easy card making

Whatever he is I coloured his shell green! I must say this set has some really nice dodad stamps . Dodad stamps are what I call the supporting stamps in a set. Like the clouds, raindrops and flowers in this one.
For my final card I had to share the fox image.

Playing in the Rain stampin up simple stamping easy card making

This dapper fellow has a coordinating hat and raincoat in bright blue to help brighten the rainy weather he's experiencing. 
So there you have it the first of 5 projects showcaseing the Playing in the Rain stamps.  Who is your favourite?  

Playing in the Rain stampin up simple stamping easy card making


Friday 27 January 2023

Fun Fold Friday - Happiness Abounds

 Hello again, thank you for joining me again today. Today's fun fold is a simple folded card plus a slightly smaller one. I started with a regular sized C6 card mat and took some of the paper from the Hues of Happiness DSP then added it to the front of the card. Once that was on, I took another card mat and trimmed it down to 14.4cm high by 20cm wide than scored it at 5cm and10cm. I adhered it to the card so that it opened the opposite way to the card base with the fold folding outwards. Using the Happiness Abounds stamp set, I stamped several of the flowers on the inside of the card base in Smoky Slate ink. I prefer to use the lighter ink now as it's not so pronounced as black ink.


I then took my largest stitched circle and die cut from the centre top of the card front. As I hadn't glued all over the inside of the DSP, I was able to have the 2 circles cut out for me. All I needed was the White circle. I then stamped the sentiment on the inside middle of the card before adding some flowers from the papers and then colouring in the stamped flowers using my Blends pens. I used Daffodil Delight in light and dark and also Granny Apple Green light pen.


The fussy cut flowers were slightly curled with a ball tool and I added 2 rows of dimensionals in the centre of each flower to make it stand out.

Well, that's it from me this week. Thank you for stopping by and seeing what I have made. I do hope that you've found some inspiration to make your own cards.

Cary will be back on Monday so please stop by to see what she has been making. Until I come back, please stay safe, keep well but as always...

KEEP ON CRAFTING

😍😍xxx😍😍

Gillxx

Thursday 26 January 2023

This or That Thursday - Happiness Abounds

 Hello again. This week saw my grandson celebrating his 3rd birthday. I can't believe he's 3 already but 3 he is. Theo cheers me up whenever I should feel down and he helped me to chose the colours that I have used for today's card too. I am still using the Happiness Abounds stamp set but this time I added some of the masking mats across the cards. Once the mats were on, I began stamping some of the flowers either side or all around the edges of the mats. I like the blank space on the card just for the sentiment. All I had to do was to add some of the smaller flowers within the gaps to fill out the gaps. 


The 2nd card that I made is slightly different. This one has a squared mat and 3 sides that are decorated instead of the 2 on the first one. The difference too is that I added 2 flowers from the DSPand cut them in and around the corners. Everything else, I stamped and coloured with Blends marker pens.


 I completed the 2 cards by adding Rhinestones, which as many know is not something that I usually do but this time I think they are perfect.

Wednesday 25 January 2023

Watercolour Wednesday - Happiness Abounds

The last few weeks here in England, we have had some very cold weather so I am now officially fed up with the cold so I made a very warm watercolour card. Using 5 re-inkers and a few baby wipes folded together and placed over the edge of a ruler, I added a few drops of reinker along the fold. I joined and overlapped the colours so that there were no gaps and then wiped the baby wipes and ink across the card mat. Then using the Happiness Abounds stamps and a Versamark ink pad, I stamped the 4 different flowers across the inked and dry mat.

Following that, I poured the white embossing powder all over and tipped the rest back into the pot. The mat was then heat set using my heat tool. I went on to die cut the large flower from the Artistic Dies out of plain white card and added a sentiment to finish the front. 

On the inside, I cut a mat slightly smaller than the usual size and added the cut offs from the front of the card all around the edge of the mat. A sentiment from the Happiness Abounds and a fussy cut flower from the Hues of Happiness DSP to complete it. 

I found this technique of water colouring on Jennifer McGuire Ink on her you tube channel. Please go and look as it's a brilliant technique. I have also added pictures of some of the other mats that I made.


Tuesday 24 January 2023

Technique Tuesday - Happiness Abounds

 Today's technique so to speak is one where the card does the talking. I haven't stamped any words on the front of the card but I used the twin embossing folders, Let's Celebrate. Using the stamp set Happiness Abounds I stamped some of the smaller flowers in the gorgeous light purple of Highland Heather and some leaves in the bright green of Parakeet Party. The card itself is basically white on white except for the mat behind the embossed piece. I used one of the gorgeous, shaded backgrounds from the DSP pack of Hues of Happiness designer series papers. The papers are stunning! I love them!

In addition to the white embossed mat, I scored lines right across the card base, 3 times at the top and 3 at the bottom of the card. It gives a lovely pattern all over. I continued with the same colour theme on the inisde of the card and again used DSP for the mat behind the sentiments.


Monday 23 January 2023

Make It Simple Monday- #simplestamping - Happiness Abounds

 Hello. Once again, Cary excelled last week didn't she? Some more beautiful cards from her... here's hoping that I can make some more. I am going to use the Happiness Abounds stamp set this week. I know that it's one that I used a while ago but I couldn't decide so opened the back of the catalogue and pointed to a stamp set in the Index. This is the winner. 

So as it's #simplestamping, I have made a simple card with a few colours of ink and Memento black ink. 

I used a C block from Stampin' Up! and covered it in ink and then placed it firmly onto the card. I repeated it twice more and then stamped some of the flowers with the Memento ink across them. I used 3 soft colours, Yellow, (So Saffron), Lilac, (Highland Heather) and Pink (Blushing Bride).


Friday 20 January 2023

Fun fold Friday Warm Welcome

 For the final inspiration for the week we like to share what we call a fun fold. I like to make them but I also like to create what I call simple fun folds.  And for my last card of this week of inspiration using the Warm Welcome bundle I have created a very simple fun fold.

The card starts life as a piece of cardstock measuring 14.85cm x 29.7cm. I then scored it from each end at 9.9cm. I then trimmed a smidge off the left hand side so that it can be folded in and the right-hand side folded over.

Warm welcome stampin up fun simple fun fold cute card


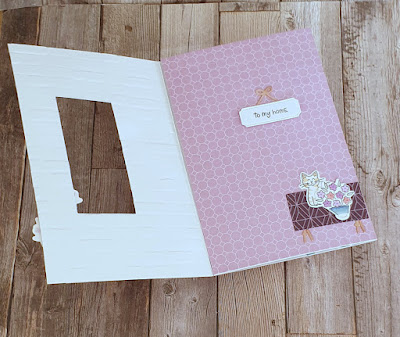
And that is it! I chose to cut out an appature on the front panel . This gave a peekaboo through to the inside which is fun. I stamped cut and coloured a several cats and flowers to decorate my card with. 

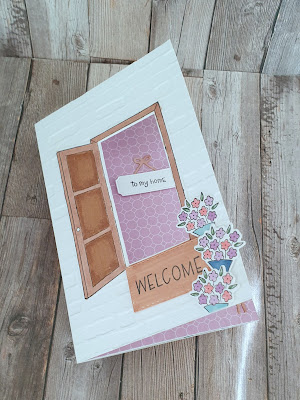
For the front I stamped the door stamp then die cut it out and cut the inside of the opening out too. I then marked where the opening was on the front panel of thw card base and die cut there too. Once die cut I used a brick embossing folder to add texture to the front panel. I then adhered the door die cut in place and added a door mat with the word Welcome on it.

For the flowers I stamped and die cut the arm holding a bunch of flowers. Then trimmed the end so that it resembled pots. I also cut and coloured 3 cats and a couple of sentiment panels.

Warm welcome stampin up fun simple fun fold cute card

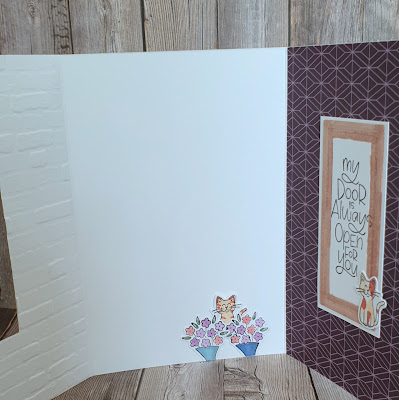
I love the way the card opens up giving you lots of places to decorate. I covered the inside completely with pretty pattern paper.  I positioned the plaque so that it could be read from the front . I also popped a little kitty so that his face was peeping through the front. I use another piece of paper and coloured some slips of cardstock to create a little table for kitty to sit on along with another vase of flowers.

Warm welcome stampin up fun simple fun fold cute card

For the inside right panel I also decided to cover it in pretty paper. I added a panel with another lovely sentiment on it and a cute kitty.

Warm welcome stampin up fun simple fun fold cute card

And for the center panel I just added 2 pots of flowers with another cheeky kitty peeping out.

Warm welcome stampin up fun simple fun fold cute card

Well thats all from me for this week. I do hope you've enjoyed my samples and have perhaps been inspired to get crafting yourself. Next week join me as Gill shares her creations with us all.
Have fun
Cary xx
P.S don't forget it's  Sale-A-Bration time! Which means free goodies with qualifying purchases over in my on-line shop and in person orders 😀 click HERE for my on-line shop .


Thursday 19 January 2023

This or That Thursday Warm Welcome

 Today I'm back to a cleaner look than yesterday's card (Here) . I must admit I really like the way that this Warm Welcome bundle is so very versatile. 

Do you ever use sketches for inspiration?  Sketches are line drawn layouts that are created to inspire you. I used a layout for today's cards. One of the things about sketches is that they are open to interpretation.  You can change the orientation , shapes etc so they're not restrictive. Here's  the sketch I used.


So with the sketch in mind my first card is this one. 

Warm welcome stampin up clean and simple  birthday card

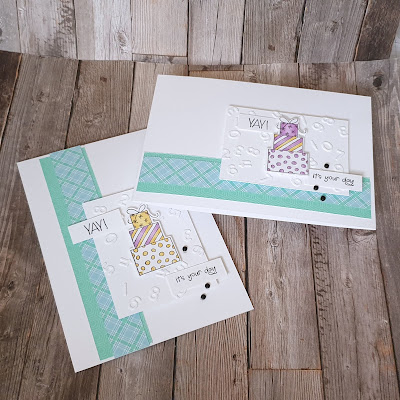
I used the number dies from the warm welcome dies and created a tine in tone background for the parcels and sentiment. I like the clean look of the colour palette.  The pops of colour against the white givebthe card a crisp feel.
For the second card I rotated the sketch. I changed the orientation from the original portrait to a landscape one.

Warm welcome stampin up clean and simple  birthday card

I tend to do a lot of portrait cards so it's nice to have a go at changing to a landscape one. What's  your go to orientation?  Portrait?  Or landscape? 
Which of my cards do you prefer? 


Warm welcome stampin up clean and simple  birthday card