Wednesday, 21 September 2016

Sometimes big is best...

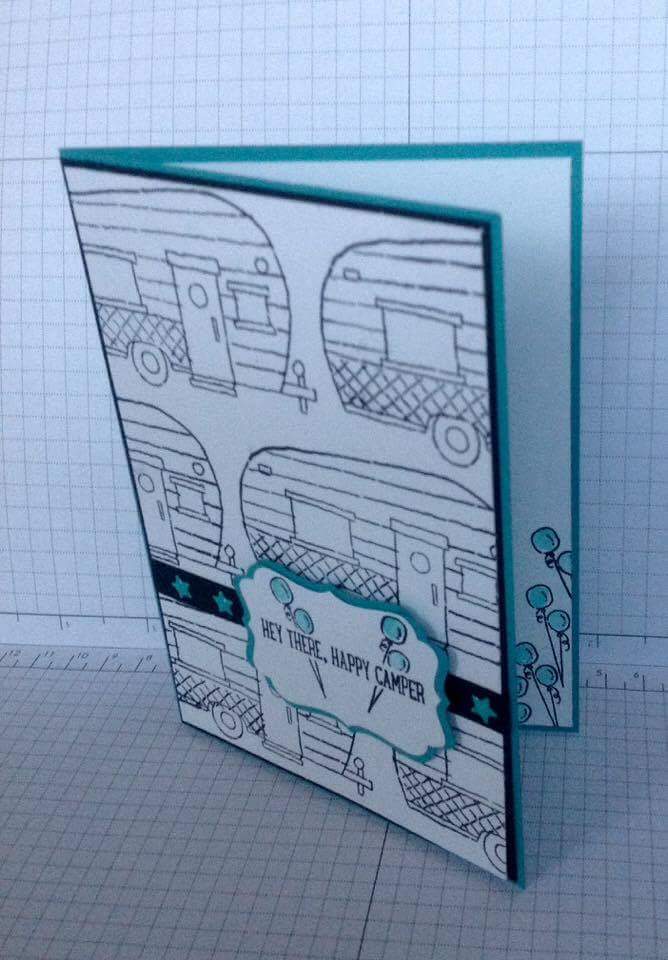
The caravan in the Glamper Greetings set is quite a large image but I really like the idea of using it as a background image. So to ensure it wasn't too busy I kept it simple in the colour department.  Black and white with a dash of a bright colour is one of my favourite combinations.  Whilst it is still strong in the colour scheme of things it's very crisp and clean to me.
I hope you like it as much as I do ☺
In the next photo you can see I've even stamped inside the card. I think it adds a little something. 
The final picture shows how I've used 2 punched decorative labels cut them and repositioned them behind the sentiment to create a boarder that coordinates nicely .


Tuesday, 20 September 2016

Messy is best....

So after yesterday's pushing myself out side my comfort zone  today's project is much more me...messy that is! Lol.
This card and book mark feature a technique I like to call finger painting with ink! And yes it can get messy! Lol
The project shows how you don't always need an image to be the focalpoint of a card sometimes a sentiment is all you need.
What you can't see in my bad photos is the gorgeous shimmer that comes from the shimmery paper I've used 


Monday, 19 September 2016

Out of my comfort zone.....

This weeks inspiration features a stamp set from Stampin ' Up!  Called  Glamper Greetings. It's in the winter mini catalogue.
It's a great little set that offers lots of varied sentimentsand images.
I don't know if I'm alone in this but I really struggle to use sets that are what I call "scene builders " so foe today I went out of my comfort zone and have created a series of "scene " cards using the Glamper Greetings set. Now I know they might not be fantastic works of art but I'm rather pleased with the way they've turned out!
I hope you'll join us for the rest of this week's inspiration
Thank you to Gill for last week's beauties.
Have fun Cary ☺ x


Saturday, 17 September 2016

Tutorial - Blue and White card

I have been asked for a tuturial for this card...so here goes!


This card was made in Night of Navy and Whisper White but for my 
next one I have used Real Red cardstock.


The measurements for this card is, from left to right..
DSP 4.5 cm by 12.5 cm.
Whisper White 5 cm by 13 cm.
Real Red 5.5 cm by 13.5 cm


The centre piece for the inside of this card is made in Real Red 15 cm by 15 cm


The lines are to show you where the score lines should go.
  The Real Red centre piece is 15 cm by 15 cm.
   

The Whisper White mat is scored the same but is cut at 14 cm by 14 cm
 

Stick the 2 layers together keeping the folds matching up.


The C6 card base is 10.5 cm by 29.7 cm
ie. half of a sheet of A4 cut looking at portrait style.


The 2 squares are 6.5 cm by 6.5 cm
Use these for the 2 angled sides on the inner square.


I rounded all of the corners of the card and inner mats.
 

The finished project.


I hope you like this project.
Please send us a picture of your projects too.


Tutorial Curvy Keepsake Box

  
Curvy Keepsake Box Characters 

MINIONS  


 Curvy Keepsake Box Framelet Dies.(135853)
 

Stampin' Up! designed these amazing Thinlets Dies and as you can see they are VERY versatile.


Cut 2 for each box out of cardstock. In this case I used Daffodil Delight.
Using tape, I glued them together like this below.
The curved handles should be opposite each other and the handle slots opposite each other too.


 I used Fringe Scissors and Basic Black cards for the hair pieces. 
Circle punches from 1/8" to 1" to make the shapes below.
The dungarees were made by cutting and shaping a piece of card
 around one of the box sides, curling slightly to curl along with box. 
The G for Gru was made by punching a 1/2" circle out of card and 
cutting a square around the circle.
A snip to form the gap in the G. 
I punched a 3/4" black circle to lay behind it. 


 I used Marina Mist for the dungarees, pocket and G.
Smoky Slate for the goggles.
A small circle cut out of card and a larger one was cut around that hole.
The mouth was a 1" circle out of card and overlapping that hole with the same punch, I punched around that hole and a mouth was cut from Basic Black card.


 The eyes are from a 1/2" punch with a 1/8" black circle for the pupil.
......................................................................
OLAF
  

Olaf was made using circles, ovals and the Tree Builder punches.
The hair was using Fringe Scissors and his arms are with the 
Tree Builder punch which you can see below.
  
  
The mouth is a 1" circle in Basic Black with a white tongue made with a 
1" circle and slightly trimmed at the sides. 
His nose was made with an oval punch in Whisper White and the Carrot 
was with an old Stampin' Up! triangle punch.
It can be made easily, using a scallop punch or framelet to give the curly edge.
The eyes were 1/2" Soft Sky and Whisper White circles, with 1/4" black pupils.


 The Tree Builder punch (138295) and Trimming Scissors (133325) below.
 

.........................................................................

PEPPA PIG
Peppa was made the same way as before but this time using Melon Mambo for the box.
Blushing Bride for the cheeks and nose and Daffodil Delight for the crown.
 

I use Melon Mambo tiny circles for the nostrils and the mouth too.
The crown was made using the Flower Medallion punch (137417). 
One flower is cut into 2 across the petals, then glued at the edges so that
 it will sit over the handles of the Curvy Keepsake Box.
 

The simplicity of the decoration and the crown only glued at the edges on show.


.......................................................................

SUPERMAN


Superman is another easy shape to make. 
Pacific Point was used for the box.
I used a piece of Real Red card measuring 6 cm by 7 cm which I trimmed 
at the top edges to make it look more like a cape. 
The shape on the front was made around the size of the star that I used.
The Daffodil Delight star was laid onto Real Red and cut around.
Then placed on a piece of Daffodil Delight and the shape was formed.


I continued in this way until I got the size that I wanted.
Adding the cape to the back of the box finishes this one.
 

I hope you have found some of this tutorial useful.
Please don't forget to send us pictures of your projects that you make too.
.........................................................................
.......................................................
..................................



Friday, 16 September 2016

Punch Art

For the first of  these last few projects for this week, I have used the Bow Builder Punch
 and Pop of Pink DSP and Washi Tape.
I love, love, love it!
The contrasts between the bright pink of Melon Mambo with the Whisper White and Basic Black.are just perfect.


Short strips of Washi Tape with a bow at the end gives a very simple but effective card.


Endless Birthday Wishes Stamp set for the simple message and Rhinestones to finish.


This card, I am back with the animals again.
This time, the Heart punch makes the Chickens and half a circle trimmed to make the eggs.


I used a dauber and Crushed Curry to add colour to the edges of the Hens and eggs.
I have used No Bones About It stamp set for the messages.
The Woodgrain Embossing Folder was used on the white mat.


Thursday, 15 September 2016

Elegant Butterfly Picture Frame

continued from Monday 12th September

I mentioned that I was going to get a picture frame for the project on Monday. 
Here it is.


I must admit that I am very pleased with the finished article.
I think it's turned out really well .


Sorry about the reflection!