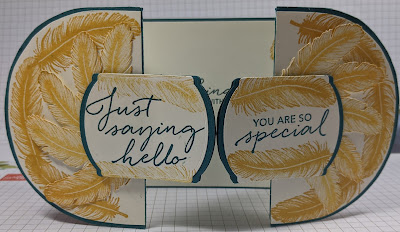
Hello and thank you for stopping by. For my last card this week it has to be a fun fold. Well, Fun fold it is but I added a little extra! I made a C6 sized Gatefold card but I've added extra card to the front on each side to give the circular effect. A standard gatefold is a very simple card to make and this, I guess if I had read the measurements somewhere maybe it would have been easier but I like to push my self out of my comfort zone. I started by making a standard wide Gatefold using Thick Very Vanilla card. I then decided at this point to make it longer. I needed a circle that was the same size as the depth of the card which is 10.5cm or 4,1/8". There are no circular dies that size so I looked around and discovered my Tear n' Tape roll was the right size thankfully. I took a piece of vanilla cardstock which was bigger than I needed it to be. I drew around one side of the circle of the tape on both ends of the card. I then cut it with my snips very carefully and using an emery board, I smoothed the edges. After cutting the mat in half I had 2 half circles but they each had a longer sides to form a stretched out D shape. I needed them to be longer to add them to the card base I had made. It worked as you can see in the first lot of pictures.
I then took some Pretty Peacock card and repeated these steps again and made an elongated Gatefold card. Using some Very Vanilla card I made all of the mats in the same way as before but single panels and smaller to show off the lovely green of the card. I stamped the feathers and some of the little branches and fussy cut them all out. That's why it took so much longer than it should have done. However, many of you know me and the fact that I love to fussy cut. So it had to be done!
I used the Tasteful Textures, Tasteful Label Dies and the lovely Wrapped Texture dual Embossing Folder. The inks I used were Bumblebee and Pretty Peacock. A very simple colour palette which is what I prefer to do. I hope you like it.
More information on the stamps, dies, folders and anything else you'd like to browse through in my online shop HERE
The link will open up in a new page so that you don't loose where you were. It will take you initially to the stamp set that I have used this week but by clicking on the Products button, it will allow you to browse around the shop. Please do have a look around as there really is so much to see.
The picture below shows the whole of the finished card from the front. I added a label on each side to conceal the way the feathers were placed. I also added an extra mat behind the labels and consequently this will need to be posted as a large letter because of the depth with the foam pads or Dimensionals.


No comments:
Post a Comment