Have you ever seen a card then tried to find the instructions and come up empty handed? Well this card is the result of seeing a card, finding the instruction was so hard that I ended up making my own up! It took me ages because math is not my forte!! Lol 😉
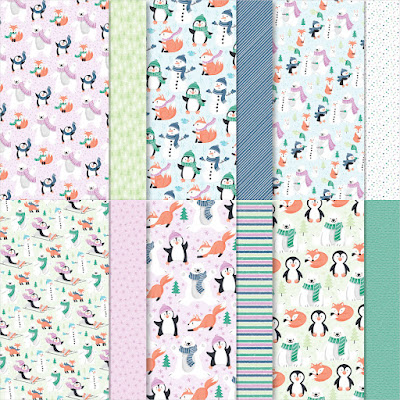
So for the final time this week I will be using the gorgeous Delicate Dahlias with another Sale-A-Bration offering the super fun Penguin playmates. This fun pattern paper coordinates with a stamp and punch in the July to December mini catalogue from Stampin' Up! Which you can see Here.
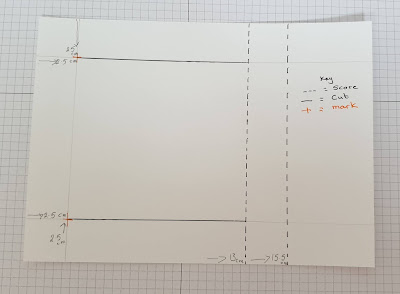
Now to the construction of the card. Start with a piece of cardstock measuring 14.85cm x 20.5cm. Score at 14cm and 15.5cm as per the photo below.
Now with a pencil gently mark 2.5cm in and 2.5cm down from the left hand side . Then mark 2.5cm in and 2.5cm up from the left hand side as per the photo below.
Now cut from the marks to the 13cm scoreline top and bottom. The solid line in thw photo below indicates a cut line, the dotted line means a score line and the orange crossed the pencil marks.
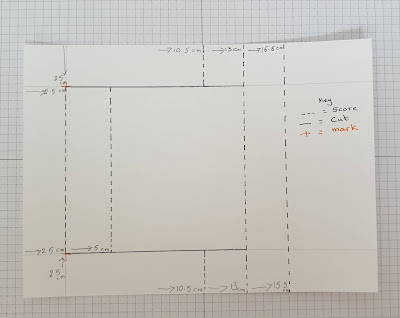
Now to add some more score lines. First score at 2.5cm and 5cm between the cut lines. Then score at 10.5cm above and below the cut lines as shown in the photo below.
Now to fold the first fold is a mountain, the second a valley. The 3rd are mountain and the 4th a mountain too.the 5th and final fold is valley.
Now the fun part the decoration. I firstly cut my pattern paper 14.4cm x 20cm for the outer portion of the card. I then cut a panel out by marking 2cm down and 2cm in on the left-hand side. Then mark 2cm up and 2cm in from the left hand side too. Then cut between the marks vertically. Now staring at the mark cut horizontally to 13cm both top and bottom. Finally cut at the 13cm line between the horizontal cut lines. Remove the rectangle of patterned paper and use for anothwr project.
For the inner portion of the card I used a coordinating piece of patterned paper measuring 9.9cm x 9.4cm. Once adhered gently fold along the score line.
With the card base complete it was time to stamp fussy cut out my flowers and leaves. Once adhered to the card I stamped my sentiment and mounted it onto a piece of patterned paper. A few square gems and sequins to add a litle twinkle and I was finished!
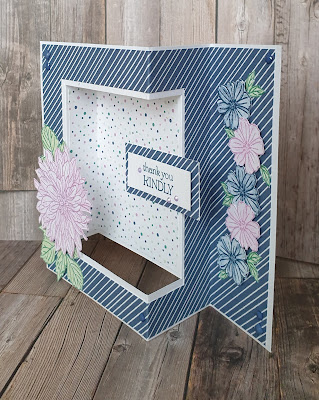
The card folds flat to fit within a standard C6 envelope but stands at a jaunty angle on the mantle!
The view from the top shows how the card folds.
Well that's it from me for this week. Please join me next week when Gill will be sharing her creations with us all.
Have a great weekend and remember to have fun 🙂
Cary xx
If you're in the UK we'd love to be your Stampin' Up! Demonstrators. You can purchase any of the products used in my creations Here
If you'd like to join our Larger Than Life Stampers community/ team and enjoy all the benefits that being a part of the Stampin' Up! Demonstrator family please click Here


No comments:
Post a Comment