Hello again, it seems that I was only posting a few days ago and here I am a week later posting again! This week I have decided to play with Nature's Prints stamp set, the beautiful Designer Series Papers and Fern, a new coordination embossing folder. Anyway, today being #simplestamping day I have made the quickest cards ever! In fact, they were so simple I made 5 of them! One in each of the new, gorgeous, In Colours!
Monday, 16 May 2022
Make It Simple Monday - #simplestamping - Nature's Prints
Friday, 13 May 2022
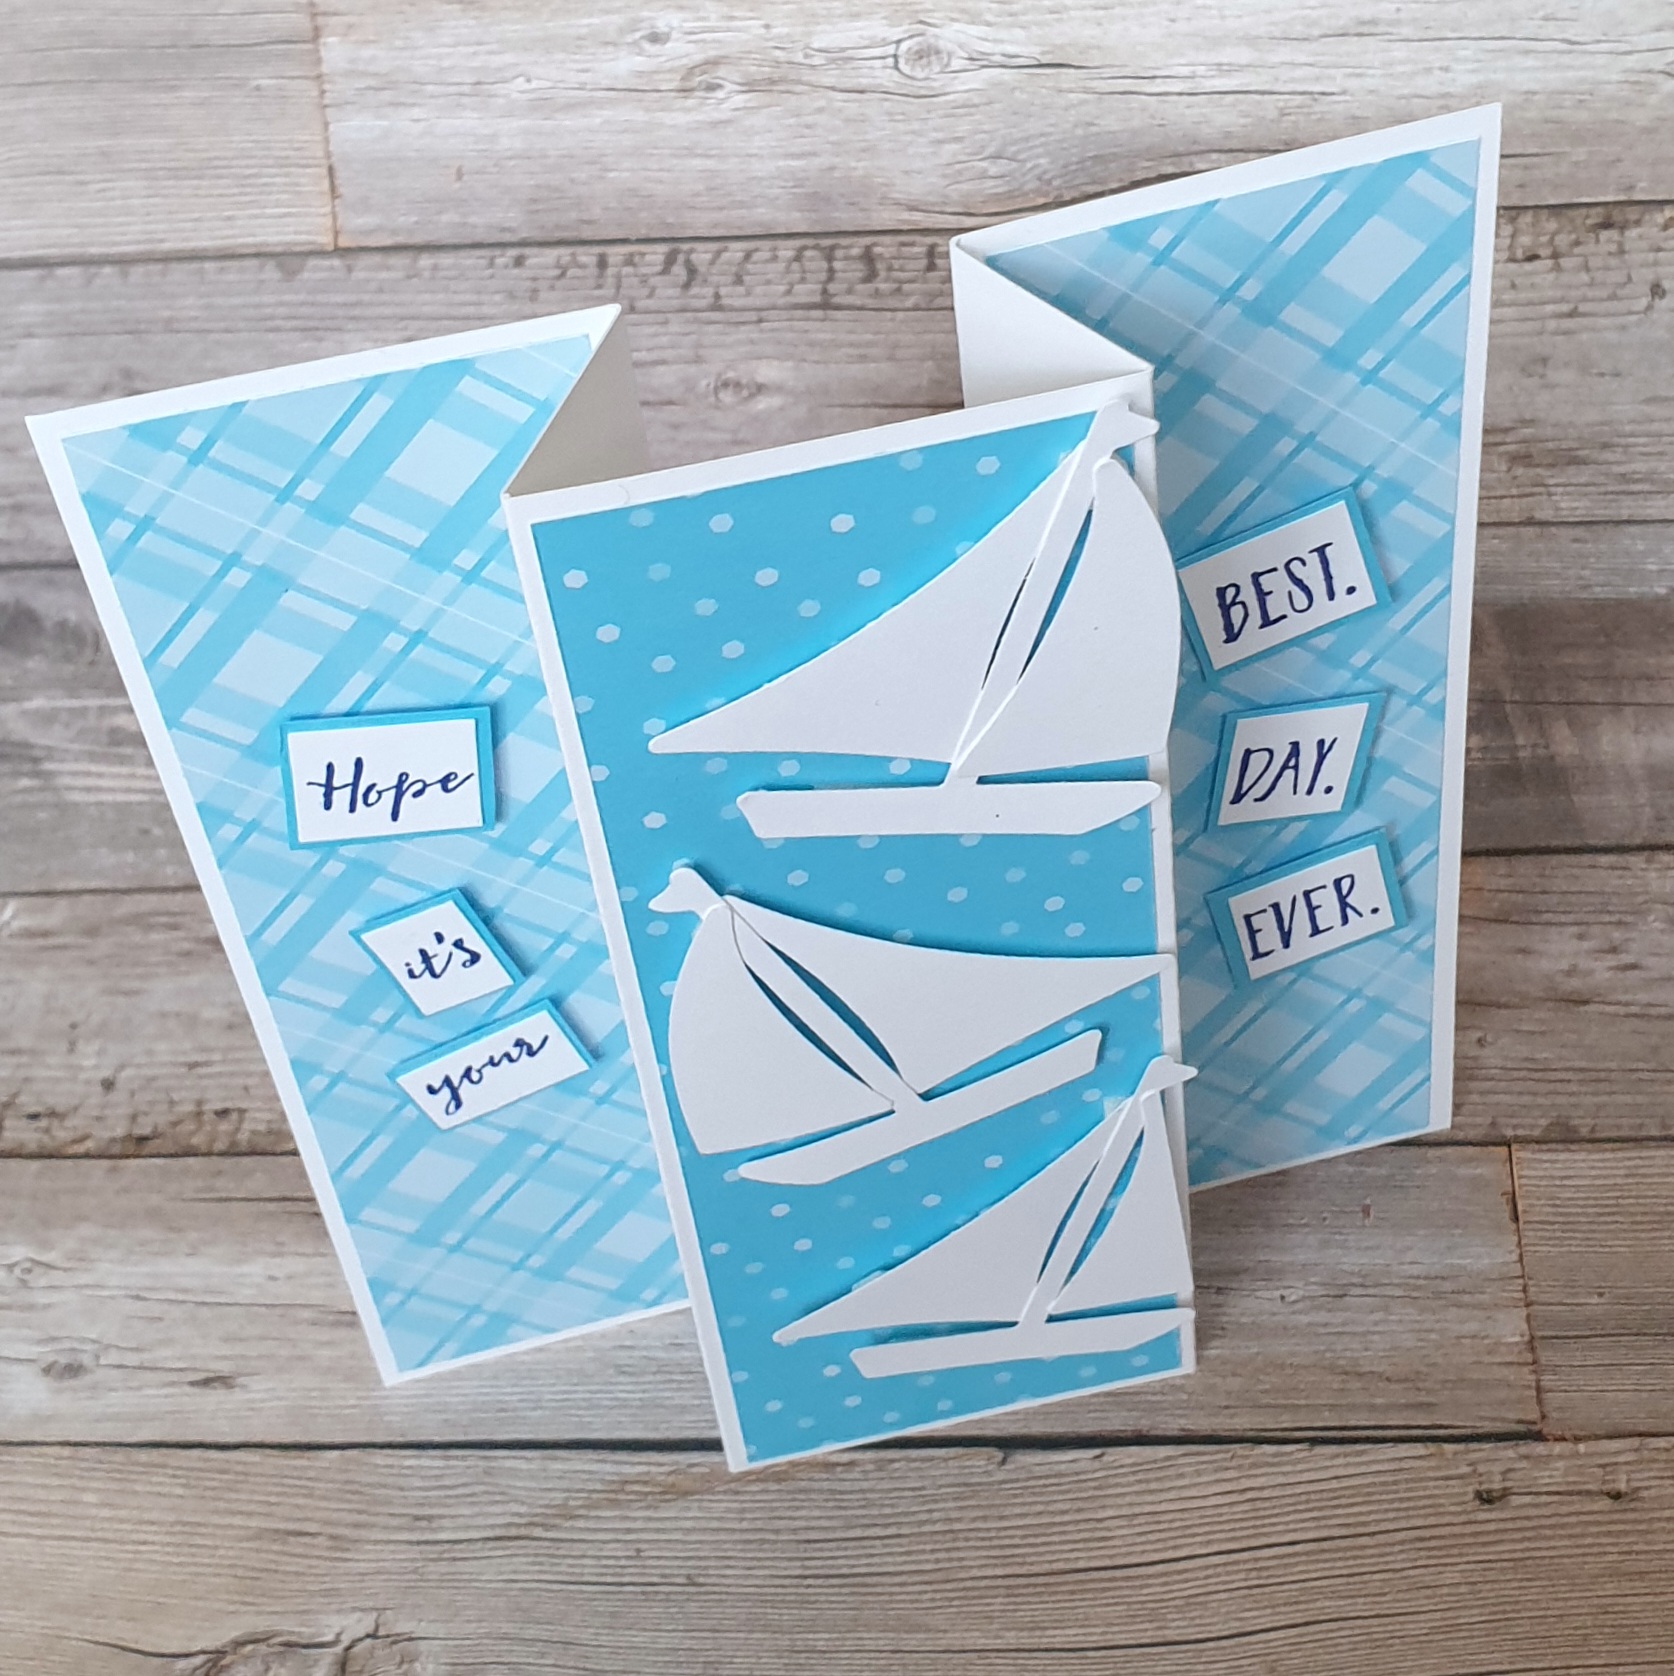
Fun fold Friday Let's Set Sail
Now I love a fun fold as much as anyone! But sometimes you just don't have time to get creative and spend lots of brain power creating engineering wonders in cardstock. So for today's fun fold I thought I'd keep it simple! I knew I wanted to use the Builder sailboat punch and to show some of the fantastic 2022-24 In-Color pattern paper.
I used basic thick white cardstock for the card base . Take a piece measuring 14.85cm x 21cm ( 8" x 6") Then score from both ends at 5cm and 7.5cm along the long side ( 2" and 3"). This is all the scoring and cutting you need to do for the card base! See I told you it was simple! 😁
Now to fold your card you need to reinforce your folds by burnishing them with a bone folder, or your nail 😉. The first fold is a valley fold and the second is a mountain. Repeat from the other side. This creates a card that will stand and still fold flat.
I then chose my pattern paper. I decided that the Tahitian Tide check and spot papers were the ones for me. I cut 2 panels measuring 14.4cm x 4.5cm ( 5 3/4" x 1 3/4") and one at 14.4cm x 5cm ( 5 3/4" x 2").
I then punched 3 sailboats out of white cardstock and adhered them using 3d foam to the center panel.
I then stamped my sentiment out using Starry Sky ink and cut it into single words. I then mounted them onto Tahitian Tide cardstock. I adhered the words to the out side panels flat.
I love the clean lines and monotone colour palette of this card. It really looks great. It would work wonderfully in any of the 2022-24 In-Colors for sure. What colour would you chose to use?
Well that's it from me this week thank you for joining me. I do hope I've inspired you to get crafting.
Please join me here next week to see what Gill has in store for us as she shares her inspiration.
Have fun
Cary x
Thursday, 12 May 2022
Throwback Thursday Let's Set Sail
Today is Throwback Thursday and I saw this post back in 2020 when I was showcasing the retiring In-Colors. I thought why not replicate it using this years In-Colors and the Let's Set Sail stamp set. Here's the inspiration I've used.
So let me introduce you to the 2022-24 In-Colors. First up we have Parakeet Party
Wednesday, 11 May 2022
Watercolour Wednesday Let's Set Sail
Today's watercolour inspiration was a little messy in the making but I was so happy with the end result that it was well worth it!! I wanted to create a water like effect for my boat from the Sailboat builder punch that coordinates with Let's Set Sail stamp. ( it is available as a Bundle with a 10% discount!)
I started with reinkers, cling film, water spritzer and cardstock. First I scrunched up my cling film then gently spread it apart. Next I carefully dripped drops of reinker onto the cling film. I chose to use 2 shades of blue from the 2022-24 In-Colors Tahitian Tide and Starry Sky.
I loved the effect I'd achieved and wanted to keep the rest of my card quite simple. I cut a mat of cardstock and used my Sweet Sorbet ink pad to add colour directly to all 4 sides. I then used a piece of adhesive sheet to completely add adhesive to the back of the watercolour background. The reason for this is that the cardstock can become quite warped due to the amount of water used. Having a full cover off adhesive allows it to adhere cleanly and avoid bumps and lumps.
Now it was time to create my sailboat. I punched the pieces out of basic white cardstock. I then covered the mast and blended colour over the hull of my boat. Next I added colour to the pennant at the top of the mast. Then I covered the hull and pennant and blended a different colour onto the mast.
Now it was time to add some interest to the sails. I decided to stamp one of the sentiments from the Let's Set Sail set over them. I moved the stamp and reinked and stamped again till the sail was covered.
I attached the Sailboat to the background using 3d foam. I then chose to use the same sentiment and stamped it directly onto my card.
Tuesday, 10 May 2022
Tips tricks and techniques Tuesday Let's Set Sail
I love sharing tips, tricks and techniques any day but especially on a Tuesday 😁 For my card today using the Let's Set Sail stamps and the 2022-24 In-Colors I've a new twist, well new to me 😉, on a favourite style of card.
Called a window card it's where the inside peeps out through an appature in the card front. Usually I would stamp or decorate the inside of the card and either write amidst the pretty part or on the reverse of the card.
My new take on the window card is a very simple trick. What I did was cut a piece of cardstock to 10cm x 14.9cm . I then scored at 0.5cm along the 14.9cm edge.
Taking the piece of cardstock I stamped my scene. I used the tequnique of generational stamping to create the sea . I inked up the large water stamp then stamped it. Then I stamped again but instead of inking again I "huffed" over the stamp to reactivate the ink left on the stamp. The effect is that you get shades or tones of the same colour.
I then took a piece of cardstock measuring 14.85cm x 21cm and scored it at 10.5cm. I then took a circle die from a set called Stylish Shapes dies. This a fab set of stiched circles, squares and banners. I then placed my chosen die onto the card front and cut it out.
Next I used an embossing folder to add texture to the whole of the card front. A tip here is that when you make your sandwich for embossing only place the top plate up to the score line. This means that the back of the card will be flat and unmarked.
I then placed adhesive along the narrow strip on the stamped/ decorated layer. Place the side with the adhesive onto the inside of the card base lining the scored line next to the score line in the cards base. The panel will be slightly smaller than the card base.
I then took another mat of cardstock measuring 10cm x 14.4cm and adhered it to the card base. This is the area that I will write my message on. I did a little generational stamping on this piece just because I could 😄
Finally I decorated the front of the card. I die cut a circular frame from a piece of the gorgeous tahitian tide cardstock. I adhered the frame around the appature.
I then used the circles from the die cuts to create the sentiments along with a banner die cut.
I love the way this card turned out . It's fun and yet clean and simple. Even though it does have layers they are seperate. All in all I this fun card came together quickly and without any drama... always a good thing in my book 😀
Monday, 9 May 2022
Make it Simple Monday Let's Set Sail
Welcome to #makeitsimplemonday here at 2 Big Girls Crafting 😀 I'm Cary and this week I'll be sharing inspiration using a stamp set called Let's Set Sail.
I'll be combining this fun set with the fantasic new 2022-24 In-Colors.
These colour are just sooo amazing I thought a whole week of inspiration featuring just this colour palette would be a fun challenge.
I chose the Let's Set Sail stamps because they are just a little bit different and I love a challenge 😉.
So for today's #simplestamping inspiration I have used a direct to paper ink techniques that we call Swinking! This fun way to use your ink pad requires no special skills nor any fancy tools. I'll be sharing how I created today's card in my Facebook Live here at 4pm BST. I will add a link to the video later for those who can't make it.
So here's the card I created for you.
I've used all the gorgeous In-Colors inks on this card.
Please join me for the rest of this week as I share more inspiration using these fabulous stamps and inks along with a few other goodies 😉
Friday, 6 May 2022
Fun Fold Friday - Happiness Abounds
Friday already! Wow! That has come around quickly hasn't it? Cary and I have had some fantastic news this week. We have been added to the Making Cards and Papercraft Magazine as a Blog to watch!That's fantastic isn't it? Well, we think so! We are extremely delighted! My last card this week is with another of the new stamp sets and products from the BRAND NEW Stampin' Up! catalogue which was released on 3rd of May, this week. Using today the Happiness Abounds stamp set I've made this really fun fold! It started as a simple gate-fold card and I've just added a few doors to it! The typeset or font of the sentiments is beautiful. I do like a really good font! I started by choosing the card base colour of Fresh Freesia. It's a really lovely pinkish, shade of lilac. This is one of the In Colours for 1 more year before it will be replaced with new colours.
I took a piece of A4 card and cut it at 14.85cm high by 29.7cm wide. Then scored from each end at 9.9cm, then just under 4.5cm on the 2 outer panels. I burnished the folds really well and cut 2 mats in the Fresh Freesia card of 9.9cm by 14.85cm. I cut 2 white mats 9.5cm by 14.4cm and instead of embossing, this time I used the Stitched Greenery die. It pierces little pin holes in the leaf pattern all over the card. It gives a beautiful background. Add each of the extra panels to each side of the card base on the external panels.
I cut 2 types of DSP in the Hue of Happiness DSP which matches the stamp set. 2 pieces of each design both 4.5cm by 13.85cm. I had some spare, white, Stitched Greenery mats that I cut down to fit onto the DSP and adhered them to the DSP strips and then onto the inside panels of the card. I used another piece of DSP to cut out the flowers from. The dies also fit most of the flowers so if you have or buy the dies, you'll be able to save time on fussy-cutting. It was then down to the decorating of my card. I curled the flowers at the outer edges and fixed them by using Dimensionals or foam shapes. I also added the flowers from the edges of the paper and glued them to the edges of the mats too. Waste not, want not! A few sentiments and the card was complete.
Thank you for stopping by this week. I hope you've had some ideas for cards of your own.
Cary will be back on Monday to share her creations.
Until I return, TAKE CARE, STAY WELL and KEEP ON CRAFTING!!!
Thank you once again,
😍 xxx Gill xxx 😍
.jpg)
.jpg)

.jpg)
.jpg)
.jpg)
.jpg)
.jpg)
.jpg)
.jpg)


.jpg)
.jpg)
.jpg)
.jpg)
.jpg)
.jpg)
.jpg)