Showing posts with label #mementoinkpad. Show all posts

Monday, 16 September 2024

Make It Simple Monday #simplestamping - Christmas Friends

 Hello and thank you for stopping by today. This week I am going to play with the NEW set called Christmas Friends. These cute little set are just as I would imagine them if they were to celebrate the Christmas time. 2 cards for the price of 1 today though. I started with a gorgeous soft minty green of Coastal Cabana which I love. I stamped direct to the card base on the one side after protecting it with a piece of Sticky roll and then got stamping. I added a strip of the even softer minty green  Pool Party ribbon. Love it  as it even has tiny little white pom poms on!

I then wondered what it would look like in White, so I tried that too. Now, I couldn't decide which I preferred so I asked the family. Would you believe that out of 6 of them it was half and half!

christmasfriends stampin up 2big girls crafting coastal cabana pool party pom pom ribbon

christmasfriends stampin up 2big girls crafting coastal cabana pool party pom pom ribbon

christmasfriends stampin up 2big girls crafting coastal cabana pool party pom pom ribbon

christmasfriends stampin up 2big girls crafting coastal cabana pool party pom pom ribbon

christmasfriends stampin up 2big girls crafting coastal cabana pool party pom pom ribbon


Monday, 2 September 2024

Make It Simple Monday - #simplestamping - Changing Leaves

 Cary made some beautiful cards last week didn't she? It makes me wish that I lived nearer the sea! Cary's daughter and family live very close to the sea so they are always down in the water, Cary too! This week I am going to be playing with Changing Leaves stamp set. We held an all day class a few weeks ago using this set and making backgrounds. Cary is a whizz at backgrounds and unfortunately I don't do messy and Cary really loves things the messier the better! Shaving Foam, Bubble Wrap, marbles... you name it and she has played with them. 😂

My simple stamping card is just that though today. I stamped all 4 corners and then the tip of the stamp to fill in some of the gaps on the edges. A very simple but rather lovely card even though I say so myself.

stampin up 2biggirlscrafting simplestamping easy card changing leaves lemon lime twist

stampin up 2biggirlscrafting simplestamping easy card changing leaves lemon lime twist

stampin up 2biggirlscrafting simplestamping easy card changing leaves lemon lime twist

stampin up 2biggirlscrafting simplestamping easy card changing leaves lemon lime twist

stampin up 2biggirlscrafting simplestamping easy card changing leaves lemon lime twist


Friday, 9 August 2024

Fun Fold Friday - In My Heart

Hello, WOW! It's Friday already! Where has the week gone? My family have all been away this week with the children on a short holiday so I've been home with the 2 dogs and it's been very quiet here! Just to let you know that I chose the Coastal Cabana card from yesterday for my son and daughter-in-laws wedding anniversary card. They loved it too so that was good. For today's card, I have been playing with a few bits of paper and have made a multi layer card using the In My Heart stamp set.


I started off  with a standard C6 card base and removed one triangle from the right on the front panel. I then added a 10cm by 11cm wide white mat which I scored at 1.5cm on the left and added it on top of the card base. The triangle, I cut off was given a fold at 1cm and adhered around at the back too. I had recieved a special,demonstrator only, pack of pink DSP for a challenge a few months ago. It is called Countryside Rose. It's identical to the Countryside Inn DSP except for the colours. Fortunately, I love both the blues and the pinks. I used simple pieces of DSP for this card and a mat of Melon Mambo card to go on the inside with a white card mat on top for the sentiments and images. 


I then stamped and coloured all of the images once more and then punched them out using the Stampin' Up! circle punches in one size for the images and a slightly bigger one for the Melon Mambo cards for the pink behind them.

I added the tree to the inside and this once again tells the story of boy meets girl or girl meets boy and how life changes from there.

Well that's it from me for this week once more. Thank you for stopping by this week and I hope that you have been inspired to make yourself some cards too.

Until I get back, Cary will be here next week but as always...until I return,

KEEP SAFE, STAY WELL  but as always

KEEP ON CRAFTING

😍😍 xxx Gill xxx😍😍

Thursday, 11 July 2024

This or That Thursday - Sketched Butterflies

 Hello from me on a warm Thursday. Today's 2 cards were very straightforward for me today. I had the ideas in mind and just went ahead and made them! That's a first for me! The only difficulty ... deciding where to place the butterflies of course! The Sketched Butterflies have rapidly become one of my very favourite stamp bundles. I had some scraps of Designer Series Paper from the In Colour DSP and quickly took 2 colours and die cut the group of butterflies and the 2 smaller ones. I actually chopped the the group of them up and carefully finished the edges off with my Stampin' Snips (scissors), one of my favourite tools. I used the 2024-2026 In Colour DSP stack for both of today's cards, they are such gorgeous papers.

THIS

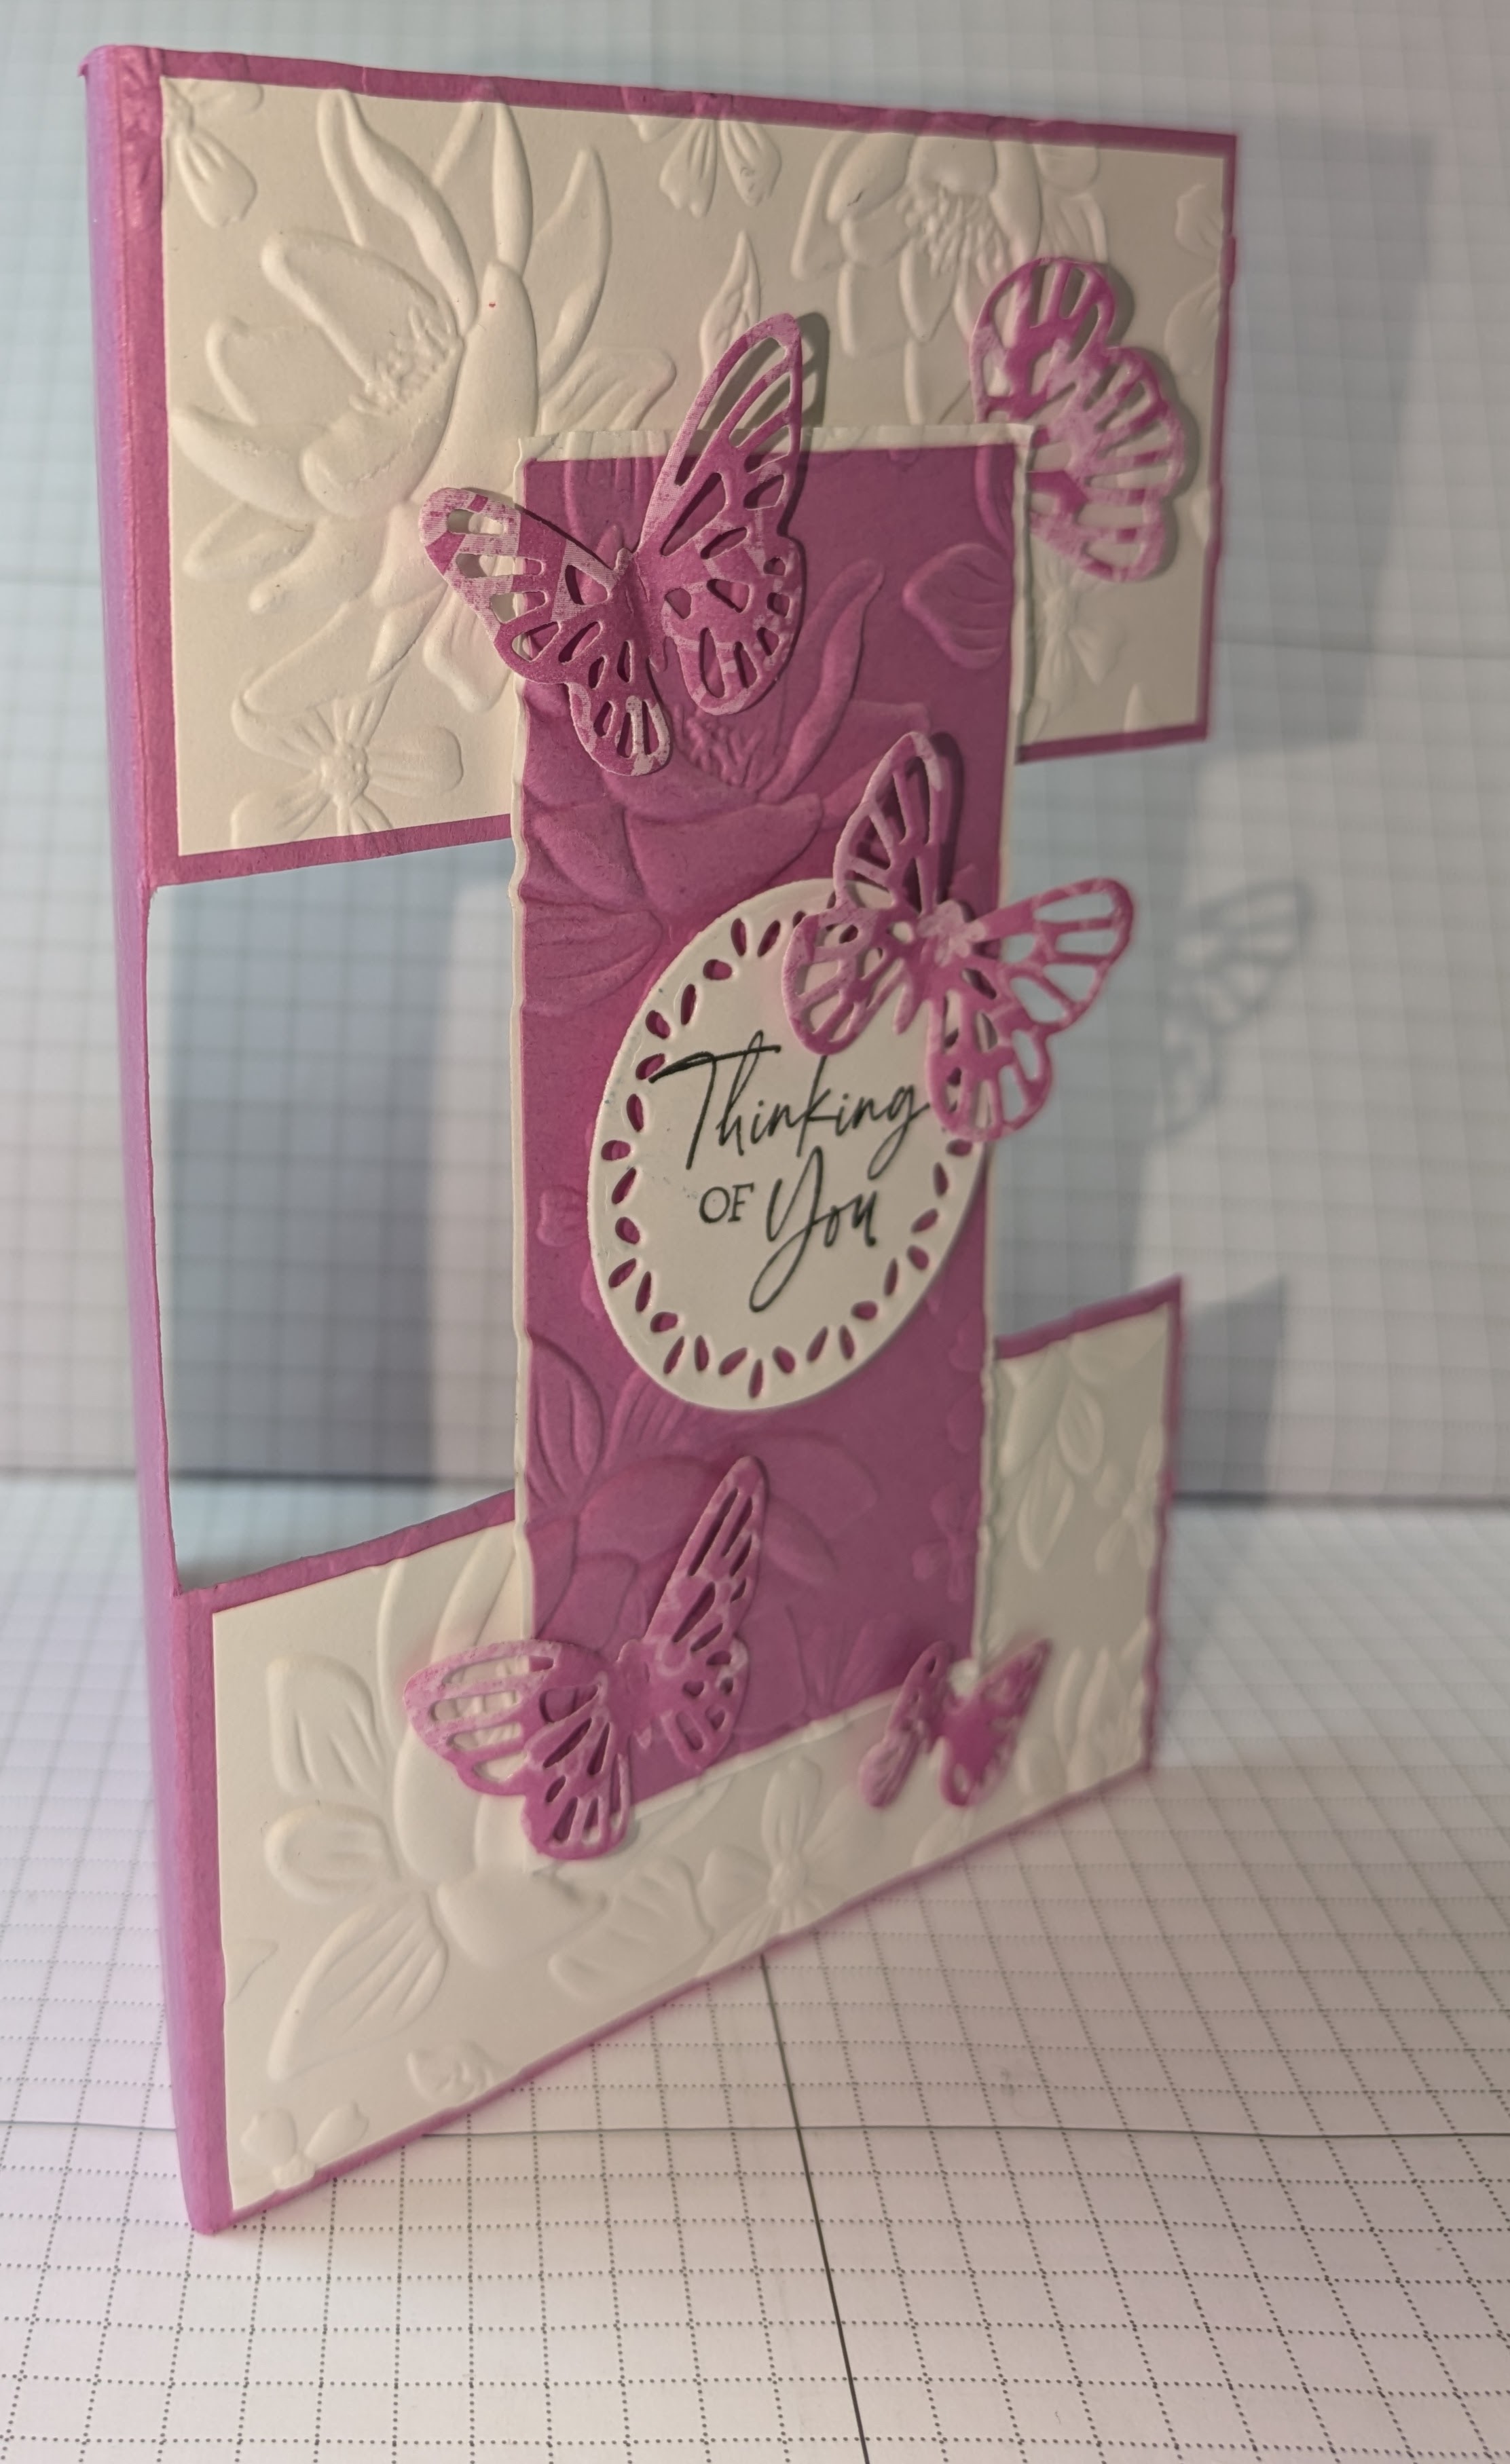
I cut some DSP into 3 strips 2.8cm deep by 12.5cm wide. (5" by 1,1/8th") I turned the card base a way that I never do for some reason ..tent fold, but it just seemed right on this occassion. I adhered the 3 strips to the white mat and then added a strip of ribbon in Pretty In Pink to one side. The sentiment is on one of the circles from Spotlight on Nature as was yesterday's and the butterflies fluttered across the card and simply adhered where they landed. I used Memento ink pad for the sentiments today.


THAT

There is something about a card folded in this way that I just love. So, starting with the card base in Petunia Pop, I cut from the front edge to the centre fold at 5cm from the top and 5cm from the bottom edge too. I cut the centre piece off and added it onto a band of white card. I embossed both the card front and the middle panel using the gorgeous embossing folder called Layered Florals. It really is a cracking folder. I love it! Once embossed, I added Dimensionals to the rear of the front panel and balanced it onto the card front. Then I added the sentiment to the centre panel and inside. As with my THIS card, I scattered the butterflies across the card and then adhered them into position too.  I had some little strips of DSP left over so I trimmed them finely down and added them along the edge of the inside. I like the finish it gives.


 Now it's up to you to decide which you prefer please... 😁😄

Wednesday, 10 July 2024

Watercolour Wednesday - Sketched Butterflies

Hello. Today's card has had me going around in circles. Literally! Each time I started to make something, I went off in another direction, constantly going around and around in circles! That was it...I needed circles! Using the Sketched Butterflies stamps today, I started with several differerent sets of images in lots of different colours, even throwing many away! In the end, I decided on some pretty Boho Blue ones I had watercoloured and restamped over the images. 

I then remembered that I had bought the dies to go with the Spotlight On Nature stamp set, (the stamp sets are out of stock 😢). That was what I needed. So rumaging through my order that arrived on Monday, I found them. I die cut a circle from a piece of DSP from the Thoughtful Journey Designer Series Papers and then several different sizes of circle in the same design onto white card. I took a card base in Boho Blue, a gorgeous In Colour from last year and embossed the whole card with another new embossing folder called Dotted Circles. It suits it just perfectly. I hope that you agree with me. My first thought was it reminded me of the planets in the universe! Oh well!! 


Friday, 28 June 2024

Fun Fold Friday - Sneak Peak Week - Winterly Tree Tops Bundle

 Well, here we are again on a Friday already. Today's card is a basic Landscape, Gate Fold Card in White. Well, it started with a white card base 29.7cm wide and 14.85cm high (11,3/4" by 5,7/8"). I scored this at 4.9cm and 9.9cm (1,7/8" and 3,7/8") from each side and after I burnished each fold line really well. I started adding some strips of the DSP from Nests of Winter DSP. These were each 4.7cm wide by 14.4cm high (1,13/16th" by 5,7/16th"). The other sides of these papers are lots of birds so it's been difficult trying to decide to use it! The colours of the DSP to me look like Petal Pink or even the New Basic Beige or even a combination of the 2. Very soft colours which is why I chose them. I cut a white 9.5cm by 14.4cm mat for the centre (3,15/16th" by 5,7/16th") and embossed it using the Birch Wood embossing Folder and I stamped the sentiment onto white and added it to another strip of the DSP. Lots of fussy cutting on this one as the birds are much smaller but still gorgeous nonetheless. 

I made a belly band for this card from the piece of card that I cut off from the A4 sheet of white card and working in 10 cm wide or 4" strips, I die-cut along the bottom edge and then repeated it until it was all cut out. You have to make sure that the piece you don't want die-cut, i.e.the upper edge remains above the die or the die will end up cutting the sides of the band too. I repeated the same for the top of the band. 

Nothing is wasted if I can help it as you can see, I used the white die-cut out pieces for the front 2 panels of the card. I stamped a pair of the boughs, coloured them in and die-cut them out. I was able to join the 2 pieces together at the back on the sides using a Dimensional, then adhered it to the front of the belly band along with the pair of beautiful birds and berries. 

I am unable to send you a link to the new products until they have been released but do watch out for them in just over a month. 


Well, once again, that's it from me for this week. Please take care and stop by next week as Cary will be sharing some of her creations for you. 
I will be back the following week as always but until then ..... 
Stay safe, Keep Well, but .....

KEEP ON CRAFTING 

😍😍😍 xxx Gill xxx 😍😍😍


Wednesday, 26 June 2024

Watercolour Wednesday-Sneak Peak Week - Winterly Tree Tops

 On this lovely, hopefully very dry and warm day today I have made a card very similar to yesterdays card. This time though I took a white card mat and watercoloured wash in Pool Party across the whole piece and left it to dry. While that was drying, I fussy cut 2 sets of the birds from the Nests of Winter DSP. Unfortunately, with this sheet the dies don't fit! :(( However, as always, I enjoy fussy cutting images anyway so it isn't a problem for me. Once dry, I die-cut the frame for the card using the large die and then using a piece of DSP from the Thoughtful Journey papers for my watercoloured background! A bit of a cheat I know but this is a much better version than I could do! I placed the die-cut frame face down on the desk and added the die cut DSP face down into the frame. By adding tape across the back of it, I was able to trim it down to size easily for the card base which this time is in the lovely shade of blue from Misty Moonlight. I then added the birds onto the picture and completed this one.


Tuesday, 11 June 2024

Tips, Tricks and Techniques Tuesday - Legendary Ride

Hello on a much cooler Tuesday. I know that it's supposed to be a maximum of 16 degrees but to me that's too cool! For Cary..... It's even then too warm! She has her own central heating system! Lucky woman! Mines like a fridge! Anyway, today's card is one that I was inspired to make by my son, I showed him the stamp set and he remembered that it was used for his birthday last year. His response was...I'd just like to fly away on mine sometimes! Hence flying into the clouds! I am calling this one a Z fold card.

I used a piece of DSP from the Take To The Sky papers from this year's new stamp set called Adventurous Sky. It's all about bi-planes. It really is a great looking set and I can't wait to share some cards with you from using them. I have used the dies too today and played around with them to highlight parts of the bike, which I must say looks very like my son's bike too!


Thursday, 30 May 2024

This or That Thursday - Thoughtful Wishes

 Hello on another cool and wet Thursday. Unfortunately, unlike Cary I am a very cold mortal and Cary is the complete opposite! She is constantly wanting all of the doors and windows open and I want them shut! So while she will be happy with the weather that we are to expect today, I for a change (NOT)  will not be! I will be putting my jumpers on once again and wishing for the sunshine :)) Today's cards are both similar of course but obviously different. Using the Thoughtful Wishes stamps, paper, card and dies, I have used some of the In Colours like Shy Shamrock, a lovely fresh and bright green and also Peach Pie which is a gorgeous beautiful peach colour. I have used some of the papers from the Thoughtful Journey's DSP and matted them onto a piece of the colour matching card. I have layered the smaller pieces over the larger pieces and added a few die-cuts from the range of dies in the suite. On the peach a simple Dearest Friend with a Night of Navy die-cut and strip of the same ribbon. Then on the green, I have added silver foil with Missing you....

THIS


THAT


Tuesday, 28 May 2024

Tips tricks and techniques Thoughtful Wishes

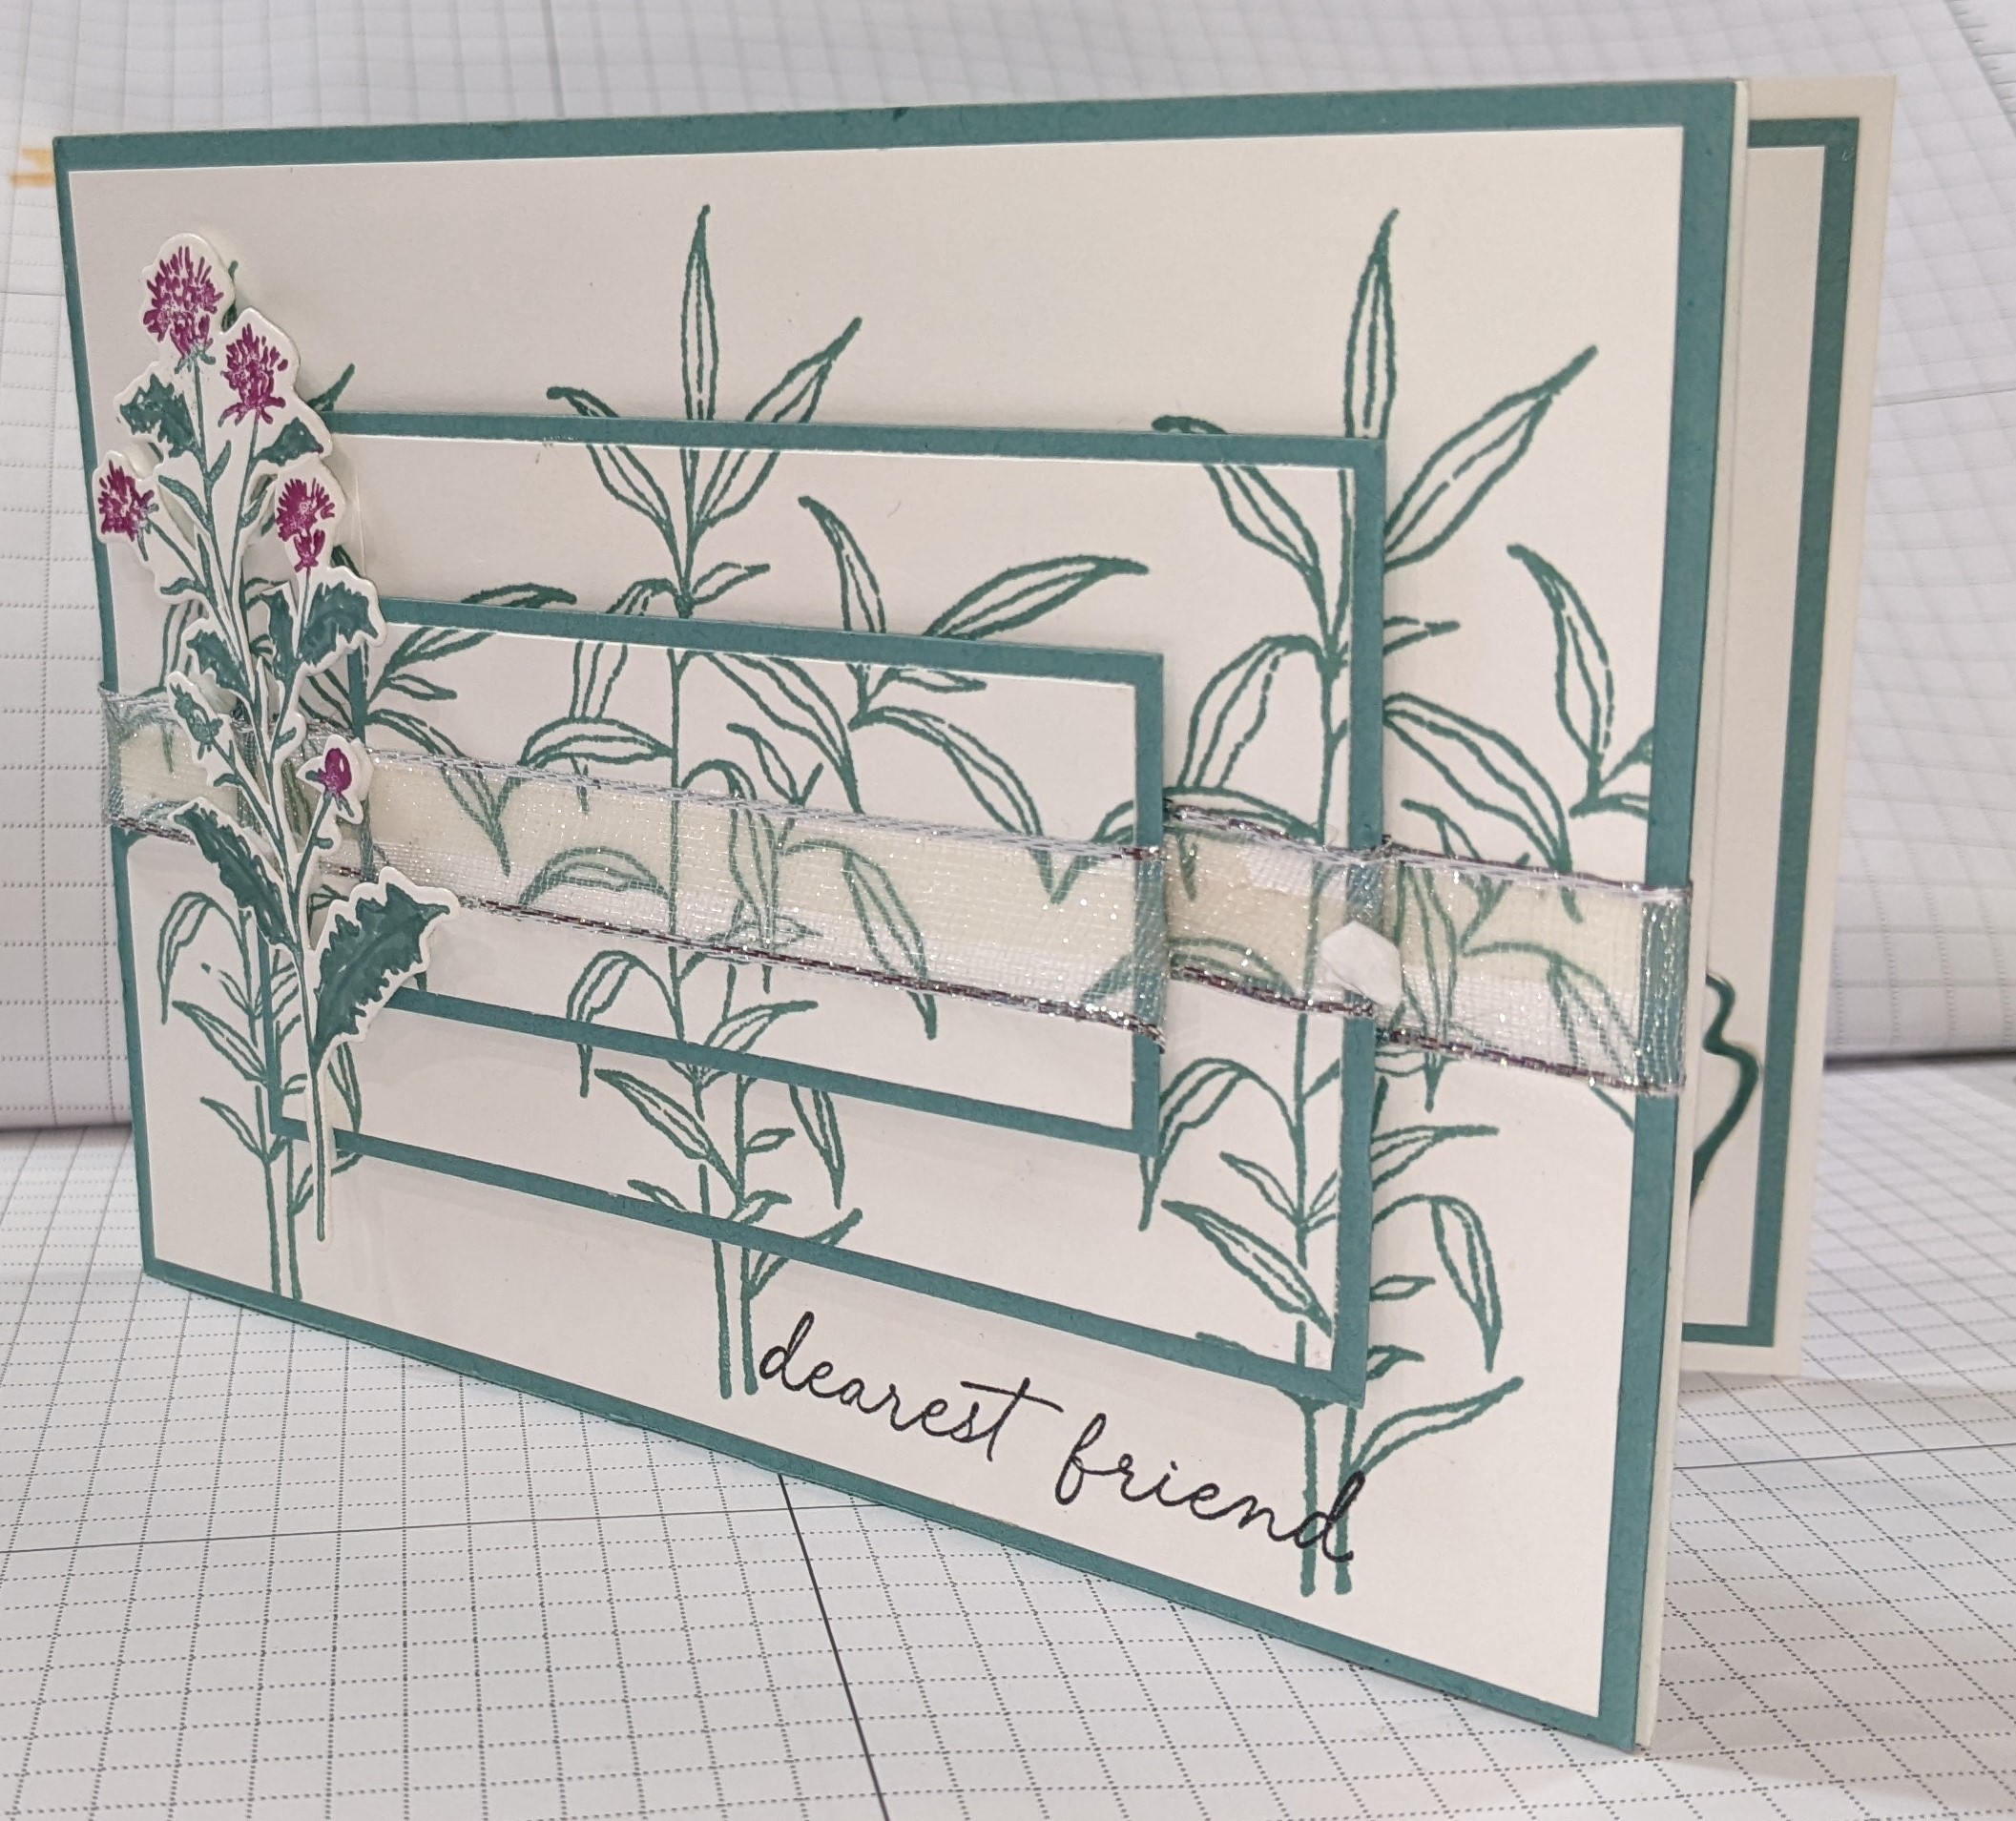
Hello and thank you for joining me today. I must apologise for missing the blog out yesterday. It was my son's 30th birthday and I haven't seen him since the middle of last year so it was important to see him and like a twit I forgot to make a card for the blog! Today though, I have not forgotten. This week I will be using the lovely Thoughtful Wishes stamp set and dies. My card is a very simple one by stamping the image onto a piece of card 10.0 cm by 14.4cm I stamped the large leaves 3 times. Then I chopped it up. I started with a 2 cm border and once the outer edge was cut I trimmed again at 1.5cm that left me with a small rectangle for the centre. I matted each rectangle onto a piece of gorgeous greenish blue of Lost Lagoon. I then added a piece of retired ribbon in white going across the centre of the 3 pieces and then once they were all ready, I added dimensionals (double sided foam shapes) to the back of each piece. It was then a case of adding each layer to the card base and matching the pattern that I had stamped onto the white. I stamped a sentiment at the bottom and stamped and diecut a flower from the stamps and dies to complete it.