Showing posts with label #mistymoonlightinkpad. Show all posts

Tuesday, 11 June 2024

Tips, Tricks and Techniques Tuesday - Legendary Ride

Hello on a much cooler Tuesday. I know that it's supposed to be a maximum of 16 degrees but to me that's too cool! For Cary..... It's even then too warm! She has her own central heating system! Lucky woman! Mines like a fridge! Anyway, today's card is one that I was inspired to make by my son, I showed him the stamp set and he remembered that it was used for his birthday last year. His response was...I'd just like to fly away on mine sometimes! Hence flying into the clouds! I am calling this one a Z fold card.

I used a piece of DSP from the Take To The Sky papers from this year's new stamp set called Adventurous Sky. It's all about bi-planes. It really is a great looking set and I can't wait to share some cards with you from using them. I have used the dies too today and played around with them to highlight parts of the bike, which I must say looks very like my son's bike too!


Monday, 11 December 2023

Make It Simple Monday - Everlasting Beauty

 Hello, that week went by so quickly but as always Cary made some beautiful cards to share and hopefully inspire you.  This week I will be using the lovely set called Everlasting Beauty. I've had the stamps et for quite a while but never used it until today. I've made a very simple card with one of the flowers simply stamped across the white mat of the card which was edged with a dark blue ink and it was also stamped in the same ink colour.


Tuesday, 19 September 2023

Technique Tuesday - Designer Series Paper - So Sincere

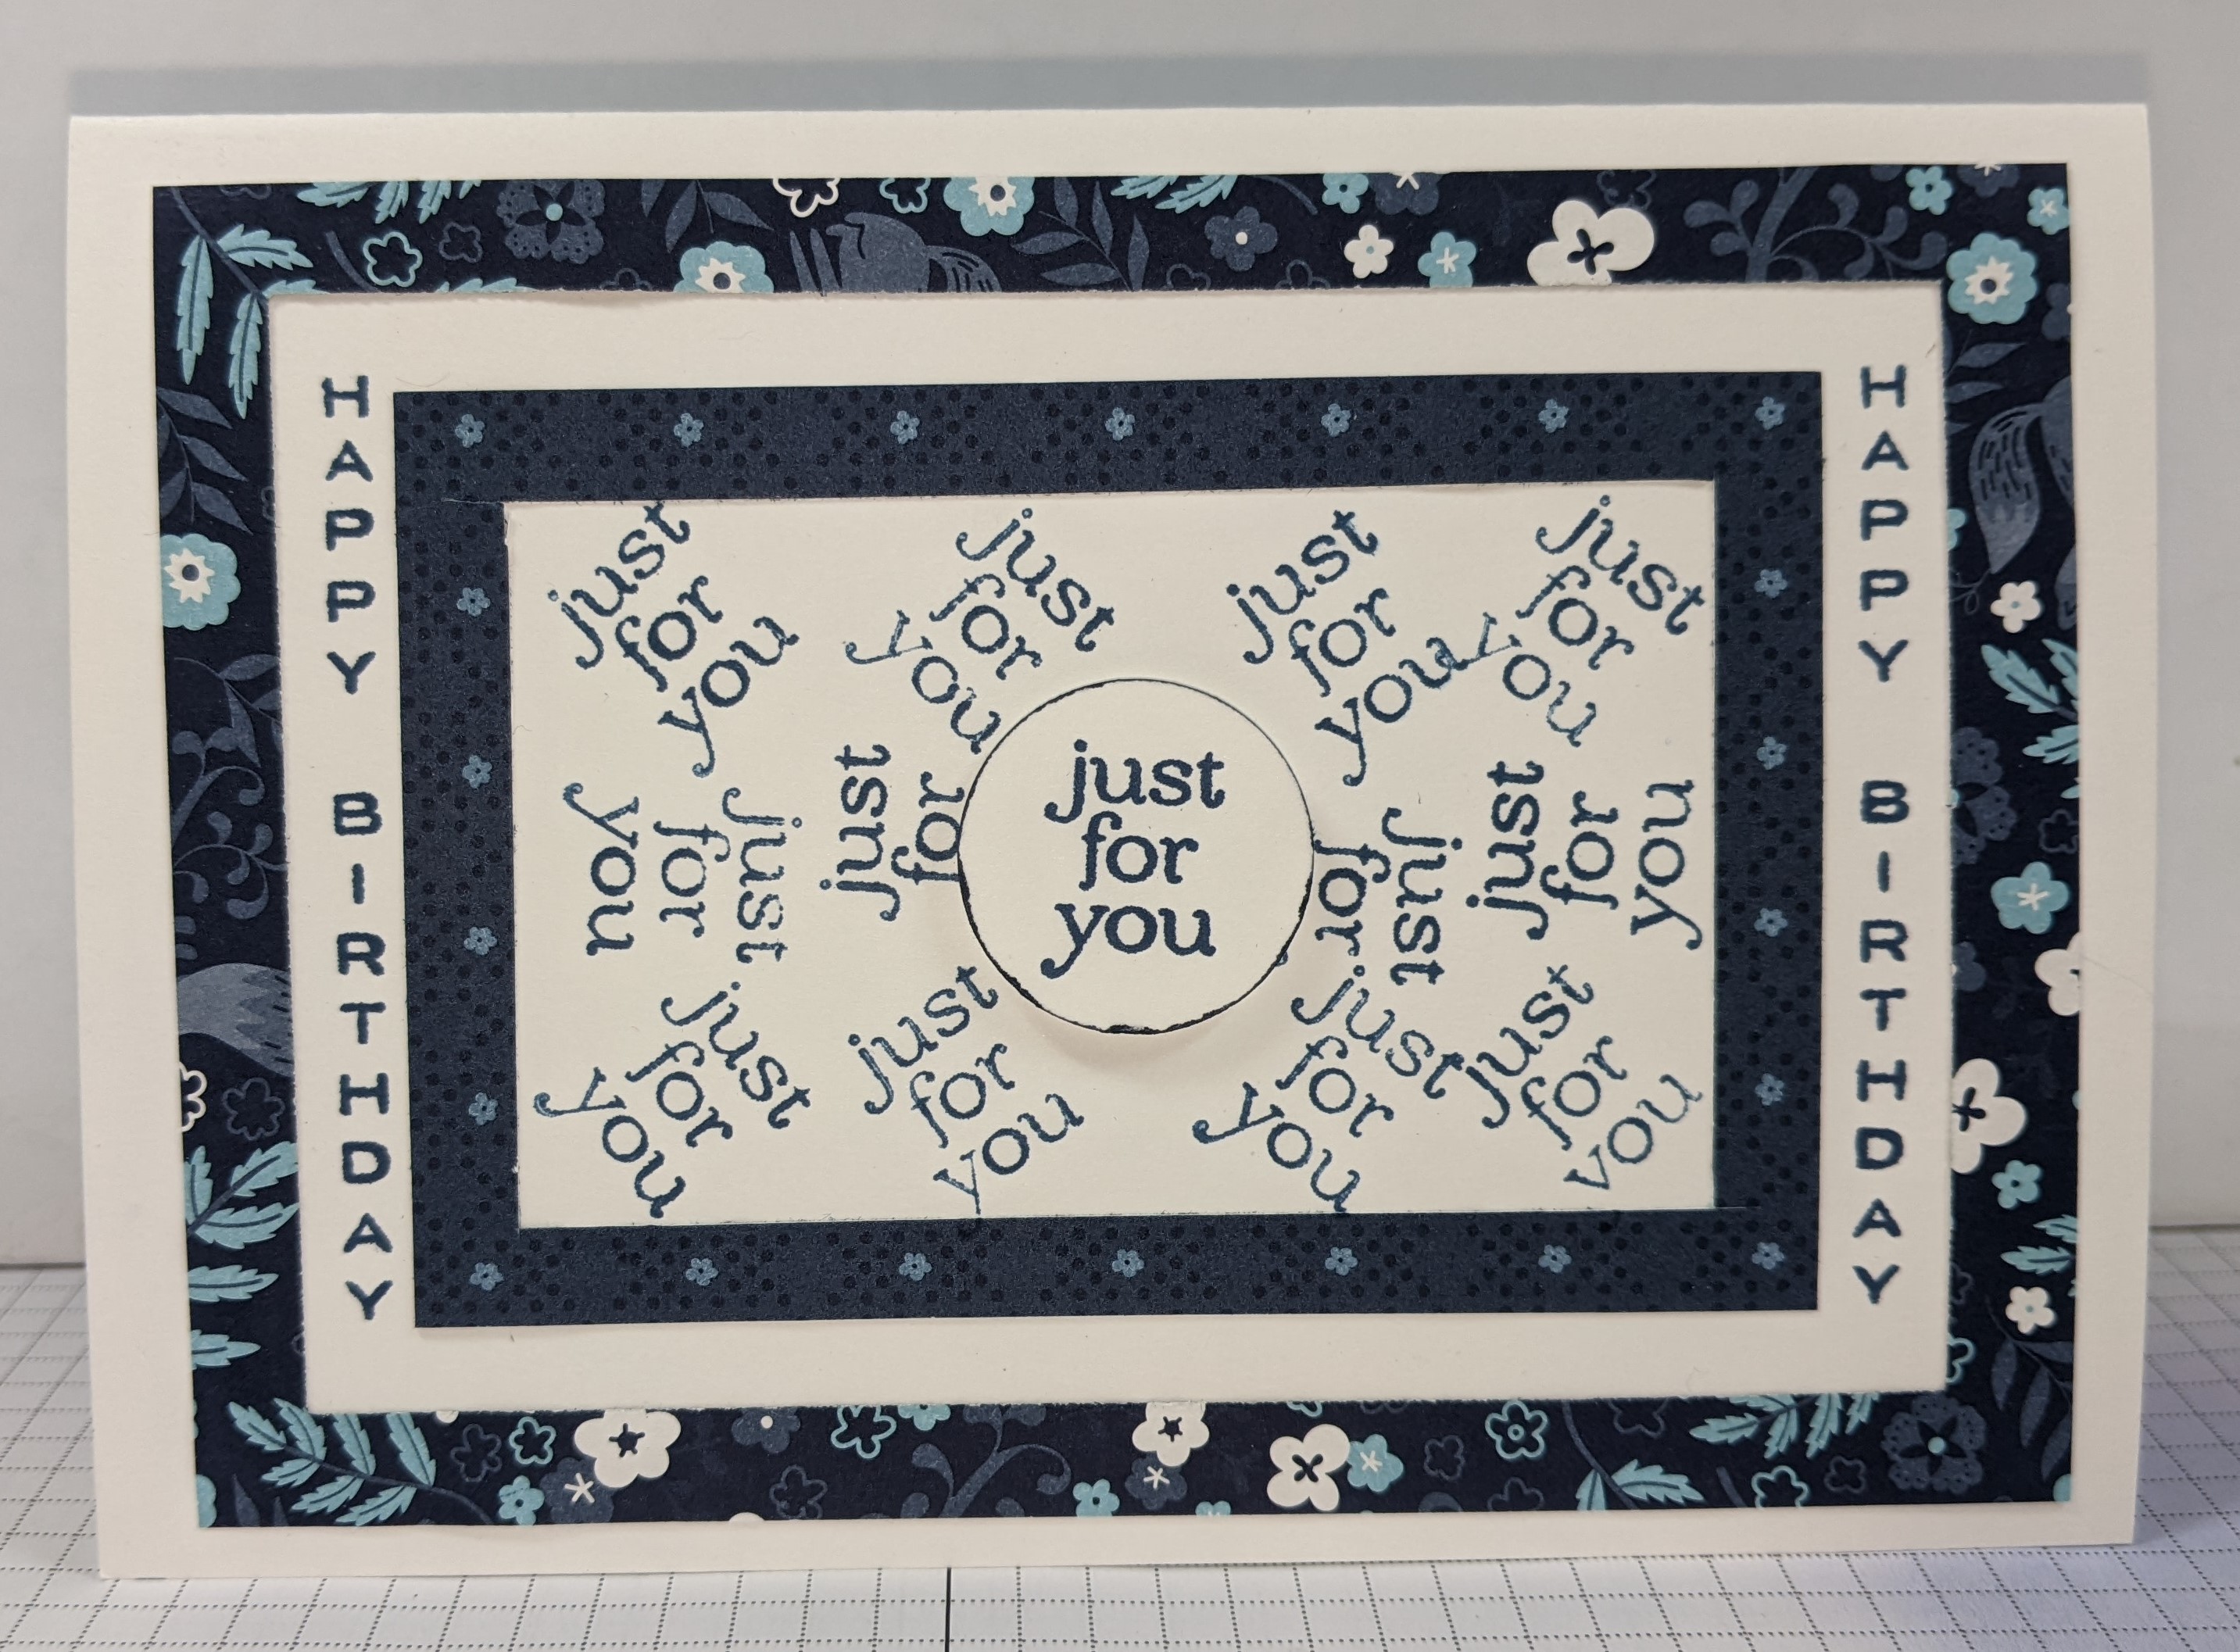
 Hello again. Today's card is a follow on from yesterday's card. Like most crafters, we don't particularly like wasting papers so once again using the Countryside Inn papers, I cut these 3 frames down to blend together. I used the So Sincere stamp set again for the sentiments. I have many great sentiment stamp sets and this is one of them. It's one thing to make a card for someone but it's even better with the appropriate sentiment. 

I started with a Blueberry Bushell card base and adhered the frames to the base of the card. I used a small white mat for the sentiment and using the Stampin' Write Marker pen in Blueberry Bushell to add the dots all around it. The technique today is using the strips and shapes of DSP wherever you can as they really are so very useful.


Monday, 18 September 2023

Make It Simple Monday - #simplestamping - Designer Series Paper - So Sincere

 Hello and thank you for stopping by. This week, I couldn't decide which stamp set to use so instead I am going to show you some project using Designer Series Papers and a Sentiment stamp set. Today's card was made using the So Sincere stamp set and papers from the Countryside Inn suite. The papers are really gorgeous and they are mostly shades of blues and as I rather like blue they are right up my street so to speak! Another thing that I like to use is all of the little bits of papers too. In this pack on a previous occasion, I had cut a small rectangle from a piece which left a frame. I have used some of the frames for today's card. Just by using a simple frame, or two, I had some fun and made this very easy card.


Friday, 5 May 2023

Fun Fold Friday - Dainty Delight

 Friday is here already and my last card although is a fun fold, it is an easy one. This isn't my design it's one that I saw on Pinterest by Connie Stewart in USA. She called it her Valentine fun fold.  It's brilliant! I made my card base in the lovely Misty Moonlight card that has just been returned to us as a staple colour. It is a mid blue not as dark as Night of Navy but it's going to be used as much as it was too. I am so pleased it's back. I cut 3 white mats. One was 9.5cm by 14.4cm and 2 which are 9cm by 11cm. Using the Dainty Delight stamps, I stamped the largest image onto the largest white mat and each of the 2 other images onto a mat. I have kept the design very simple once again with just a flower and a sentiment on each mat.  


I have made my chart in metric measurements, if you would like them worked out in Imperial (inches) please let me know. I have cut a piece of card portrait style at 29.7cm by 14.8cm, I scored at 4.9c, and 9.9cm from each side landscape. I turned the card portrait again and measured 1.5cm from each side between the 2 score lines and cut them. This was repeated on the other long edge too. I then cut through the score line nearest the centre on each side. I added some DSP on the 2 outer edges and the 4 narrow 1.5cm deep bars at the top and bottom. I cut 2 Balmy Blue mats 9.5cm by 11.5cm and adhered each one to the second of the scored panels on each side so that the edge of the paper goes toward the cut inner part of the card base. I added the 2 white mats onto the Balmy Blue mats and the White mat in the centre I  have since the photos, added a Balmy Blue mat behind that too. 
I knew there was something not quite balanced in my card and only as I was writing about it did I realise what was missing! To err is human I am told and boy ... am I human! 😁😁


That's it from me for another week, thank you so much once again for stopping by. I do hope that you have been inspired to make some cards for yourself to give to others too. Today's card will be going to my Daughter in law's mum for her birthday. I do make a lot of birthday cards as I am always sending them out!

Cary will be back to share her creations with you next week so until I return the week after next, please stay safe, keep well and as always, 


KEEP ON CRAFTING.

😍😍 xx Gill xx 😍😍

Below is the link for the Imperial measurements and the video of Connies that I watched. Copy and paste the link below and it will take you straight to it.

https://www.google.com/search?client=firefox-b-d&q=connie+stewart+vaentine+card#fpstate=ive&vld=cid:c151e98a,vid:Ojxn9AXlq2M

Friday, 22 October 2021

Fun Fold Friday - Classic Cloche

 Well here we are again, it's Friday already! Another week has sped past once more! Today's card is probably the one that I have been waiting to show you. For the last time this week of using the Classic Cloche stamp set, I made a card base in the gorgeous dusky blue of Misty Moonlight. I folded one half of the card sides in to form the base of an easel card. I added 2 white panels to each of the smaller halves and then added a piece of the Whimsy and Wonder Speciality Paper to each of the white mats. The paper is also the Misty Moonlight and has little Christmas trees and tiny stars across it. 

 
Above is the card when it's closed and below when it is first opened.
 

I cut a blue mat 12.5cm by 9cm and another piece of Whimsy and Wonder paper in the Silver stripe. From the silver stripe paper, I die cut the cloche from the centre of it. I then die cut another cloche from Silver Foiled card and stamped the cottages onto white card using the Smoky Skate Ink pad. This white piece was die cut out using the smaller of the cloche dies which as you can see, emulates the silhouette of the cottages. I glued this using Tombow Multipurpose glue onto the silver cloche. I took the Cloche Shaker Dome and peeled the tape from the front of the dome. then placed it inside the aperture in the Silver striped paper. Next I placed Tombow Multipurpose glue on the rear of the Silver Foiled Dome and using the dome as a guide, I placed the silver dome onto the blue piece of card that I cut earlier. 

Using the Subtle Shimmer Sequins, I sprinkle 2 or 3 pinches onto the silver dome. Making sure that the sequins stayed within the stamped area on the dome, I removed the adhesive tape from the bottom part of the dome then covered the back of silver striped paper with glue then placed the dome and paper into a centralised position on the blue card mat. 


I added a white mat to the inside on the card which I stamped with the cottages once again. Taking a  small strip of white card, I stamped the sentiment and added the white strip to a piece of the Misty Moonlight card. This was then added to the inside of the card using Dimensionals (foam shapes). This allows the front of the card to stand up like an easel when open. The small blue mat with the dome on now needs to be added to the card. The best way I find is to add adhesive, tape or wet glue to the back at the lower part of the mat, then add adhesive to the top of the front half of the card to where it will be standing against.

Using the dies from the Cloche set of dies, I die cut several of the trees in different sizes then place them around the front of the blue and silver mat. 

For more information on any of the products that I have used this week, please click HERE  It will take you to our Stampin' Up! shop where you can see all of the products including the Clearance Rack offers too. If you would like to order through us, please feel free to as we would love to be your one stop shop for all things Stampin' Up! If you are in the UK then please click the link to have a look at our shop.

We also have a wonderful community of fellow Stampin' Up! Demonstrators called Larger Than Life Stampers.  If you're interested or would like more information in becoming a demonstrator and live in the UK, Austria, France, Germany or the Netherlands, please click the link  JOIN on our shop page or message us for more details. There are lots of advantages to becoming a demonstrator with Stampin' Up! including saving money! The product quality are second to none!

Well, that's it from me for another week, Cary will be back again to inspire you with her creations on Monday so please stop by. 

Until I return have a good week but most of all stay safe, stay well and 

KEEP ON CRAFTING xxx 

Thank you for joining me, Gill xxx