Showing posts with label #stampinwritemarkerpens. Show all posts

Tuesday, 19 September 2023

Technique Tuesday - Designer Series Paper - So Sincere

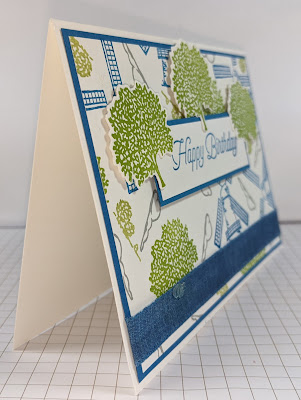
 Hello again. Today's card is a follow on from yesterday's card. Like most crafters, we don't particularly like wasting papers so once again using the Countryside Inn papers, I cut these 3 frames down to blend together. I used the So Sincere stamp set again for the sentiments. I have many great sentiment stamp sets and this is one of them. It's one thing to make a card for someone but it's even better with the appropriate sentiment. 

I started with a Blueberry Bushell card base and adhered the frames to the base of the card. I used a small white mat for the sentiment and using the Stampin' Write Marker pen in Blueberry Bushell to add the dots all around it. The technique today is using the strips and shapes of DSP wherever you can as they really are so very useful.


Monday, 20 February 2023

Make It Simple Monday - Legendary Ride

 Hello again, that week has really flown past hasn't it? Cary and I are both in full swing of getting ready for our annual retreat so it's really crazy at the moment. Yesterday was my son Jonathan's birthday and I used Legendary Ride stamp set for his birthday card. As it was still on the desk, I decided I will try to make more. 

The first one is a very simple or #simplestamping card, a little stamping and it's completed. I used Memento ink pad for the motorbike and some marker pens just added to the stamp to add a splash of colour.


Wednesday, 8 February 2023

Watercolour Wednesday - He's All That

Today's card is a little bit pathetic for a water coloured card! I had a scrap of paper and using a clear block, I scribbled some Pacific Point (blue), Sahara Sand (light beige) and Crumb Cake (beige) all over the block and then spritzed it with lots of water. I literally spread it over the scrap paper a few times and then repeated the process until I got the colouring that I wanted. I cut the bottom part of a C6 mat of DSP and added a brown border below to make it look like the side of the river. I stamped the sentiment in Early Espresso a gorgeous rich brownand die cut it out for the front.


Wednesday, 6 April 2022

Watercolour Wednesday - Love of Leaves

Hello for this lovely to be a very wet Wednesday! Very apt really as this is Watercolour Wednesday! My card this week is another very simple card. Not true to watercolouring in the normal sense but still lots of water was involved! Using the largest leaf (I think it is supposed to be a Field Maple) from Love of Leaves stamp set, today I inked up the stamp in lots of ink and then using my spritzer, soaked it with water. Once done, I stamped it straight onto the white mat that I had beside my work. Now I hadn't planned on the next thing that happened but I'm so pleased it did. As I spritzed the stamp with the ink on, the ink sprayed onto the white mat! I repeated the inking and spritzing with all of the colours.

I used, Pacific Point (bright blue), Gorgeous Grape (strong purple), Melon Mambo (bright pink), Granny Apple Green (bright green) and Mango Melody (bright yellowish/orange). I wouldn't normally put all of those bright colours together but it just seemed the right thing to do for this card. The spritzing of the colour all over the card I'm really pleased with as it turned out, lucky me! 😀

It took a while to dry so I went away for about an hour and when I came back I loved the way the lines of colour had spread over the sides of the images and how the spots really look so cool! I love it! Ok, so once it was dry, I decided to chop it into rectangles or gutted the mat several times. By cutting the inside at 1.5cm inside the outer edges I was left with a frame. I continued to do this twice more and the last one was just left as it is. Adding these rectangle frames onto a piece of the bright coloured card and trimmed all round before mounting each layer using Dimensionals or foam adhesive shapes. Another simple sentiment inside and out by colouring each of the letters using a Stampin' Write Marker pen in the exact colours.


Monday, 7 March 2022

Make It Simple Monday - #simplestamping - Slim Sayings

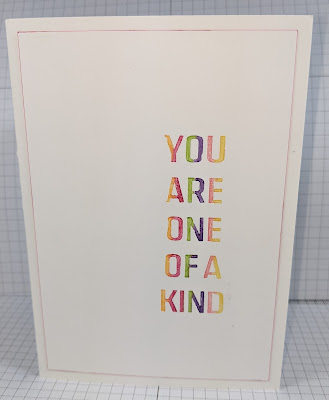
 Hello and welcome back on this cold Monday morning. Didn't Cary make some gorgeous cards with the Daffodils last week? I love them! Today I am starting some projects using the NEW stamp set called Slim Sayings. As the name suggests they are aimed for tall cards or as is the fashion at the moment, DL shaped cards. Saying that thought, they are just as simple to use for the standard shaped or even square cards too.

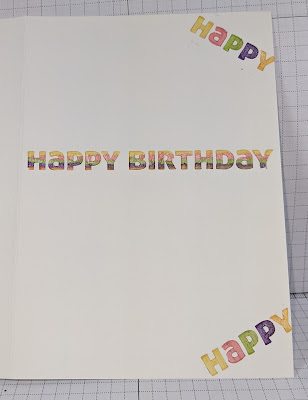
My #simplestamping card is very that. I used my Marker pens to colour the stamps and as you can see from the pictures, I literally brushed a strip along each part of the stamp. I stamped this onto a plain white mat and then just edged the piece with one of the pens. For the inside, I repeated the same technique with the marker pens only this time, across the stamp. Adding a white card base underneath it completes the first card of the week.


Stampin' Write Marker pens are brilliant as you can buy them in 1 set as a whole lot. That is a set of 40 pens which includes the strong carry case or in a smaller set of a set of 10 pens. You can then add each of the other sets as and when you want to. The bonus is that you can also buy the In Colour pens to go with the sets too. They are a really good investment too as I've had my pens for over 11 years now and they are still going strong. If they start to dry out, you can just top them up with the re-inker bottles in each colour. 


Tuesday, 8 February 2022

Tips, Tricks, Techniques Tuesday - Tulip Fields

 Hello again, Today's Tip or Technique is one that I have always loved to make. Using the Tulip Fields stamp set, I stamp randomly, the windmill, trees, and clouds all over a piece of A4 white card. Then I chopped it up! This is a very quick and easy way to make a pretty card in no time at all. Using any stamp set, anyone can make a card very quickly. We call it a One Sheet Wonder. Other ways of making a one sheet wonder is by chopping a piece of card or designer series paper into squares, rectangles, strips, triangles and so on. This card is just one of the rectangles with a few extra trees thrown in for good measure. I added a piece of the lovely wide, white ribbon from the Flowers For Every season combo pack. Yes, I did say white ribbon but using my Stampin' Write marker pen, I coloured it using the strong blue of the Pacific Point pen. 

The sentiments are from a Saleabration set called Special Moments. Saleabration from Stampin' Up! It happens twice a year in January/February and in July/August. When you place an order for £45 or multiples of, you get to chose any of the items from the Saleabration booklet. This includes stamp sets, papers and combinations of them. Special Moments is one of these free items that I chose when I placed my own order.

I did add a bow to the centre of the card but it's disappeared from my card and the desk!