Tuesday, 23 May 2023

Tips tricks and techniques Tuesday Beautiful Balloons


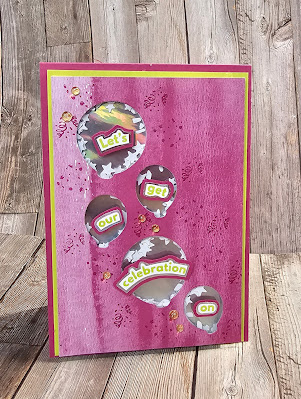
 Today I'm sharing a fun interactive card... a shaker card. Shaker cards are fun and not to hard to make. I have used the Beautiful Balloons bundle and the coordinating Bright and Beautiful pattern papers. 

Beautiful Balloons stampin up shaker card

Beautiful Balloons stampin up shaker card

To start with I die cut ballons from a piece of pattern paper. 

Beautiful Balloons stampin up shaker card

I then turned it over and adhered a piece of acetate to it. Then I used 3d foam strips to go around the appatures. 

Beautiful Balloons stampin up shaker card


I then used the confetti die and some scraps of basic white cardstock to create confetti to put in the shaker.

Beautiful Balloons stampin up shaker card

Next I cut a piece of some of the fantastic new Holographic trio speciality paper to the same size . I then adhered it using the 3d foam strips.

Beautiful Balloons stampin up shaker card

Now my shaker panel was complete and ready to adhere it to a mat and then the card base.


Beautiful Balloons stampin up shaker card

For the sentiment I stamped it onto white cardstock then cut it apart. I then adhered it to scraps of the holographic paper. I then cut around it again and mounted it on to some scraps of berry burst cardstock. 

Beautiful Balloons stampin up shaker card

I stamped some of the sprinkle stamp randomly in berry burst ink all over. And then a few lemon lime twist tunsel gems to add a little something extra.

Beautiful Balloons stampin up shaker card

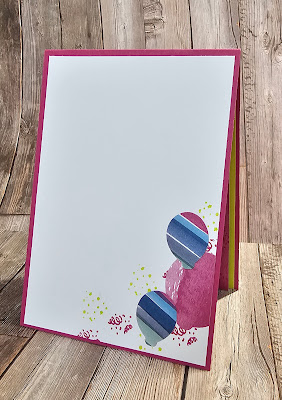
As my card base is a beautiful strong berry pink colour I decided to add a white insert on the inside.
Beautiful Balloons stampin up shaker card

I decorated the inside with a little stamping in berry burst and lemon lime twist ink and added 3 of the balloons that came out of rhe pattern paper. 
Beautiful Balloons stampin up shaker card

I do enjoy a fun shaker card. And these brigjt bold colours are some of my favourites. 

Monday, 22 May 2023

Make it simple Monday Beautiful Ballons

 I hope you've all had a great weekend. We sure did! Saturday was our catalogue launch event. We hosted 9 people in person and 10 people joined us online. We had a blast lots of laughter and crafting 😀 For the event everyone recieved a goodie bag which contained a selection of products from the Beautiful Balloons suite. This included some of the fantastic bright and beautiful memories and more cards pack and the coordinating Cards and envelopes.  Now these are only part of a super suite of products including stamps, dies and gorgeous pattern papers. Over the coming week I'll be sharing projects using lots of these products starting with the Beautiful Balloons stamps.

Beautiful Balloons stampin up simple stamping easy congratulations card

These stamps are such fun. And because they're photopolymer they're perfect for beginner stampers. Why? because they are see-through! Layering them up is a doddle!

Beautiful Balloons stampin up simple stamping easy congratulations card

The colours I've used a 3 of the new core colours from Stampin' Up! 
The pink is bubble bath, the yellow is lemon lolly and the blue azure afternoon. 

Beautiful Balloons stampin up simple stamping easy congratulations card

Now it may look like I've used 2 shades of blue but I haven't. All I've done is inked the sentiment and strings and stamped directly. For the balloons I inked then stamped on to scrap paper then huffed the stamp to moisten the ink and stamped onto the card base. This simple technique is what I call generational stamping. It's  a great way to make the most of your inks.

Beautiful Balloons stampin up simple stamping easy congratulations card

I love how this simple card came together . I hope you do too.


Friday, 19 May 2023

Fun Fold Friday - Cheerful Daisies

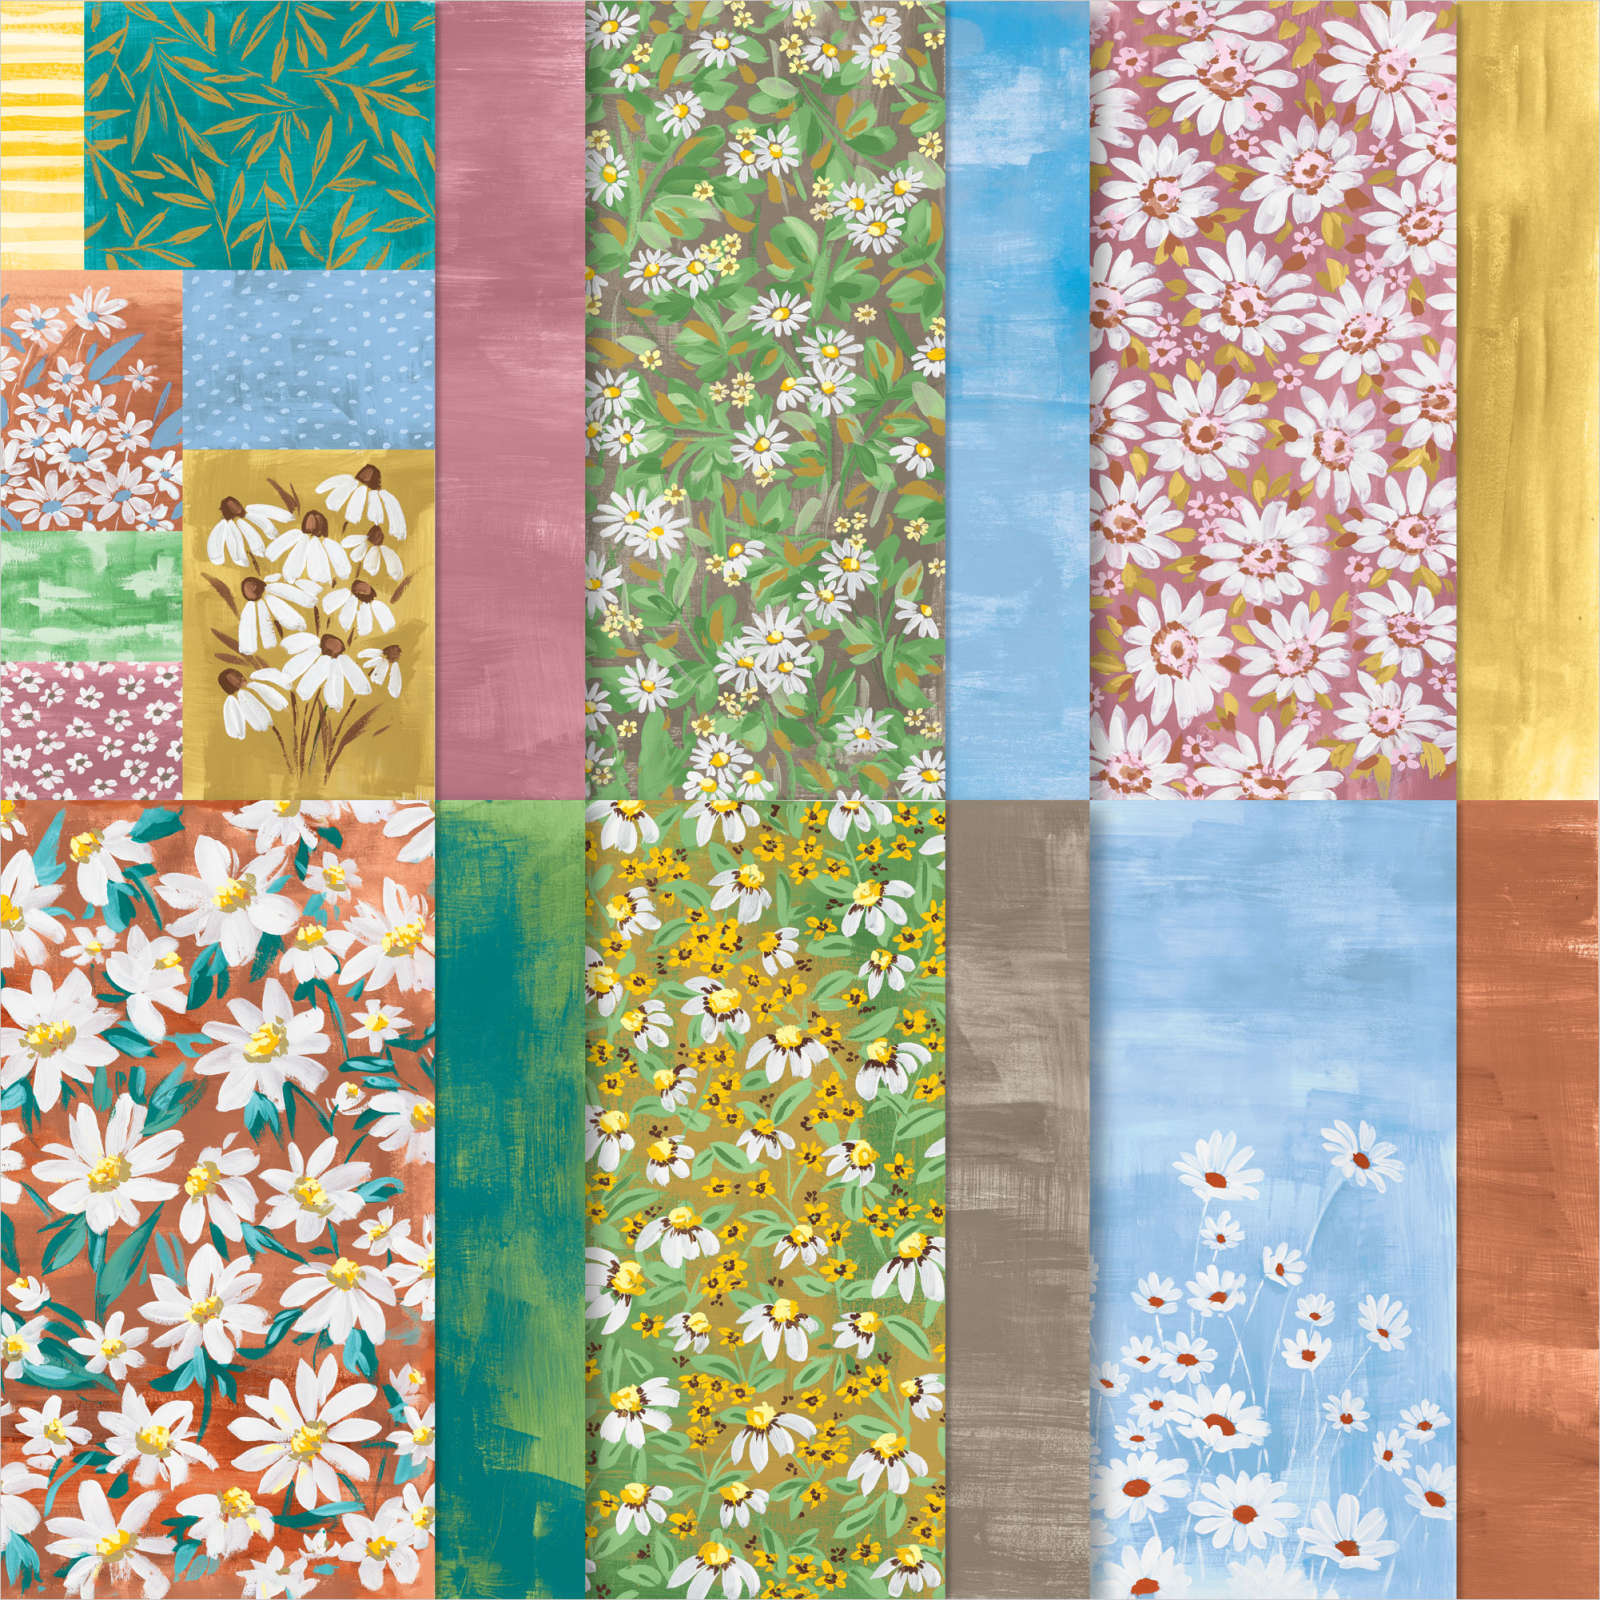
 Well here we are again, back on to Friday's fun fold post. I know that I say this a lot but this card really is a very easy and simple card. Using the C6 white card base and a pencil, I marked 8cm along the central fold of the portrait style card from the left hand edge. Then I marked 6cm down from the fold to the opening edges. Using my trimmer. I scored from the centre-fold to the first mark on the front of the card and then again on the back too. This created a V shape along the centre fold. I pushed them into the card and burnished the folds firmly. I stamped several of the large and small flowers from the Cheerful Daisies stamp set using the Pretty Peacock and Wild Wheat ink pads onto white card. I added the smaller flower to the centre of the large flowers using Dimensionals. I chose these colours as the DSP Fresh as a Daisy has 2 sheets of DSP with several different designs in many different sizes and the one I chose is simple but very gorgeous! The pattern I used is at the top left of this picture next to the yellow stripe.

FRESH AS A DAISY 12" X 12" (30.5 X 30.5 CM) DESIGNER SERIES PAPER


That's all from me for this week. I do hope that you have been inspired to make some beautiful cards for yourself. Cary will be back on Monday to share some of her creations with you. 
 
I will return the week after but as always, take care, stay safe and

KEEP ON CRAFTING. 

😍😍 xx Gill xx 😍😍 


Thursday, 18 May 2023

This or That Thursday - Cheerful Daisies

 Well, it's that time of the week when we ask you for your opinion. For my This or That today, I have made 2 blue and white cards both different but then both similar. Using the dies and stamp set for the Cheerful Daisies I die-cut several of the flowers in white card and stamped a few sentiments for each. Very simple but layered cards, I started with C6 card bases each one different. 

THIS                                 and                            THAT


THIS

The first card or THIS card is an upright card base and I added a mat 10 cm by 14.4 cm of DSP to the front of the card. I die-cut a frame using the Countryside Corner dies and embossed this using the Painted Posies embossing folder which was added by using Dimensionals to the back of it. The die cut daisies then had the surface petals added to them and adhered to the card base using Dimensionals. A simple sentiment to complete THIS. 


 The THAT card (BELOW) is a landscape direction card and using a piece of the same DSP as THIS card, I added to a strip of Night Of Navy card which I had Scalloped using the die from the retired Apple Harvest dies. I cut a mat 10cm by 11.5cm and embossed it using the Painted Posies Embossing Folder.  I added the white panel to the right side of the card front and the blue panel to the left overlapping the edge of the white panel.The flowers were raised and adhered to the card using Dimensionals and completed using a sentiment from the stamp set. 


Now it's your turn to decide which is your favourite. Please do let us know. 

Wednesday, 17 May 2023

Watercolour Wednesday - Cheerful Daisies

 Hello again, I am so pleased that I chose the Cheerful Daisies this week as the weather has been so very lovely here, it's been what I call lovely smiling weather. Today's card is one that I have seen done several times but I never had the luck of making it turn out right. I started by choosing 3 similar colours. The first is Fresh Freesia, then it's Highland Heather and finally Gorgeous Grape. I first of all spritzed the piece of Fluid 100 water colour paper in water really well. Then starting with the lightest, I stamped a Stampin' Up! acrylic Block C onto the ink pad and made sure it was covered in ink. I spritzed the block with water and placed it onto the paper. Where I had gone wrong before was that I lifted the block off. I shouldn't have. I tipped the block lightly from side to side and top to bottom so that the ink on the block covered the whole of the square that I wanted covering. I repeated with the other 2 colours but as the Gorgeous Grape ink is quite strong, I didn't over ink it. All 3 blocks were overlapped and dried really well. 

I stamped the large and small line images and inside colours onto white paper then die cut them all out. I mounted the small daisies using Dimensionals and the centres of the flowers were rounded/stretched a little and added with Dimensionals too. The whole of the mat was placed on Adhesive foam sheet so that it straightened out and laid flat well before placing them all onto the Fresh Freesia card base.


Tuesday, 16 May 2023

Technique Tuesday - Cheerful Daisies

 Continuing on with the simplestamping theme, but using a technique that I like using. By adding a piece of patterned paper to a card base and adding images or sentiments on top, you can make a very simple but pretty card. Using the Cheerful Daisies stamp set I stamped the sentiment and on a plain C6 mat I stamped another and some small flowers. I took the dies of the same name which go with the stamp set and die cut the large die which is the 3 daisies all attached together plus the inner parts of the daisies and die cut them all out in white card. Once cut out, I used a blending brush and gently brushed Balmy Blue ink across the inner parts of the 3 daisies. I left the main body white. I added some Tombow multipurpose glue to the back of the centres and placed them on top. I added the sentiments and completed the card.


Monday, 15 May 2023

Make It Simple Monday - Cheerful Daisies

 Hello and welcome back this week. As always, Cary made some marvellous cards with those cheeky little monkeys last week didn't she? My cards this week will be using the gorgeous Cheerful Daisies stamp set. There is something about seeing daisies at the beginning of spring that I just love. So delicate and simple they come up year after year without fail. Perfect! My simple card for today is some #simplestamping. I started by adding a strip of sticky note across the centre of the page and stamped around and over it using Smoky Slate, a very soft gray. Then using the fill-in stamp, I stamped using the beautiful NEW colour of Lemon Lolly, a beautiful soft lemon-yellow ink inside. That was it. Simple enough?