Showing posts with label #prettypeacockinkpad. Show all posts

Wednesday, 29 May 2024

Watercolour Wednesday - Thoughtful Wishes

 Hello on a very wet Wednesday! Yes, it's here again in the UK. It has barely stopped in 3 days. That's the UK for you we most definitely can have all 4 seasons in the one day! Not fun. Anyway, I'm indoors so able to stay nice and dry so today is Watercolour Wednesday and I have made the cheats version of a watercolour card. Using a piece of Designer Series Paper (DSP) from the Thoughtful Journey set of papers, the stamps from the Thoughtful Wishes set. I cut a piece and added it to the front of a Pretty Peacock card base. I then started stamping and die-cutting some of the lovely leaves from the Thoughtful Wishes set of dies. Once they were done, I added them to the front of the card. A sentiment on the front and inside completes this card. I am sorry there is no water in sight on my card today! I did say it's a cheat's card! :)


Tuesday, 30 April 2024

Tips Tricks and Techniques Tuesday - Grassy Grove

 Hello, today my card is more grungy than I am used to. I am trying to push myself a little...though it is quite hard for an old girl to use new tricks! 😅 Using the Grassy Grove stamp set again today along with some daubers, I took the largest stamp and added ink to the stamp using a brownish grey of Gray Granite and the green from yesterday of Old Olive. Then with another dauber, I added some different colour in the form of a blueish green called Pretty Peacock. The colours of inks were all taken from the ink pad with the daubers alone and not direct to the stamp at all.


Wednesday, 17 April 2024

Watercolour Wednesday - Botanical Beauty

 Hello and thank you for stopping by. Today, using the gorgeous stamp set Botanical Beauty, I really went to watercolour heaven! I stamped the image in Lemon Lolly, one of the last years new colours. It is soft and subtle but can be bright too. I lightly stamped it onto White card and then I started with many of the green inks from Stampin' Up! I used  Shaded Spruce, Granny Apple Green, Pretty Peacock and a touch of Old Olive. I stamped an acrylic block onto the ink pad and using my fine water brush, started to colour in the leaves and ferns in different ways. I repeated this with all of the colours until I was happy with the depth of each colour. I went on to cut the white stamped mat down to 9.4 cm I left the width at 10.5 cm. 

I then chopped it up randomly from top to bottom at different angles. I added the pieces onto a mat of the Lemon Lolly card. Once the last piece was ready to go I was able to trim the width down to fit my card base. I adhered the mat to a black mat a few mm larger than the yellow which I think has made the colours stand out so well. I mounted it using Dimensionals on the back and added a piece of yellow ribbon from the Sheer Ribbon Combo pack. 3 gorgeous colours in the pack, Lemon Lolly, pink of Bubble Bath  and the bright blue of Azure Afternoon. A sentiment inside and a few extra leaves etc. and I was finished.


Wednesday, 20 September 2023

Watercolour Wednesday - Designer Series Paper - Happy Labels

 Today's card is a bit of a cheat to be honest! I took a White card mat, stamped an acrylic block onto Pretty Peacock ink pad and added some water to it. Once mixed up, I sprawled the watercoloured ink over the centre of the mat. I didn't delicately brush it on, I just swirled it over the mat and left it to dry. Once dry, I dry embossed it using the striped mat from the Stripes and Splatters set of 2 folders. I then used a silver marker pen that I had and ran it along the stripes of the embossed mat. It gives it a little sparkle.

I added the mat to a Pretty Peacock card base along with some scraps of DSP from the Delightfully Eclectic, large pack of papers. A few of the scrap flowers from another set of dies and the sentiments from Happy Labels stamp set completes this one. I love the special sentiment on the inside of this one...I just want to hug you... isn't that just gorgeous?


Friday, 19 May 2023

Fun Fold Friday - Cheerful Daisies

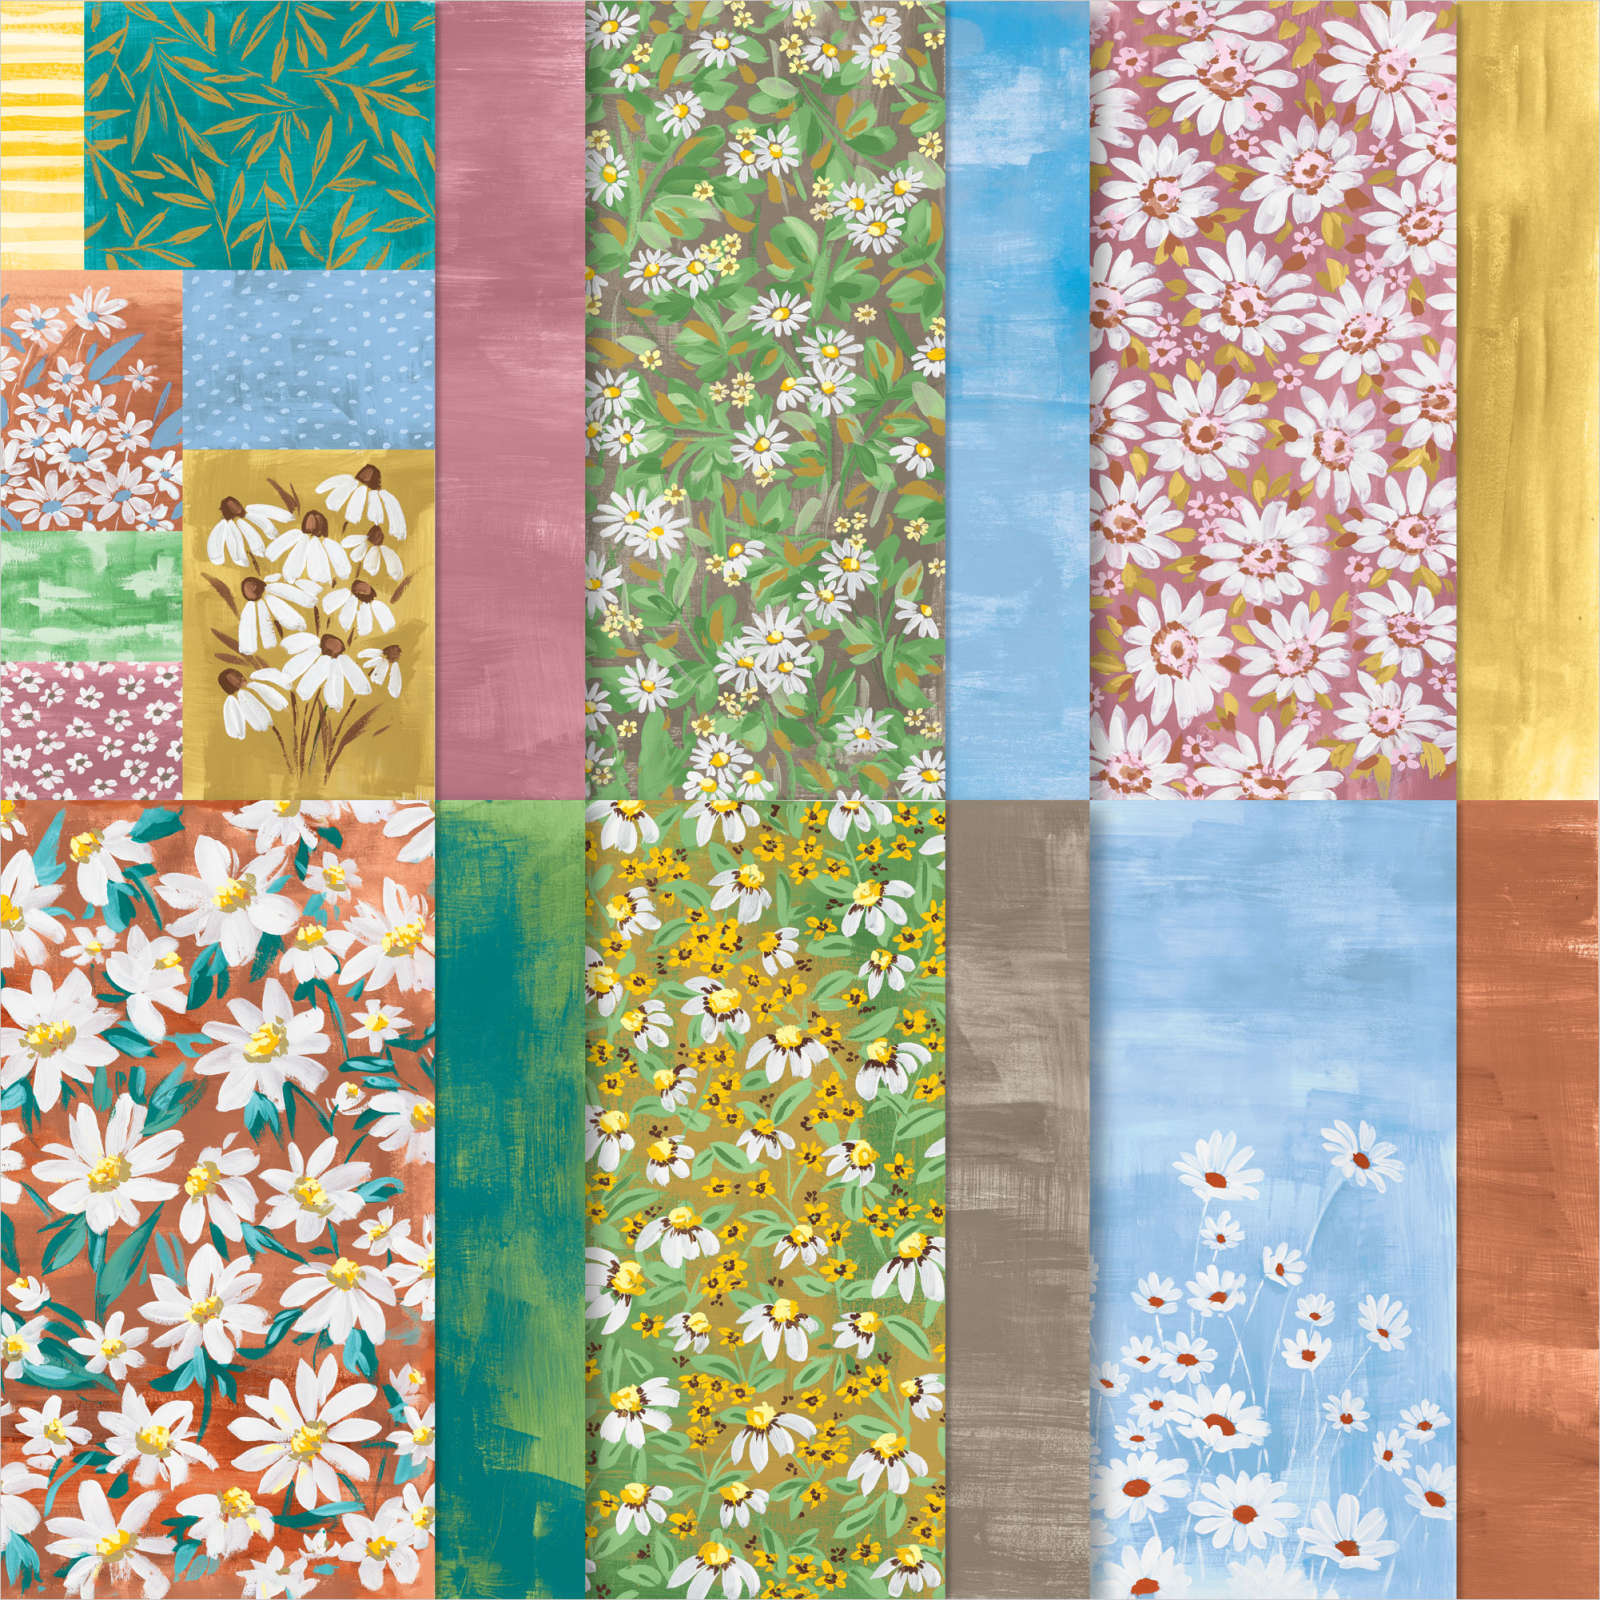
 Well here we are again, back on to Friday's fun fold post. I know that I say this a lot but this card really is a very easy and simple card. Using the C6 white card base and a pencil, I marked 8cm along the central fold of the portrait style card from the left hand edge. Then I marked 6cm down from the fold to the opening edges. Using my trimmer. I scored from the centre-fold to the first mark on the front of the card and then again on the back too. This created a V shape along the centre fold. I pushed them into the card and burnished the folds firmly. I stamped several of the large and small flowers from the Cheerful Daisies stamp set using the Pretty Peacock and Wild Wheat ink pads onto white card. I added the smaller flower to the centre of the large flowers using Dimensionals. I chose these colours as the DSP Fresh as a Daisy has 2 sheets of DSP with several different designs in many different sizes and the one I chose is simple but very gorgeous! The pattern I used is at the top left of this picture next to the yellow stripe.

FRESH AS A DAISY 12" X 12" (30.5 X 30.5 CM) DESIGNER SERIES PAPER


That's all from me for this week. I do hope that you have been inspired to make some beautiful cards for yourself. Cary will be back on Monday to share some of her creations with you. 
 
I will return the week after but as always, take care, stay safe and

KEEP ON CRAFTING. 

😍😍 xx Gill xx 😍😍