Showing posts with label #inkpads. Show all posts

Wednesday, 1 May 2024

Watercolour Wednesday - Grassy Grove

 Hello on another lovely and warm Wednesday. We have had some gorgeous weather for the past week which is really lovely to see. How long it will last...no one knows but I am enjoying it while it's here. For my watercolour card this week I have used the Grassy Grove stamp set and watercoloured onto Fluid 100 watercolour paper. I literally soaked the paper with a spritzer full of water and stamped the first set of plants in the centre. As it was very wet, it bled onto the paper quite a bit which I was happy about. It has given me some lovely colours throughout the whole image. I did soak up some of the ink that had bled across the sky using a piece of kitchen tissue but am really pleased with the tinted green effect.


Wednesday, 1 November 2023

Watercolour Wednesday - Gift of Giving and Joy To You

 Here we are on this very wet Wednesday. Here in the UK we are having the most horrendous amount of wind and rain. In fact we have had severe weather warnings so to wash away the rain I chose to make a really fresh and happy coloured card. Well I think it is anyway! I used the watercolour brush and washed the gorgeous soft pink of Bubble Bath ink all over the centre of the white mat. Once it was dry and using a Stazon Jet Black Ink pad and the Gift Of Giving stamps, I stamped the lovely little gift boxes and then started to give them a lovely watercolour wash in the individual colours. 

I matched colours up with the ribbon which is Sweet Sorbet Metallic Woven Ribbon. I mounted the white mat onto a piece of pink in the Bubble Bath card then added these to the White card base. I finished the card with the sentiment from Joy To You stamp set.


Wednesday, 4 October 2023

Watercolour Wednesday - Jolly Words

 Hello again. Today's card started somewhat different to what it turned out. I played for a while with it and in the end, I didn't like so I cut off the edges! I used a Lost Lagoon card base the same size as the C6 card base but I made it wider the higher. I made a blue, pink and yellow sky for the card mat. By adding all of the colours to a large acrylic block and I soaked the watercolour card very well too, and spritzed the ink all over the block too and sploshed it onto the wet card and moved it around quite a bit to blend the colours really well into it. Once I dried it, I stamped the image across and watercoloured the image. I adhered the coloured mat to the white piece of card and then onto the card base. 


Wednesday, 26 July 2023

Watercolour Wednesday - Seasonal Branches

 For the watercolour card today, this one has not turned out anything like I intended it to! However, using a block stamped into Coastal Cabana ink, I added lots of water to the ink on the block then using the large water brush, I washed it across a piece of Fluid 100 watercolour paper which I had soaked earlier. It went really smoothly across the card mat. Once dry I added some more different colours including blue, pink, yellow.... Once I was completely happy with the mat, I set it aside to dry. I die cut several of the large branch dies out of Pecan Pie card using the Seasonal Branches dies. Then using the stamp set, also called Seasonal Branches, I stamped lots of the leaves onto another piece of watercolour paper. I die cut them out once they were dry and put them aside to when I wanted to add them. I die cut the centre frame out of some Gold foiled card and embossed it with the Metal Plate embossing folder. I added the branches and leaves onto the mat and added the frame around the whole front of the card. I die cut a few golden apples (who wouldn't love a golden apple tree in the garden)?


Tuesday, 27 June 2023

Technique Tuesday - Translucent Florals

 The cards for today are using the technique of using Vellum cardstock. It's called cardstock vellum as it's quite weighty in comparison to something like greaseproof paper which looks very similar but is not as beautiful to work with as the vellum is. Using the Translucent Florals stamp set, I stamped the images of the flowers in a water based ink and/or Memento Tuxedo Black. Most of what I have done is in coloured inks as the stamps show so much of the whole image. The first card is white on white with a little added colour. This was based on some elements that one of the demonstrators were using on Sunday. I had a scrap, strip of the spotted vellum and added a small white mat over it which had been embossed using the Splatters embossing folder. It is one of 2 folders in the pack called Stripes and Splatters. I die-cut the petals from some more of the spotty vellum from the Vellum Basics papers.I added some Calypso Coral Blends pen to the back of the smaller flower and some of the individual leaves using the Granny Apple Green, both in the dark shades. The sentiment was die-cut from the Deckled Rectangles dies and the little flower centres were also di-cut from the scrap of coloured vellum. 

The second card is on a Fresh Freesia card base with another of the Deckled Rectangles die cut in white card. I embossed another of the pieces of white with the Splatters folder once again and added the sentiment landscape this time across the card. A simple spotty, clear, vellum, flower and some leaves, complete this one. 


Card 2


Wednesday, 5 October 2022

Watercolour Wednesday - Cheerful Basket

Here we are again on a Wednesday for the water-colouring. Now water-colouring isn't really my thing but I am trying really hard to learn as much as I can. Today's card was one that I knew how I wanted it to look but wasn't positive that it would work so with the Cheerful Basket stamp set I stamped the apples in Saddle Brown Stazon ink and the apples in Tuxedo Black Stazon ink. Then I had fun. I started by die-cutting the corner from a C6 white mat using the Split Card Textures die and got my son to choose a base colour. He chose Granny Apple Green. (Love It)!

I decided to emboss the green mat with one of the retired Meadow Moments Embossing Folders and added it to the Basic White card Base. I mounted the White die-cut mat on top of the green using Dimensionals to add another layer. After that I started to colour the apples and basket in. I like to use a block to add the ink to and by adding a few drops of water on top, mixed it and used it for colouring. I used 3 different colours for the basket with Crumb Cake, Early Espresso and Soft Suede. The apples were a little different in as much as they are made up of so many different colours. I used, So Saffron, Granny Apple Green, Calypso Coral and Sweet Sorbet. That is a lot of colours but I think they look better in a multitude of colour. What do you think?

Here's my working on the apples, only problem is that I wasn't paying proper attention! Hearts instead of apples!!


Wednesday, 7 September 2022

Watercolour Wednesday - Family & Friends

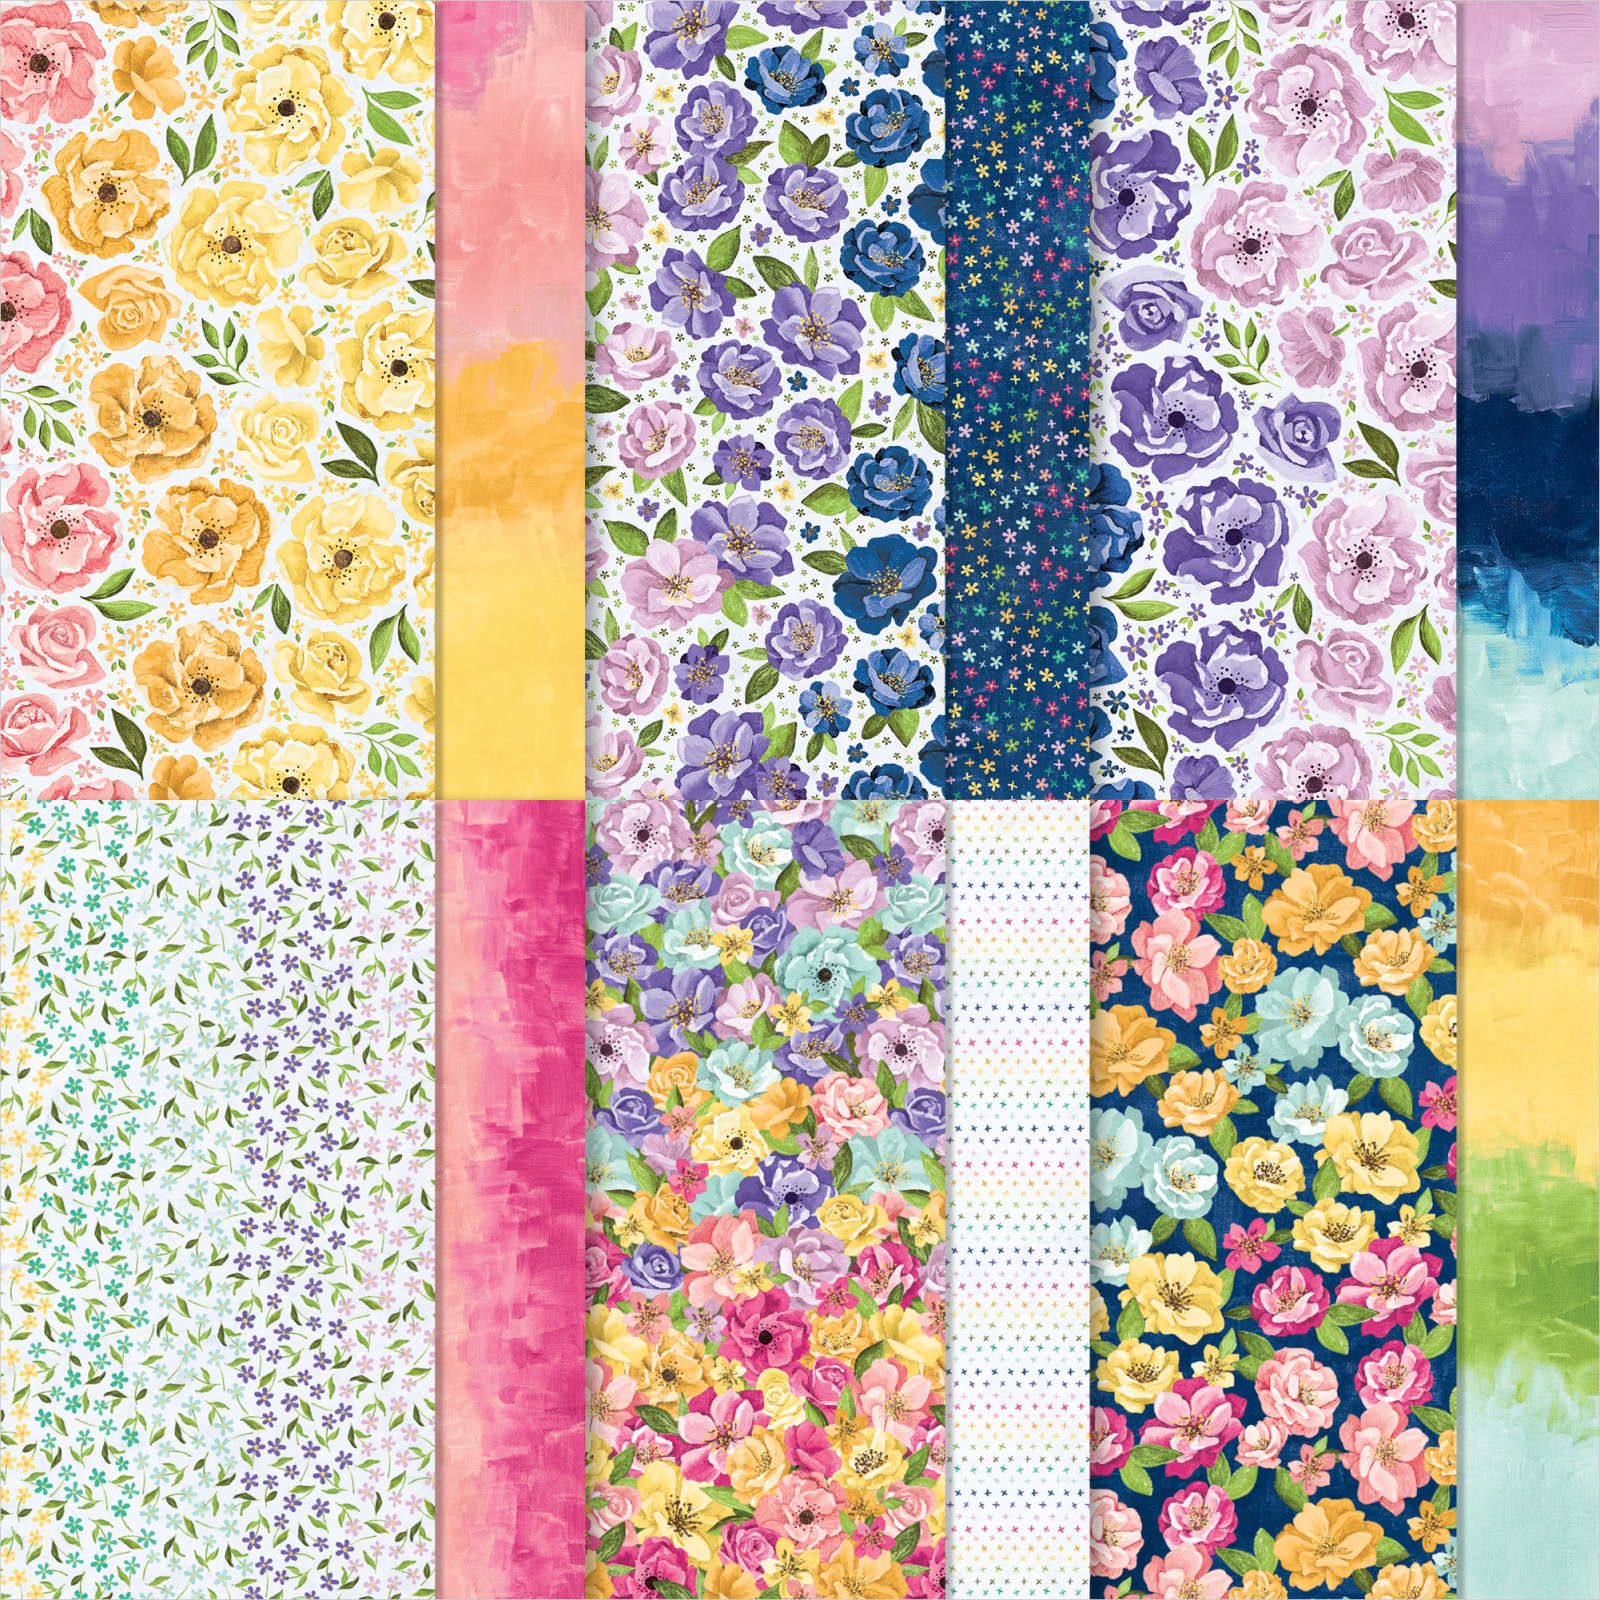
Using the Family & Friends stamp set again today, I cheated a little! Instead of watercolouring the whole background, I have used a piece of Designer Series Paper. It is from the Hues of Happiness papers which are stunning to say the least.

HUES OF HAPPINESS 12" X 12" (30.5 X 30.5 CM) DESIGNER SERIES PAPER 

The piece that I used is the last on the bottom right. Aren't they just gorgeous? Anyway, now I am sure that many of you have family and friends living abroad so for this one, I stamped the couple and then watercoloured them using the water painters and ink which I added onto an acrylic block from the ink pad. I seem to prefer taking the ink from the block, it's less messy too. I think this would work for me as I have many family and friends in much warmer countries than here in the UK. I die cut the image out using the Stitched Rectangle dies and added it to a piece of Granny Apple Green card. A few sentiments inside and out and another stamped image on the inside completes today's card. I also use Charming Sentiments for the sentiment on the inside.


Tuesday, 6 September 2022

Technique Tuesday - Family & Friends

 Today's project  is yet another simple one that if you have a Stamparatus you can replicate or mass produce very easily and quickly. I lined that card up and placed the magnets over it. Using the Family & Friends stamp set again I added the clean stamp to the left of the card so that it would cover most of the card. Then using several different colours, 6 in total, I inked the stamp and placed it down onto the card. When using different colours on 1 stamp, always remember to clean the ink off the stamp each time or you'll get messy ink pads! 

I added a strip of retired Real Red Sheer Ribbon that I had and tied with a knot. It doesn't conceal where I added the stamped image to the right of the card but just adds a focal point. Nothing else but the strings of lights. That's it!