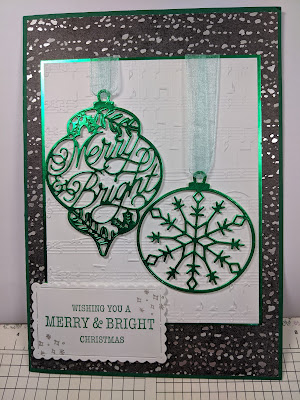
Hello again on this cool and chilly morning! Ooo! It really is nippy out there today! I'm glad I don't have to go out! For my last class using the Bright Baubles stamp set, today I am showing the 1st card that I made for the all-day class. It is a little fiddly, so it's not for the faint-hearted but it's really well worth it. This is an easel card so a fairly simple one until you see that I have cut out the centres of two panels.
The best way to start this is by folding a piece of A4 in half and burnish the folds really well. The add it to the trimmer and gut the centre at 3 cm all around the 4 edges. This now gives me a folded frame in Pool Party card. Then adding a piece of card 15.85cm by 21cm. I scored 1cm down the full length and using tape, I fixed the 1cm strip under one side of the gutted frame of the card. This is now 3 panels wide so quite a large card base. Obviously, as I've removed a large part from the centre of the card, I needed to stabilise it a little to give it a bit more strength. To do this I used some of the Green foiled card.


I cut some pieces of green foiled card 14.4cm by 20.5cm and gutted them both 2.5cm from each edge. I now have 4 separate frames. 2 in Pool Party of the card and 2 in the green foil. I decided to emboss the foiled frames using the Wintry embossing folders. I used the pine tree one from the twin pack. I love the texture it's added to the card.

Onto the decorating now. I stamped a bauble twice using a Memento Tuxedo Black ink pad and coloured the images in identically using my Stampin' Blends before glueing them together using Tombow multipurpose glue, adding a piece of Baker's Twine into the centres first. I die cut a 'JOY' bauble from both sides of the foil. This ensures that you will get a mirror image of the dies. I added some Baker's Twine to the inner parts and glued them together using Tombow again. Once they were both dry and able to be moved, I added them to the centre, top fold and secured them using some tape where the foiled panels are going to go.

Now onto the solid panel of card. I added one of my most favourites in the pack of DSP Peaceful Place papers. This simple white and silver design is, in my mind, simply stunning. I stamped a sentiment onto Basic White card in the Shaded Spruce Ink and mounted it onto a piece of green foiled card then placed it about 4 - 5 cm from the front edge of the card using foam shapes (Dimensionals) to enable the front mat to stand up. I had lots of die cut white snowflakes and added them around the card to highlight it.
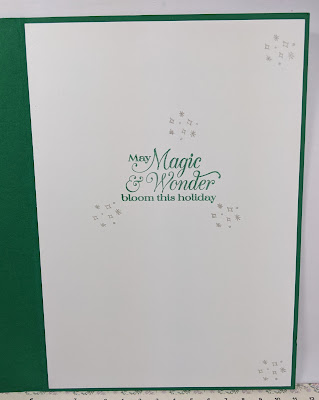
I haven't done it yet but I will be adding a white panel to the base to write my message on. There's not really much space to add it unless I write all over my favourite paper!
That's it from me for another week. Once again, I am so sorry that I missed Monday's post.
I hope that you are now nearly ready for the Christmas holidays and ready to spend some quality time with your friends and loved ones. If you can, please remember those of your neighbours who are on their own. Try to pop in and see them and give them some cheer.
Cary will be back next Monday, (I don't think she has any dental appointments)! Until I return on 27th December, I hope that you all have the most wonderful Christmas time and manage to get to spend some time with family and friends.
Whatever you are going to do please
xxxxx STAY SAFE, BE WELL and KEEP ON CRAFTING. xxxxx
Happy Christmas and have a wonderful New Year
Gill xxx 😍😍😍