Wednesday, 16 March 2022

Watercolour Wednesday Kite Delight

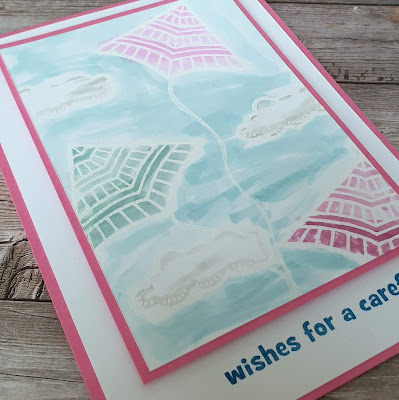
 Today I'm sharing a card that makes me a little nervous.  The card was made using some of my favourite techniques,  watercolour,  heat embossing but it didn't turn out in real life quite how it did in my imagination! Does that ever happen to you? I had this image of beautiful kites floating in a blue sky with fluffy white clouds. All the elements are found in the fab Kite Delight stamp set and I thought watercolour background perfect!.....

Well it didn't turn out quite how I imagined and I was a little disappointed πŸ˜” I wasn't going to share the card but then I thought stop just because it didn't turn out exactly as I thought it should doesn't mean it's not good enough.

Sooo here it is...

Kite delight Stampin up watercolour heat embossed card

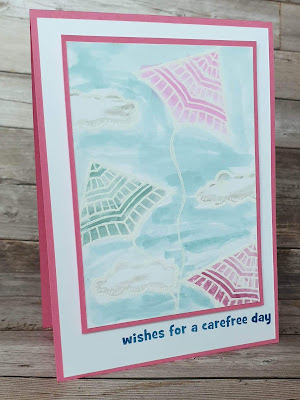
I must admit I liked it more once I'd mounted it and added it to a card base πŸ˜‰ Isn't it funny how sometimes adding just simple layers can make something more pleasing to the eye.

Kite delight Stampin up watercolour heat embossed card

Well that's it for today please join me tomorrow for another project using the Kite Delight stamp set and a fun technique πŸ˜‰ 
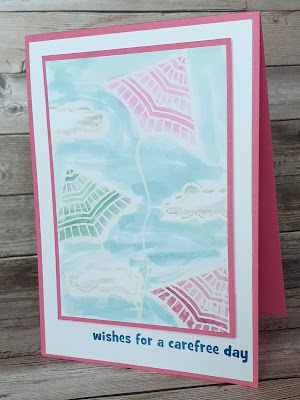
Kite delight Stampin up watercolour heat embossing card


Tuesday, 15 March 2022

Tips Tricks and Techniques Tuesday Kite Delight

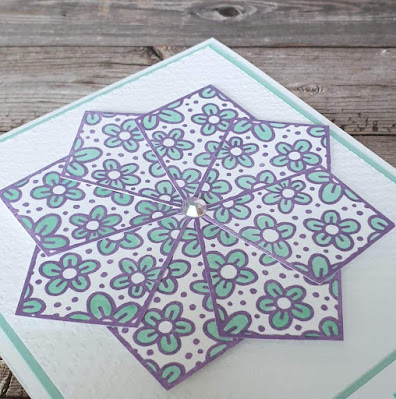
 When I first got started in papercrafting one of the first technique that I was awed by was tea bag folding. Originally made from the paper that tea bag were wrapped in these beautiful paper folded creations are similar to origami. The first time I saw the pretty floral kite it reminded me of a tea bag fold medallion. 

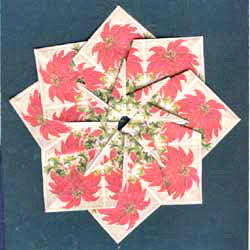
Teabag medallion kite delight Stampin up

The image that is above is just what came to mind when I thought of the tea bag folded medallion. 

So for my version I stamped and coloured 8 of the floral kites . I then cut them out. With their nice straight lines they're pretty easy to cut πŸ˜‰.

I then popped a small square of scrap card onto my work area. I then played around placing the kites till they were in the right positions.  Then I carefully stuck them into place.

Kite delight Stampin up fun faux teabag folding medallion card

For the card I kept the background simple. A white card base, a coordinating coloured mat then a white mat that I embossed with an embossing folder called Tasteful Textile. 

A simgle iridescent rhinestone for the middle of the medallion and a sentiment was all that was needed for this elegant card.

Kite delight Stampin up faux teabag folding card

I hope you like my faux teabag folding medallion and will give it a go yourself.

Kite delight Stampin up faux teabag folding medallion card

Monday, 14 March 2022

Make it simple Monday Kite Delight

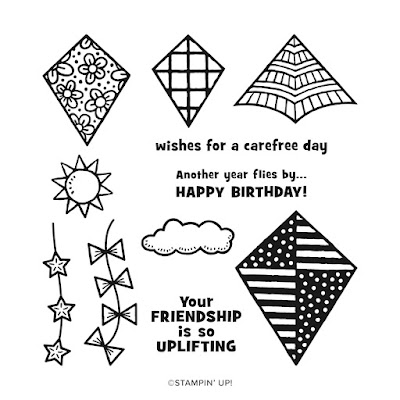
 This week I'll  be sharing inspiration using a stamp set that needs a little love from the January to June mini catalogue from Stampin' Up!. Called Kite Delight this fun set is great for so many occasions and recipients. The images are great for colouring, they are easy to cut out and easy to place as they are clear stamps made from from photopolymer. 

Kite delight Stampin up

 As it's Monday it's #makeitsimplemonday and boy was I glad of that! This coming weekend is our annual retreat event. We host a full weekend of crafting fun and games. We love hosting this weekend but it does entail a lot of hard work in the run up to it so a #simplestamping project was just what the doctor ordered!!!

My colour palette is inspired by one that is very on trend at the moment in support of the events taking place in the Ukraine πŸ‡ΊπŸ‡¦.  

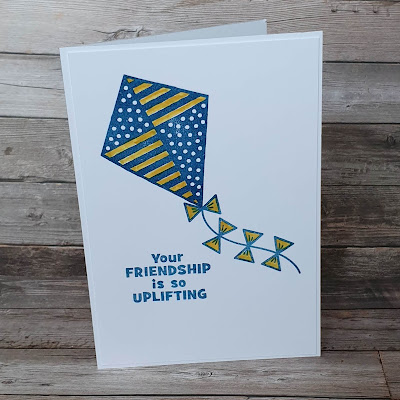
Kite Delight stampin up simple stamping easy card making

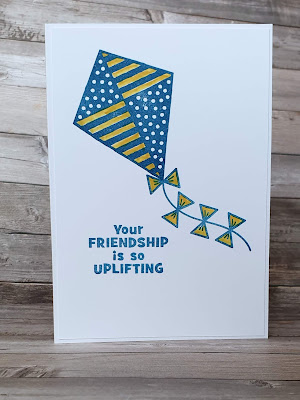
The blue I've used is a colour called pacific point and the yellow is daffodil delight.  The 2 colours work so well together to give a bright and bold look.

I stamped in the blue ink and coloured with the yellow. I used a great little tool from Stampin' Up! Called blender pens . These can be used to pick-up any colour waterbased ink and use them as you would a marker pen. If you'd like to see how I do this I will be demoing this technique in my Facebook live Here this afternoon at 4pm GMT. 

I hope you like my clean and simple and quick card and that you'll join me tomorrow with more inspiration with this fun stamp set. 


Kite delight Stampin up simple stamping easy card making

Here's the link to the video of the demo of this card   


Friday, 11 March 2022

Fun Fold Friday - Slim Sayings

For my last card this week. I really have had fun making this one. This very easy fun fold is made using only squares of card or Patterned Paper if you want to as that will work too. Slim Sayings stamp set has no images only sentiments but that hasn't stopped me at all this week. I have really enjoyed playing with this stamp set and the dies too. 

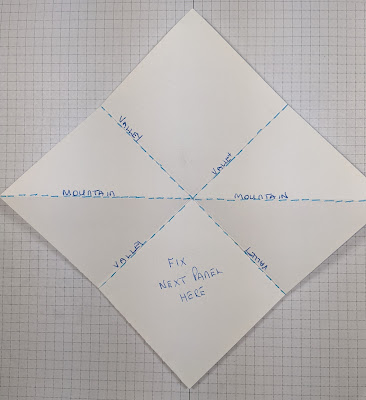
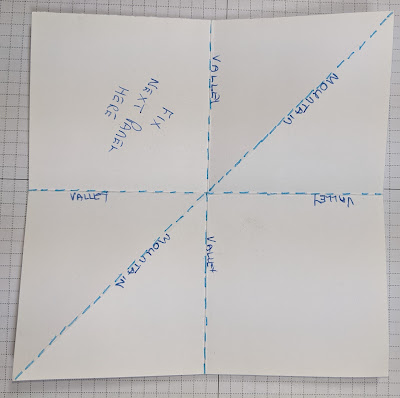
I started with 3 pieces of Night Of Navy card 14.85cm by 14.85cm or just under 6" by 6" in Imperial measurements. I then scored each piece at 7.4cm horisontally and vertically and once diagonally across from point to point going through the centres of each square. See below.


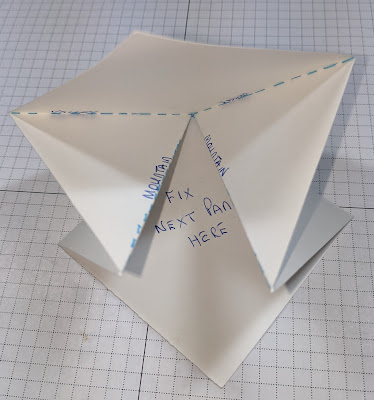
By holding the corners that were scored diagonally and pulling them together towards you get a beak like shape. Well, that's what someone called it last week! πŸ˜‚ Following the folds and the direction that they go, the square will be folded into a quarter of it's size.

This can be made in almost any card size as long as it's a proper square. It can also be as long or as many panels as you want too! Once all 3 of the squares are scored and folded, make sure that the folds are burnished in both directions. That way the edges have both been stretched and will crease beautifully when the pieces are glued to each other. 

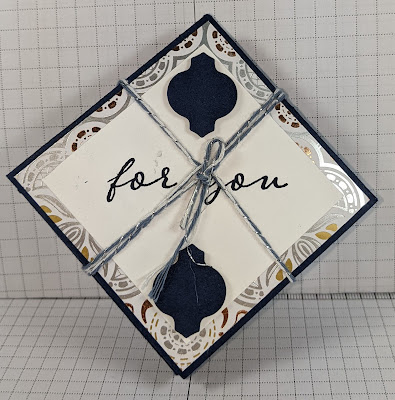
The top of the folded card above and below are side views when closed.
Below is the1st page once opened.

 
Above and below are pictures of the whole card when opened. You will see when folding your card, (should you decide to make one) that the 2 outer pieces will fold forward at the diagonals and the centre set will fold backwards. 
Another way of making this card is to use it as a brag book or memory album. Instead of adding sentiments you can add photographs or drawings. 
The shape is so versatile. When I decorated the card I used the mosaic pieces that come from the other large die. I can use the frame on another project but meanwhile the inner pieces are on this card. 
The papers that I used are from the Simply Elegant Speciality papers and Beauty of The Earth designer series paper. Both sets of these double sided papers are really gorgeous and so versatile in so many ways too.


Above is the stamp set and the dies that are Slim Sayings and the Slim Card Dies. As I said at the start of today's post I really have had great fun with the stamps and dies this week. Should you decide to buy them and I highly recommend you do, I am sure that you will be very impressed with them. 
 
Thank you for popping by this week. Cary will return next week with some more of her creations.
 
I will be back the week after Cary as usual but the weekend of the 19th and 20th March, Cary and I are holding our 1st annual retreat in person since lockdown 2 years ago and we will both be extremely exhausted when we return.
 Will we post on the blog when we return? Who knows? Hopefully we will be here in spirit if nothing else! πŸ˜‚
 
Until I return, please stay safe, take care and be well but most of all.....
 
😍😍😍  KEEP ON CRAFTING!!!   😍😍😍


Thursday, 10 March 2022

Throwback Thursday - Slim Sayings

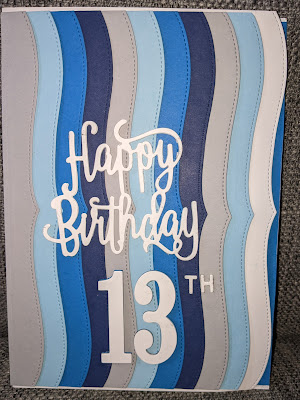
Today's card is a special one. Many years ago Stampin Up had a set of dies called Layering Alphabet Edgelits dies. The card today reminds me of just that one. Using the Slim Sayings and the Slim Card Dies, I made my Grandson Jayden's 13th birthday card in a similar way. 

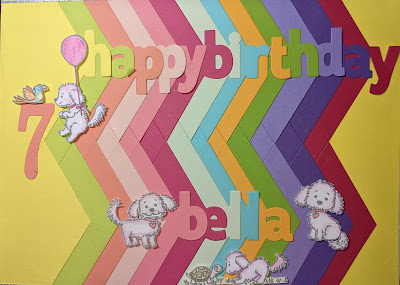
Stampin' Up! no longer sell the Layering Alphabet dies but the dies in this set reminds me of Bella's card which you can see at the bottom of the page. 

Using 4 different colours plus white card, I die cut several of the wavy shapes and layered them in a similar way to Bella's card. I did use a few other retired things on his card which I'm sure many people still have but I just love the way that the lines of colour and waves are perfectly elegant. So yet another technique to use those lovely Slim Card dies for. 


Wednesday, 9 March 2022

Watercolour Wednesday - Slim Sayings

For today's card with the Slim Saying stamp set I started with some watercolour paper or Fluid 100 paper as we call it. Using a spritzer, I sprayed it well with water and put it to the side while I made the coloured base. Using some re-inkers in several colours, I dropped randomly all over a cello bag some Melon Mambo, Mango Melody, Daffodil Delight and Flirty Flamingo. I then spritzed it with water and as it was mixing the colours up, I laid the Fluid 100 paper on top of it. Leaving it for a few moments to soak up the colour before I lifted and inspected it. I was hoping that the pink was going to be stronger but no, It's mostly shades of yellow. That's great as I like the yellows too! 

The message was stamped with Mango Melody ink and then I kissed the edges of Melon Mambo ink pad. I love the way you get the different tones of colour throughout. Both pieces of paper were added to coloured card and mounted onto the White card base using Dimensionals or foam adhesive shapes.


Tuesday, 8 March 2022

Tips, Tricks and Techniques Tuesday - Slim Sayings

Today you have 2 for the price of 1. Using the dies called Slim Card Dies that go with the Slim Sayings stamp set, I die cut 2 pieces of card. One in Daffodil Delight and the other in Mango Melody. There are 4 dies in the set and are brilliant for making cards look so different. This is the Chevron shaped die and all I did was to swap the pieces over from each coloured mat. I have then 2 cards for 1. I then decided to emboss both of the colours to add a little texture. I used another of the cards shaping dies for the edge of the card and used a marker pen to pop a little matching colour on the edges.

Adding a strip of the coordinating colour on the inside makes the edges stand out more. All of the sentiments were stamped using a Memento Ink Pad.