Showing posts with label #smokyslatecard. Show all posts

Monday, 24 June 2024

Make It Simple Monday - Sneak Peak week - Winterley Tree Tops

 Hello and thank you for joining me today. Cary's cards were lovely and bright last week weren't they, really lovely. Twice a year Stampin' Up! have 2 seasonal catalogues in addition to the 1 annual catalogue. We are currently gearing up for the winter season and as a demonstrator, we are often given the opportunity to pre-order some of the new things. Well...this is one of them. Winterly Tree Tops is as it sounds, a winter themed stamp set but I have made it much brighter. Why is it always dark colours in the winter? Why can't we have bright in the winter too?

A simple card today starting off the week with, I have used a very light grey card base and a piece of the coordinating paper which look like Birch trees to me. A simple mat of paper on the front with a bird stamped in the light grey and coloured in with ordinary colouring pencils and a few sentiments to complete the inside and out.


Monday, 22 August 2022

Make It Simple Monday -#simplestamping - Heron Habitat

Cary made the most beautiful cards last week didn't she? How do I follow that? Well, I will have a go. This week I am using the Heron Habitat bundle, this includes the amazing dies too but for today it's a #simplestamping card so no dies. I wanted it to be slightly different to my normal Monday cards and I hope I have succeeded. I started by stamping the Herons in flight and stamped the Happy Birthday stamp above them all. Nope! I didn't like that! So, I chopped the top 2 off. I had half a sheet of Smoky Slate on my desk so I mounted it onto a C6 piece of that. 


Thursday, 28 July 2022

Throwback Thursday - Cottage Rose

 Hello, today's card was inspired by a card that I made for our retreat back in March of this year. I believe that it's called and book fold, I may be wrong but it looks very like it to me too. Using the Cottage Rose stamp set and the coordination papers called Abigail Rose, I cut a piece from the patterned papers and started to cut it right down. Bella continued to fussy cut it for me as I was unable to complete it. As I mentioned earlier in the week, I have carpal tunnel and I am finding it quite restricting, to say the least! 

I coloured in the piece using my Stampin Blends pens and once finished, using Tombow multipurpose glue, I glued it to a piece of Smoky Slate card and gently cut around leaving a small border behind. Before I fixed the book fold down, I tied a piece of the Gray Granite ribbon around it and used some of the Stampin Up! Tear 'n Tape to seal it.

 I used some more of the DSP on the card base, picking one of the other patterns of DSP in the same Smoky Slate and the 2 pieces were attached to the card base. I added Dimensionals to the back of the flowers to adhere to the card front. A few sentiments later, and this card is completed.

ABIGAIL ROSE 12" X 12" (30.5 X 30.5 CM) DESIGNER SERIES PAPER


Thursday, 10 March 2022

Throwback Thursday - Slim Sayings

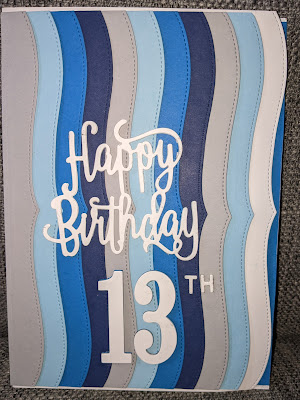
Today's card is a special one. Many years ago Stampin Up had a set of dies called Layering Alphabet Edgelits dies. The card today reminds me of just that one. Using the Slim Sayings and the Slim Card Dies, I made my Grandson Jayden's 13th birthday card in a similar way. 

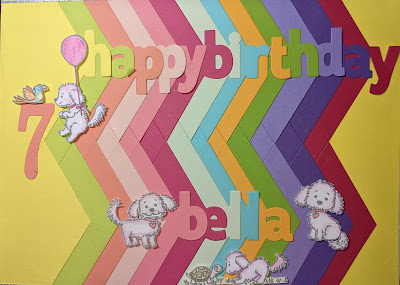
Stampin' Up! no longer sell the Layering Alphabet dies but the dies in this set reminds me of Bella's card which you can see at the bottom of the page. 

Using 4 different colours plus white card, I die cut several of the wavy shapes and layered them in a similar way to Bella's card. I did use a few other retired things on his card which I'm sure many people still have but I just love the way that the lines of colour and waves are perfectly elegant. So yet another technique to use those lovely Slim Card dies for. 


Wednesday, 26 January 2022

Watercolour Wednesday - Happy Hedgehogs

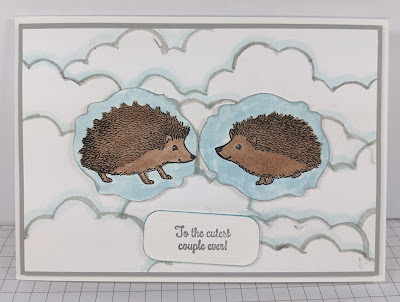
Hello, for today's watercolour using the Happy Hedgehog stamp set, I made a watercolour background and used a die cut mask. Stampin'  Up! have a set of dies called Basic Borders. There are 6 different dies in the set and there are zig-zags through to curves and points, curves to a tiled roof... I love them. Anyway, the die is a cloudy effect along the edge and using that I tried several techniques from brushing across the die cut and many other ways. I ended up by brushing a small line around the border in the very soft grey of Smoky Slate. I stamp the ink pad onto an acrylic block and add a few drops of water to make it even lighter. I moved the die cut at different angles and once done I took some of the lightest blue of Balmy Blue and washed another line across the grey. I think it adds a little dimension, What do you think?


Friday, 14 January 2022

Fun-Fold Friday - Encircled In Friendship

Hello again. For the last time this week I have made one of my favourite fun folds using the Encircled In Friendship stamp set. This is I believe called an Arrow fold. You can probably see why! 

It uses a standard C6 card base but this one is in the shape of a tent. I started with a piece of A4 card cut in half at 10.5cm by 29.7cm long. It is then scored in half at 14.85cm. From there at the bottom front edge mark lightly in pencil at 5.25cm. Along both of the sides, mark at 5cm and 10cm from the bottom edge. Once the marks are made, score between the centre, bottom mark and both of the centre corners, the centre mark and the 10cm and 5cm marks too. 

Once you have scored all 6 marks, rub out the pencil marks you first made. Then fold all of the folds into a mountain, valley fold and then a mountain once again. Repeat this on both sides. It's SALEABRATION time again and this time I used the Designer Series Papers called Simply Marbleous which are Free when you place an order for £45 or more in the current Stampin' Up! catalogues.  

I started with a piece of DSP (patterned paper) cut at 14.4cm by 10.5cm. I marked the bottom edge at 5cm and cut between that and the top outer corners. The 2 triangles are adhered to the bottom inside right and left hand side and the large triangle i cut 1cm off the bottom edge as I wanted it to go onto some white card too. This way it has a good sized border all around.

I then repeated the same with a piece of white card. The big triangle then fitted snugly into the centre on the inside of the card. 
I decorated by die cutting some of the shapes from the Encircled in Beauty dies. I used some more of the DSP, white card and Blushing Bride which is the gorgeous pink used in the papers.

 On the inside, I used a piece of the Smoky Slate patterned paper and die cut one of the medium sized shapes and a white circle for the inner sentiments.
For a change, I used a few Rhinestones to decorate.

I hope that you have managed to get some inspiration for making your own cards this week. There's nothing nicer than sending and receiving a hand crafted card. 
 
Thank you for stopping by and please pop by next week as Cary will be here to show you some of her projects to hopefully inspire you again. 
 
Until I return, stay safe, keep well but most of all 
😂KEEP ON CRAFTING!! 😂
 
Thank you once again, Gill xxxxx


Thursday, 21 October 2021

Throw back Thursday - Classic Cloche

For my Throwback Thursday card, today I've gone way back in time to when I paper pieced cards. Something that I haven't done in many, many years. Using the Classic Cloche stamps, I stamped the cottage 3 times across the white mat using the really light grey of Smoky Slate. Then using the stamp from the set to colour the images, I stamped the cottages in the rich deep red of the Cherry Cobbler Ink Pad. I stamped another of same the images onto a scrap piece of card. This was then added to a piece of the Foam Adhesive Sheet. 

This is a sheet of double sided foam very like the Dimensionals but a sheet approximately 4 1/2" square. I die cut the small cloche shape out which left me with the frame and the coloured cottages on the cloche. Firstly, I cut into the cottage piece and fussy cut them all out. They were then added onto the card image. Taking the residue from where the cloche was cut from, I fussy cut around the edge to give me a simple frame which once done, I added it to the card and surrounded the little cottages.  

A fiddly but very rewarding, fun way to give a unique look to a card.


 I'm pleased with it, I hope you are too?


Thursday, 7 October 2021

Throwback Thursday - Peaceful Deer

Today's card is another of the technique type of card that I always love to make. Using Peaceful Deer stamp set, I have matted and layered this card once or twice! I started with a Deep Gray card base called Basic Gray then added a soft, silvery grey in the Smoky Slate. On top of that, I added the gorgeous piece of Double Sided Paper or Designer Series Paper from Stampin' Up! The papers are called Peaceful Place. They are all shades of grey, black and white and on one of the sides are silver foiled patterns and designs. They are simply stunning. Well worth buying. Please click HERE for the link to see these stunning papers.

Then I started with the deer. I stamped several of them using the Memento Ink pad and coloured them in using the Ivory Stampin' Blends. I also added a strip of the gorgeous sparkly silver mesh ribbon. 

The disc for the message is made up of 2 silver foiled circles and 2 smoky slate circles. It was fun trying to get them all in different sizes but I managed it!