Hello, today's card is another which can follow on from yesterday's #simplestamping card. Using the Festive and Fun stamp set, I stamped the Hippo with his sledge 3 times, though not all completely. I lined the card mat straight along the grid lines on my gridpaper and taped it down with some low tack tape. I then started stamping the Hippo across the page. I used Memento Ink pad for this as there is a lot of detail in the picture and I needed to see all of it. I decided to colour the images in using my water colour pencils. No water, just pencils. I wanted to see the effect of the pencils along the line of colour. I have a post it roll of sticky note paper and I laid it across the bottom of the 1.5cm of the image and cut the post it roll in half across the length. I then placed the other half across the top of the images and covered the top 1.5cm up too. I aimed to colour in only a 2cm band across the whole image and I am rather pleased with it. I could have placed the strips of Real Red tribbon across the top and bottom of the images but decided against it. What do you think?
Tuesday, 28 November 2023
Monday, 2 October 2023
Make It SImple Monday - Jolly Words
Hello and welcome back. It seems so long since I was last here but in truth I know that it was Cary last week. Didn't she do a fantastic job with the Merriest Trees stamps and dies? Brilliant! This week however, I am going for more of a fun vibe. I am using the lovely Jolly Words stamp set and occasionally mixing them in with another sentiment only stamp set.
This very simple set was crying out for my very simple first card of the week. Only Basic White Card and a Pool Party Ink Pad was all I used!
Friday, 16 June 2023
Fun Fold Friday - Men's Cards - Reach For The Stars
I just love the stamp set Reach For The Stars. The Stargazing papers too are gorgeous so what more can I say other than I have had to share one of my cards from last weekend's class. This is a fun fold like I made a few weeks ago which was a design of Susan Campfield, her Flying Seagull card. I used Lemon Lime Twist card for the card base and main central mat and white for the mat on the reverse.
I cut 2 pieces of card 10.5cm by 21cm and scored them both at 5.7cm, 10.1cm and 15.8cm. The 2 pieces which measure 5.2cm are folded in and butted up together where I added tape to join them. I then added a square of white card 10.3cm by 10.8cm wide to the back where you will be able to write on. The front will have 2 pieces that look like they are 'floating' around in the centre. To that, I added a piece of card 10.5cm by 10.5cm to the 2 'floating' pieces. If you hold the 2 outer edges with the central coloured mat on the bottom, you can see why Susan called it a flying seagull card.
Make sure that all of the score lines are very well burnished so that you get a more fluid movement to the card. From there, it was just a case of measuring the panels and adding decorations to it. I added 2 white panels which I dry embossed using 1 of the 3 the Basics 3D embossing folders. I chopped several of the part planets from the Stargazing DSP and an occasional whole one to mine. I added a piece of DSP to the central green mat and stamped the sentiment and a few stars too using the White Ink pad.
That is it once again from me. I hope you have found some inspiration to make some cards for yourself too.
Cary will be back as usual on Monday so please pop by to see what she has made to inspire you.
Until I return, stay safe, keep well but as always...
KEEP ON CRAFTING!
😍😍 xx Gill xx 😍😍
Monday, 12 December 2022
Make It Simple Monday - Go To Greetings
Welcome back to another very cold week here in the UK. We have had temperatures here of -6 and it has been extremely very cold! I don't like the cold at all! We had our Christmas dinner get together with many Stampin friends on Saturday and spent a lovely few hours eating, laughing and chatting. It was great. Now back to the blog. Today I am using the lovely ascriptive stamp set called Go To Greetings. It has 5 different phrases in 3 different fonts and sizes, it's really very pretty.
I have made a very simple card using some scraps of printed paper. I cut 4 pieces for each card. (yes, I made 2 cards this time). They are both very simple cards but just each one was made in a different direction. These papers are from the Celebrate Everything Designer Series Papers.
Friday, 2 December 2022
Fun-Fold Friday - Christmas Lights
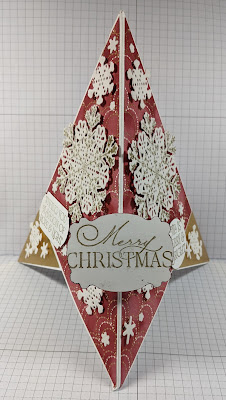
Hello again on another cold Friday here in England. I must firstly apologise for missing my postine yesterday. Unfotunately, family life and nasty baby colds got in the way! Today, I haven't missed and have made another of my favourite folds. It's the Tripod card fold. One that I started making well over 10 years ago but I keep going back to it. Using the Christmas Lights stamps, mainly the large snowflake, I stamped in gold ink onto the Snowy White 12" by 12" paper 3 times. I then started die-cutting with my MINI CUT AND EMBOSS MACHINE *****. LOTS! Fortunately, it doesn't take long at all and once they were all done, I started to adhere them to the card. I stamped several sentiments from the Brightest Glow stamp set, again in gold ink then punched them out using different punches.
In the New Year, you’ll have the opportunity to join Stampin’
Up! as a demonstrator for only £99. For that you will get to spend and chose £170
worth of products in any of the current catalogues! That’s one option. Another
option is £125 and you get £170 worth of product PLUS choose a MINI CUT AND EMBOSS
MACHINE in white or even in the NEW Pale Blue of BOHO BLUE. That all starts in
January along with Saleabration where for every £45 you order, you get to choose
NEW product from the special Saleabration Catalogue. Look out for more details
to follow soon. 2023 is going to be a very special year. 😀😀
..........
The card itself is very easy to do. It takes 3 squares of card all the same size. I used 3 pieces each 14.85cm by 14.85cm. It can be made in any size squares but they must all be the same size. Each one was scored diagonally once only. The first 2 squares, I placed the score lines placed together in an upside down V, with the 2 top score points meeting each other. I taped these 2 panels edge to edge and taped them together. Then using tear and tape adhesive along the top 2 sides nearest to the score lines, I added the third square over the front of the 2 other pieces. The scored, diagonal line on the third one was now vertical to the base cards and this will now enable the card to stand up once folded into the tripod.
TAKE CARE, STAY SAFE AND WELL but most of all,
KEEP ON CRAFTING
Thank you so much,
😍😍 xxx Gill xxx 😍😍
Tuesday, 31 May 2022
Technique Tuesday - Wisteria Wishes
Here we are on a Tuesday already, where does the time go? Well, today's card is another style that I like to make but this time using the Wisteria Wishes stamp set, I stamped the stalks and leaves a few times randomly over the white mat using the gorgeous green of Pear Pizazz ink pad and then went in with the pale purple of Highland Heather for the beautiful fronds of the flowers themselves. I added an extra layer of the flowers with the darker purple of Gorgeous Grape. Then, I chopped it all up into rectangles! It was that simple. Each of the rectangles were then adhered onto the Pear Pizazz card to show the definition between the layers. A few sentiments later and it's all complete. I hope you like it.
Tuesday, 17 May 2022
Technique Tuesday - Nature's Prints
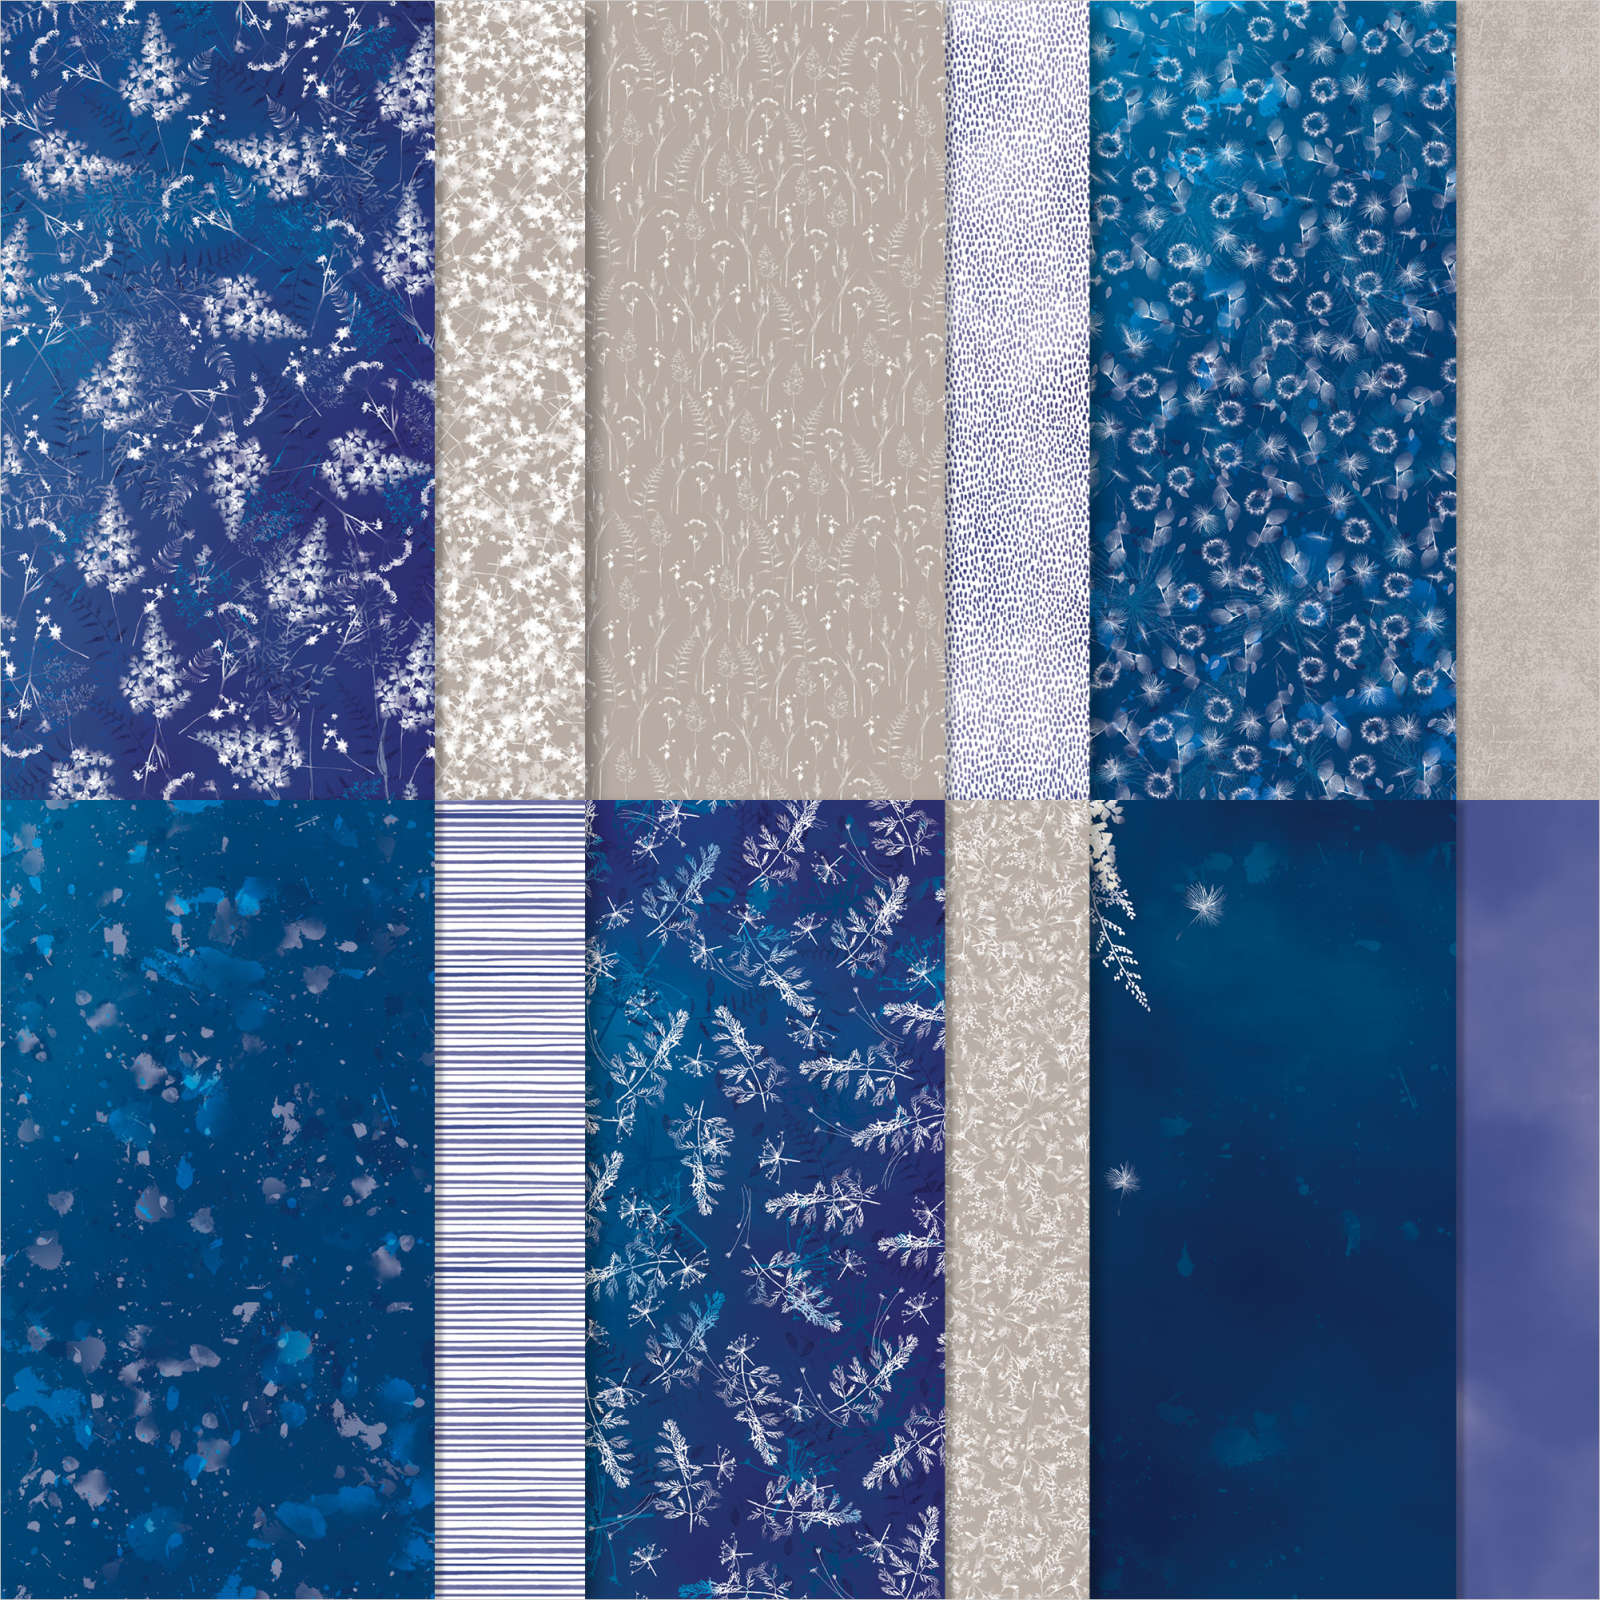
Today I have made my all time favourite in a technique and it is made all the much better because of the Designer Series Paper. I used the Nature's Prints stamp set along with the beautiful papers called Sun Prints. The papers are in many shades of blue and greys, they really are gorgeous. Anyway, I have made a standard C6 card in Basic White and added one of the pieces of DSP to the front. I stamped a few of the fern images, a flower and a sentiment which was die-cut from one of the coordinating dies for the set called Natural Prints. Adding a piece of Designer Series Paper is the quickest way to enhance a card that you can send to anyone.

Thursday, 24 March 2022
Throwback Thursday - Handsomely Suited
For today's card I have made a very simple but I think quite classy card. I have used Basic Black and Basic White card and a small piece of DSP from Handsomely Suited suite, including the papers for the bow tie. The 2 white mats were both embossed with different folders. The larger mat with Tasteful Textile and the smaller one with Bark embossing folders. Very simple but a style that I could make all day long.
Friday, 14 January 2022
Fun-Fold Friday - Encircled In Friendship
Hello again. For the last time this week I have made one of my favourite fun folds using the Encircled In Friendship stamp set. This is I believe called an Arrow fold. You can probably see why!
It uses a standard C6 card base but this one is in the shape of a tent. I started with a piece of A4 card cut in half at 10.5cm by 29.7cm long. It is then scored in half at 14.85cm. From there at the bottom front edge mark lightly in pencil at 5.25cm. Along both of the sides, mark at 5cm and 10cm from the bottom edge. Once the marks are made, score between the centre, bottom mark and both of the centre corners, the centre mark and the 10cm and 5cm marks too.
Once you have scored all 6 marks, rub out the pencil marks you first made. Then fold all of the folds into a mountain, valley fold and then a mountain once again. Repeat this on both sides. It's SALEABRATION time again and this time I used the Designer Series Papers called Simply Marbleous which are Free when you place an order for £45 or more in the current Stampin' Up! catalogues.I started with a piece of DSP (patterned paper) cut at 14.4cm by 10.5cm. I marked the bottom edge at 5cm and cut between that and the top outer corners. The 2 triangles are adhered to the bottom inside right and left hand side and the large triangle i cut 1cm off the bottom edge as I wanted it to go onto some white card too. This way it has a good sized border all around.
Wednesday, 29 December 2021
Wednesday - Not Watercolour - Elegantly Said
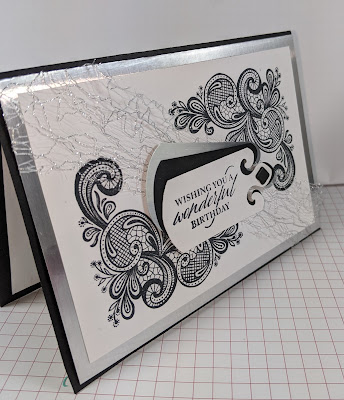
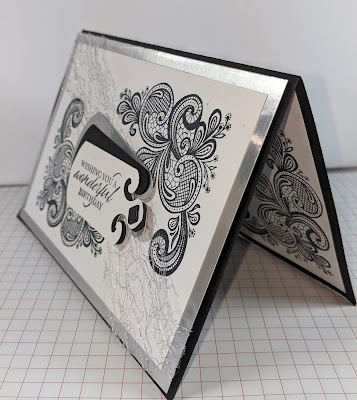
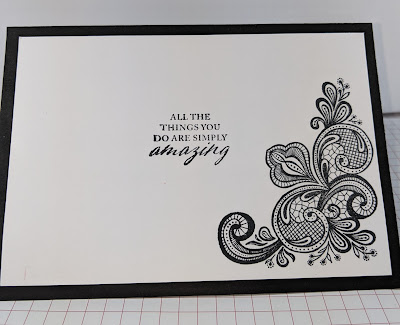
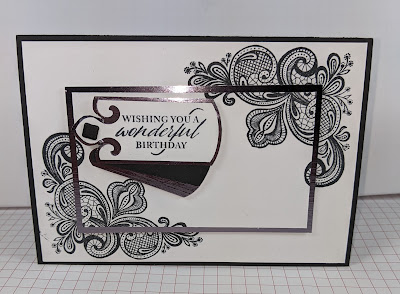
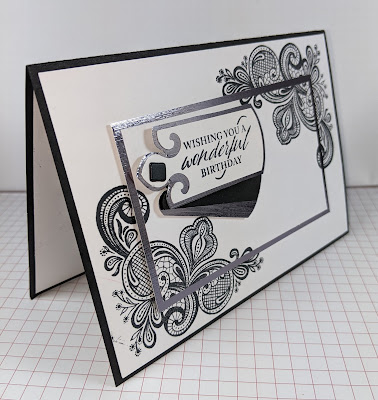
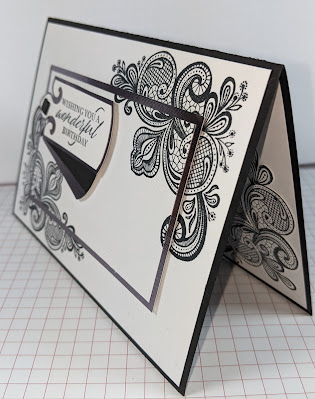
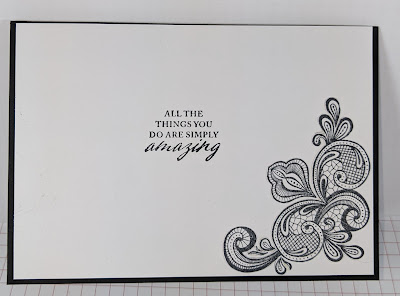
Hello and welcome back. I do hope that those of you who celebrate Christmas had a very peaceful time. Apologies for not posting before today, life has got in the way I'm afraid as it often does at this time of year. This week I have been playing with a stamp set that I fell in love with as soon as I saw it, Elegantly Said. I love the corner decoration and the font and..... well all of it really! As I now have to write several thank you and Birthday cards, I thought I had better get started now while I can. I started with a Birthday duo as I have 2 cards to send out for the beginning of January.
I have made only monochrome cards today. Very simple black and white cards. The first one I raised the whole of the front using foam shapes (dimensionals) and added the gorgeous Silver Metallic Mesh Ribbon. The second is where I cut out the centre and raised it onto a piece of the darker of the silver foils collection and the second I used the darker silver for. I have used the matching Elegant Tag punch. I love the fancy top of this punch which you can see on the message mats on the front. As I wanted the stamped images to be very crisp and sharp, I used the Stamparatus (Stampin' tool) so that I can re-ink the stamp and not have the images move. What an amazing tool that is!!


.jpg)
.jpg)
.jpg)
.jpg)
.jpg)
.jpg)
.jpg)
.jpg)
.jpg)
.jpg)
.jpg)