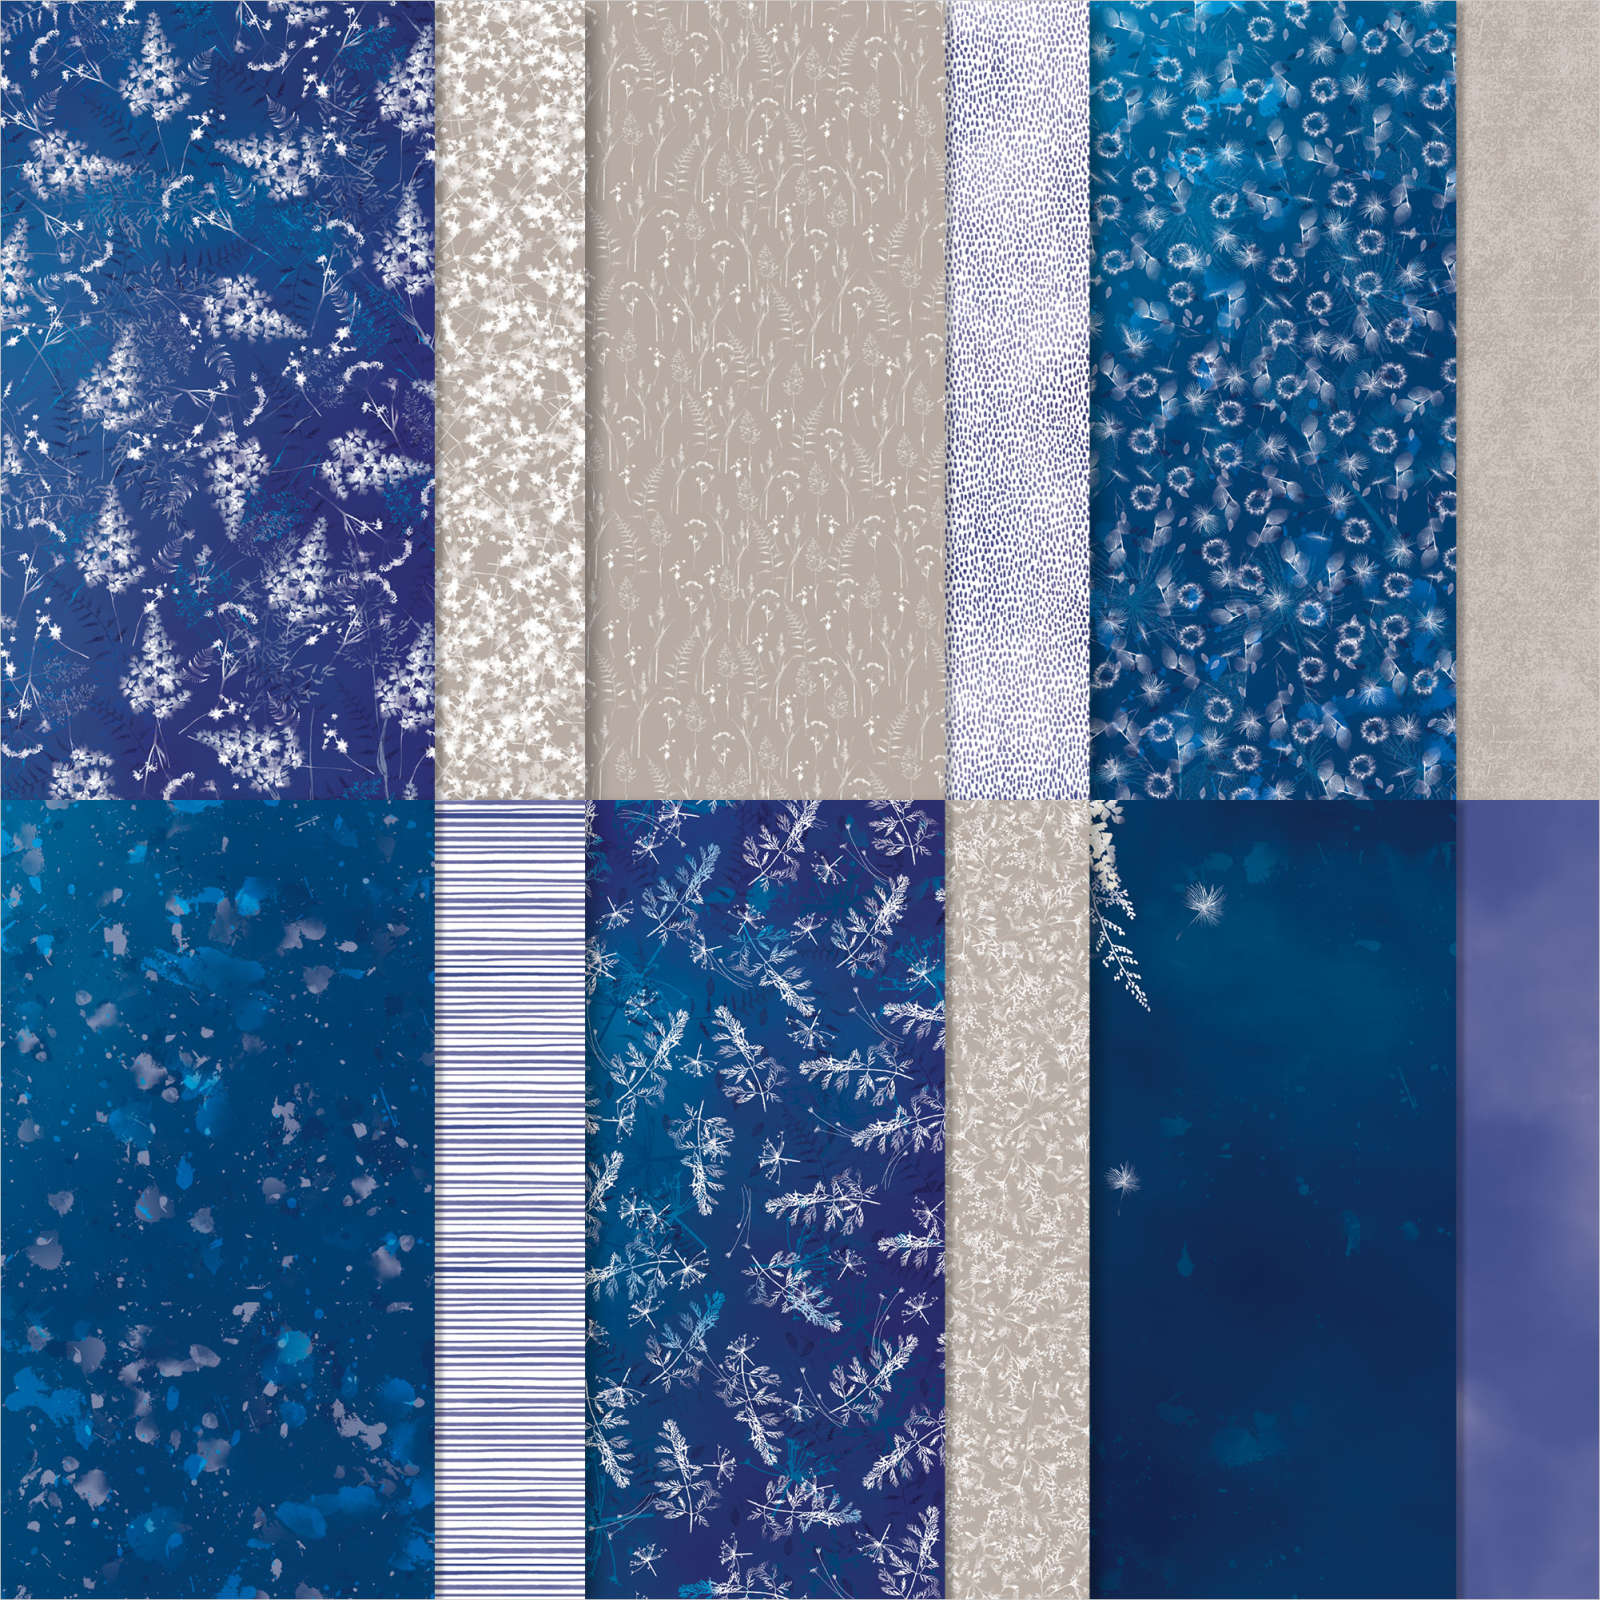
Hello, for today's card using the Jar of Flowers stamp set, I've gone back to my granddaughter's colouring pencils again. I used a piece of blue card in Starry Sky, and a piece of the paper from the Sun Prints DSP pack for the main background. The main colours of the DSP is a soft beige called Sahara Sand and several shades of blue. I added another strip of the striped pattern and then stamped the flower image from Jar of Flowers then coloured it in. I love playing with Bella's colouring pencils as she has so many different ones! I cut a piece of white card and embossed it using one of the Greenery set of 2 folders, which has sadly retired. There are a few more new ones out that will coordinate really well but I haven't yet been able to buy! After a few sentiments from the Celebrating You stamp set and then adding the flowers, this one is completed.
Tuesday, 14 June 2022
Friday, 3 June 2022
Fun Fold Friday - Wisteria Wishes
For the last card this week, I have made a very special one. This is for a very dear friends birthday next week. Using Wisteria Wishes stamp set I stamped the sentiment onto a white mat. The rest that I used was DSP, (Designer Series Paper) and the Wisteria Dies. I have made a gatefold which has another gatefold over the top edge.
I used Basic white thick A4 card and cut it lengthwise at 14.85cm by 29.7cm so a long rectangle. I scored at 4.95cm and 9.9cm from each side. I prefer to do that than measure along the whole length of the card. Holding the 2 centre panels together, I creased and burnished the folds well. From left to right of the card you should have a mountain fold, valley fold, valley fold and lastly another mountain fold.
The piece of card that is cut from the original piece of A4 you will need to score and fold with the same measurements. I chose to die cut my border with the Basic Borders dies. There is a cloud edging die which I love. From there, I started to cover the card in DSP. My choice was the beautiful pack of Sun Prints DSP.
I chose a dark blue on the bottom right of the picture below which just has some white images along the bottom and part of 1 edge. The 2 panels for the very front were 14.4cm by 4.75cm, I repeated the measurements for the inner 2 pieces and used the reverse of the same patterned paper. The centre panel was part of the remaining plain, dark blue from above the white pattern.
Once the DSP was added to the card base, I added the white border across the top and reversed the folds to be valley fold, mountain fold, mountain fold and valley fold. Once that was secured I added the Granny Apple Green leaves across it using Tombow Multipurpose Glue. I pieced the Wisteria pieces together using Dimensionals, foam shapes to give some more dimension.
I stamped Happy Birthday from the Go To Greetings stamp set in Versamark ink and poured white embossing powder across it before heat setting.
Friday, 20 May 2022
Fun Fold Friday - Nature's Prints
For my last card this week I have made a card like one that I made for our retreat back in March this year. Unfortunately, it went home with one of the attendees! I decided to make another this time using the Nature's Prints stamps and Sun Prints DSP. I believe it is called a floating panel card but I wouldn't swear to it. It's actually easier than it looks. I cut 2 pieces of card 10cm by 14.85cm and scored each in half at 5cm. A piece 19cm by 10.5cm which was scored at 1.5cm, 5.5cm from both sides. This is to be the floating mechanism. On top of that I added another piece of card which is 9cm by 12cm. I decorated each of the front facing mats and the rear facing mats too as I was originally going to add a message panel on the reverse and decorate the centre panel to the hilt but I changed my mind.
I have been desperately trying to find out where I found this design from but apologies to the designer I cannot find their name! If anyone knows please let me know or let them know that I am very grateful for the design.
That's all from me for another week so thank you for stopping by. Cary will be back on Monday with some more of her creations, so please join her too.
Thursday, 19 May 2022
Throwback Thursday - Nature's Prints
Today's card using the Natures Prints stamp set was inspired by one that I made a few years ago using Geared Up Garage. I love these papers so much that I had to do the starburst effect across a card. I cut a C6 mat in white card and all of the papers in the pack. That gave me a whole 12 designs to choose from! 😁 With each of the pieces of DSP I place the top left corner on 4cm on the trimmer and the bottom edge on the 0 to give myself triangles. Once they were all cut, I started to lay them out in the pattern I wanted. I started with the centre pieces, I had marked the centre with a pencil mark. Then I continues along both sides using all of the pieces. I'm pleased that on this one, I used all 12 pieces of paper which gave the lines much finer and you can see all of the gorgeous designs on them. A few more of the ferns were stamped and a sentiment was stamped and die-cut. Once the sentiment label was die cut, I placed it back into the machine and exerted enough pressure on it to cut just the edge off of each end. I added a strip of the white crinkled seam binding and on top a strip of the Starry Sky Metallic Woven Ribbon. A sentiment and decoration inside completed this one.
Tuesday, 17 May 2022
Technique Tuesday - Nature's Prints
Today I have made my all time favourite in a technique and it is made all the much better because of the Designer Series Paper. I used the Nature's Prints stamp set along with the beautiful papers called Sun Prints. The papers are in many shades of blue and greys, they really are gorgeous. Anyway, I have made a standard C6 card in Basic White and added one of the pieces of DSP to the front. I stamped a few of the fern images, a flower and a sentiment which was die-cut from one of the coordinating dies for the set called Natural Prints. Adding a piece of Designer Series Paper is the quickest way to enhance a card that you can send to anyone.

.jpg)
.jpg)
.jpg)
.jpg)
.jpg)
.jpg)
.jpg)
.jpg)
.jpg)
.jpg)
.jpg)
.jpg)
.jpg)
.jpg)
.jpg)
.jpg)
.jpg)
.jpg)