Tuesday, 18 January 2022

Tips tricks and techniques Tuesday Catch You Later

 Now the big questions in life are many I know but today I've got one to ask... Cats or Dogs? I have to admit that I'm definitely one team dog! But before I get drowned out by all you cat lovers out there I do appreciate a good cat stamp when I see one 😉 and the cat in the Catch You later stamp set is sooo cute 😍 

So for today's inspiration I  have created a card using some of the simple techniques that I used for yesterday's card. The technique is called masking but it can be done in a variety of ways. The first is to mask of an area and stamp into the space left. Another is to mask of the stamped image and stamp over or behind it. But the one I used for today's card is masking parts of a stamp.

I used sticky notes to mask the area's I didn't want stamped. Then inked up the stamp. Most importantly remember to remove the sticky note before you stamp !!! 
Catch you later stampin up fun clean and simple card


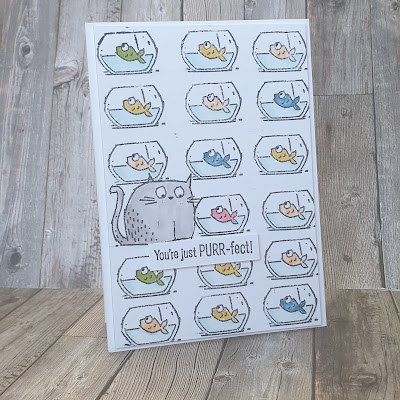
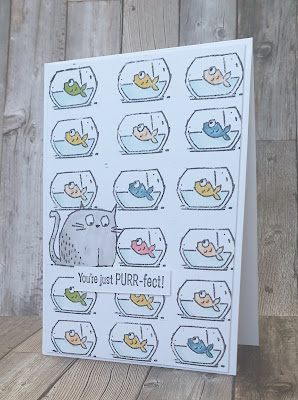
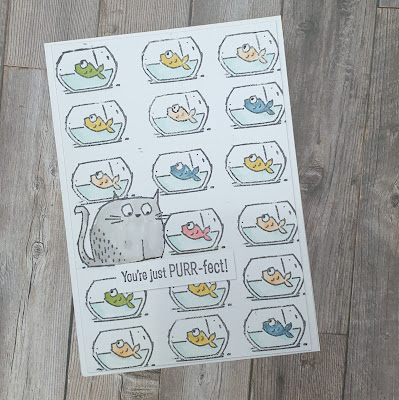
I used this technique to repeatedly stamp the fishbowl onto a white card mat in memento black ink. Before I stamped I did use a pencil and lightly draw evenly spaced lines both horizontally and vertically.  I did this to help keep my stamping evenly spaced as I find that I can have wonky lines if left to my own devices 😁

I stamped all the fishbowls before stamping the cat. Next I had great fun colouring the images. The simple sentiment was purrr-fect 😉🤣
Catch you later stampin up simple fun clean card


So for today I'm  an honorary cat person because I think this card is just purrr-fect! The sentiments in this fun set really do make for fun quirky cards for sure!
Catch you later stampin up fun quirky cat card


Monday, 17 January 2022

Make it simple Monday Catch You Later

 Happy Monday! I hope you all had a lovely weekend. I had a lovely time playing with a new stamp set and getting things ready for our upcoming Crafters Retreat. Our retreat isn't until March but we start early to make sure that all our attendees have a wonderful weekend.  So I decided to have a play with a stamp set that caught my eye as soon as I saw it in the January to June mini catalogue.  Called Catch You Later it's a great line art set perfect for colouring in.

Catch you later stampin up simple stamping easy card making

The images are just sooo cute 😍 and the sentiments just make me smile. I just had to play with it!

As it's Monday I knew I had to make it simple but I also wanted it to be a fun card. So I decided to use the fun cat and fish image.

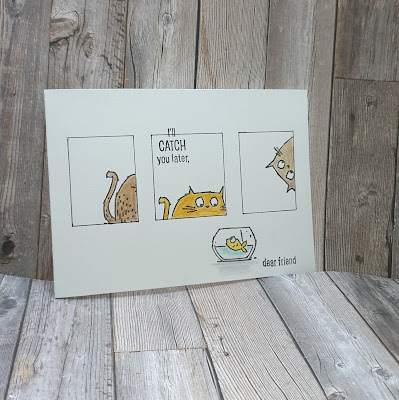
I created 3 "windows" for the cats to be in and placed the fish in his bowl on the outside. Creating the windows can be done in 2 ways. The first is with a ruler and a pencil marking your rectangles. Or the other way is to cut 3 sticky notes to the size of your windows, pop them in place and draw around them in pencil.

Next I masked off the center window with more sticky notes so that I could stamp the cat inside. I also masked of the fish bowl on the stamp before inking up the stamp. This helped to ensure that there were no bits in the wrong place.

After repeating the process for the other 2 windows I stamped the fish bowl in place. I then used a black marker to draw the window lines and erased all the pencil lines.

For the sentiment I used more of my trusty sticky notes to mask part of the sentiment before inking. I stamped the first part of the sentiment in the top left corner of the center windows.  Then after masking and inking the cleaned stamp I stamped the second part next to the fish bowl.

Catch you later stampin up simple stamping easy card making


I used watercolour pencils to colour my cats and fish bowl layering colours to create different shades. This is one of the qualities of watercolour pencils. I like that  their creamy consistency allows for mixing and blending to create cuatom colours. 

I love the almost cartoon feel that this card has. I think the sentiment will bring a smile to anyones face.

Catch you later stampin up simple stamping easy card making

If you'd like to see me demo how I made today's inspiration I shall be holding a Facebook live over on our page here later today at 4pm GMT. I'd love to have you join me and say hi 👋 

Here's the video ...


And here's  the link if the video doesn't work 🙃 

https://youtu.be/1EReLgIxnbI

Please pop by tomorrow when I'll  be sharing more of these fun characters  

Catch you later stampin up simple stamping easy card making


Friday, 14 January 2022

Fun-Fold Friday - Encircled In Friendship

Hello again. For the last time this week I have made one of my favourite fun folds using the Encircled In Friendship stamp set. This is I believe called an Arrow fold. You can probably see why! 

It uses a standard C6 card base but this one is in the shape of a tent. I started with a piece of A4 card cut in half at 10.5cm by 29.7cm long. It is then scored in half at 14.85cm. From there at the bottom front edge mark lightly in pencil at 5.25cm. Along both of the sides, mark at 5cm and 10cm from the bottom edge. Once the marks are made, score between the centre, bottom mark and both of the centre corners, the centre mark and the 10cm and 5cm marks too. 

Once you have scored all 6 marks, rub out the pencil marks you first made. Then fold all of the folds into a mountain, valley fold and then a mountain once again. Repeat this on both sides. It's SALEABRATION time again and this time I used the Designer Series Papers called Simply Marbleous which are Free when you place an order for £45 or more in the current Stampin' Up! catalogues.  

I started with a piece of DSP (patterned paper) cut at 14.4cm by 10.5cm. I marked the bottom edge at 5cm and cut between that and the top outer corners. The 2 triangles are adhered to the bottom inside right and left hand side and the large triangle i cut 1cm off the bottom edge as I wanted it to go onto some white card too. This way it has a good sized border all around.

I then repeated the same with a piece of white card. The big triangle then fitted snugly into the centre on the inside of the card. 
I decorated by die cutting some of the shapes from the Encircled in Beauty dies. I used some more of the DSP, white card and Blushing Bride which is the gorgeous pink used in the papers.

 On the inside, I used a piece of the Smoky Slate patterned paper and die cut one of the medium sized shapes and a white circle for the inner sentiments.
For a change, I used a few Rhinestones to decorate.

I hope that you have managed to get some inspiration for making your own cards this week. There's nothing nicer than sending and receiving a hand crafted card. 
 
Thank you for stopping by and please pop by next week as Cary will be here to show you some of her projects to hopefully inspire you again. 
 
Until I return, stay safe, keep well but most of all 
😂KEEP ON CRAFTING!! 😂
 
Thank you once again, Gill xxxxx


Thursday, 13 January 2022

Throwback Thursday - Encircled In Friendship

Today's card is one that I often like to make. Using the Encircled In Friendship stamp set and the matching dies, Encircled In Beauty I made the following card. I love this style of card as it's very straight forward and very easily replicated. The dies as you can see are some fancy delicately cut patterns on them.  The white mat on the front of the Rich Razzleberry card base was first embossed with the gorgeous embossing folder called Ornate Floral. I love the little delicate flowers spread across the folder and to me, it looked like the edges of the circles. 

I stamped the main image from the stamp set onto the top white die cut and coloured in using Highland Heather and Rich Razzleberry Blends Pens. Sadly, the Rich Razzleberry pens have been retired but I still have them as do many of you. 

One of the bonuses for buying a stamp set and the matching dies is that ther is a discount on buying them as a Bundle together. You save 10% each time you buy a Bundle. That's a bargain every time!


Wednesday, 12 January 2022

Watercolour Wednesday - Encircled In Friendship

 I really had fun getting messy with today's card. Now, those of you who know me, know that I HATE getting messy when I craft. So for me to get messy it probably isn't as bad as when Cary gets messy. She just LOVES it! Using Encircled In Friendship stamp set, I took a C6 mat and washed some very light blue of Balmy Blue over it. I picked up the colour from an acrylic block that I stamped onto the ink pad. I find it's so much easier watercolouring that way. Once it was dry, I stamped the flowers across the centre using a Stazon Ink Pad in Tuxedo Black and then added a piece of paper from the NEW Sunshine and Rainbows designer series paper, DSP. Stazon ink pad is a pigment based ink pad and it's not affected by water colouring. Using the same block, I added 2 drops of ink refil in the Balmy Blue  onto the block and started to add water from my brush to it. I coloured in the flowers and then the leaves in that gorgeous green of Granny Apple Green in exactly the same way.

Once they were all dry, I added 2 more drops to the colouring block and got the darker blue to do the highlighting on the flowers. I stamped the interior with the main flowers and repeated the same process as I did on the front. I had some tiny strips of DSP left over and added them to the inside as a highlight and completed this card.


Tuesday, 11 January 2022

Technique Tuesday - Encircled In Beauty

 Hello again. Today I have been stuck indoors as it's really cold and miserable outside so I cheered myself up and made this card. I love embossing folders too but I wanted a circle over two colours and here it is. Using the single flower from the Encircled In Beauty stamp set, I stamped around the edge of the circle I found in my scrap box. I die cut another slightly larger in the gorgeous dusky blue of Misty Moonlight and then again, even larger still in White. The embossing folder is called Thanks and Hello. I added the white panel to the back of the card front. Yes, I cut half of the front off first so the white is all on the inside. 

Once I had embossed the whole front of the card, I added the circle layers using foam pads, Dimensionals to add a little more texture. Inside a simple sentiment and another 2 of the small flowers to finish this one.

It really cheered me up too!


Monday, 10 January 2022

Make It Monday - #simplestamping - Encircled In Friendship

Well, what can I say... Didn't she do well? The rainbows that Cary was playing with last week were amazing! I've gone the opposite way this week as I think that many of us are still sending thinking of you and thank you cards, I know that I am. Using the beautiful stamp set Encircled In Friendship, I have made a very simple, very quick and easy card.

I stamped the image using Memento Ink Pad and then using my granddaughter's colouring pencils once again, I coloured it in very simply. Nothing fancy, no extreme colours just plain colouring in. Another simple flower, a sentiment...Because of You, and in the inside, Each Day Is a little Brighter with a single stem, it's completed. So in less than 5 minutes, I have a card ready to give to a dear friend when she pops in on Wednesday. Perfect!