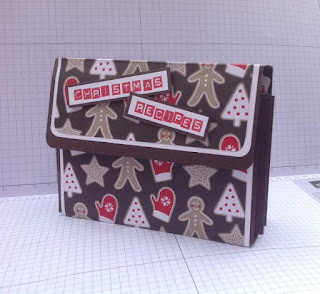
This is just a quick tutorial for the recipe box. It can be decorated to suit any occasion...
So here we go...
Take apiece of card 29 cm x 15 cm and score along the long side at 2 cm, 13 cm, 18cm and 27.5 cm. See below
Next take a piece of card 10 cm x 15cm score it at 5 cm on the short side . See below
I have used a corner rounder punch to round the corners on one sie of the card. Place adhesive on the opposite end.
Then carefully line the adhesive edge up to the 27.5 cm score line on the previous piece.
Next take a piece of card measuring 12cm x 9.5 cm. Score at 1.5 cm, 3 cm, 4.5 cm, 6 3, 7.5 cm, 9 cm and 10.5 cm on the long side as below
You will need 2 pieces like this . They form the sides of the box. Once scored accordion fold them.make sure to use a bone folder to reinforce the folds.
Apply adhesive to each long edge as below
 then attatch to the side of the long piece of card at the 1cm line upward. It's hard to explain so here's a photo to help you! Lol
Repeat on the other side and fold th 1cm to 27.5 cm side over to create the box. The lid folds over to close the box. I used wafer thin magnets to create a closure for my box. I then decorated to fit the occasion.
The dividers in side are made from 1cm x. 5 cm pieces of card that I attached labels to to create name tabs.
Well I hope that this all makes sense if you need any advice just leave a comment and I'll get back to you
Have fun
Cary ☺ x


Hi Ladies,
ReplyDeleteI adore your oh so cute little Christmas Day recipe box-file - tfs it.
However, and I hate to be the one to tell you that there are 2 measurement errors -
The first one relates to the sides of the box - you've put 6 3 - it should be 6cms.
The second one relates to the dividers - you've put 1cm x. 5cm - it should be 15 cms. I found that 3.5cms / 4cms makes the dividers more robust.
I like the way you used the label punch for the name tabs, love my label punch and stamps.
I'll post my version onto your Facebook page when I've finished making it.
Thank you for your help I have to say my usual proof reader was not available this weekend! I hope that it hasn't spoiled your enjoyment of the blog post and that you managed to understand it! Lol please do share your finished project with us Have fun Cary ☺ x
ReplyDeleteThank you for your help I have to say my usual proof reader was not available this weekend! I hope that it hasn't spoiled your enjoyment of the blog post and that you managed to understand it! Lol please do share your finished project with us Have fun Cary ☺ x
ReplyDelete