Wednesday 28 December 2022

Watercolour Wednesday - Decorative Borders

 Hello again, Today's card is another green one I'm afraid! Sorry if you don't like green but just imagine what it would look like in lots of other colours! I took a white mat and covered most of it with Low Tack tape except the 2 rectangles. I took Pool Party ink from the ink pad and stamped it onto the block. Adding a little water and mixed up all of the ink and washed it across the rectangle on the mat. I repeated the same process using Coastal Cabana ink and washed the ink over the top rectangle. It had to be left for quite a while to dry as it was very wet with all of the ink and water on. Once it was dry, using the Decorative Borders stamp set.

 I stamped 1 single flower on the left hand side only using the stronger green of Shaded Spruce. I decided that I would emboss the whole mat using the Twigs and Sprigs embossing folder before stamping a sentiment onto a punched piece. The mat was then mounted onto a piece of Shaded Spruce card stock and mounted onto the card base using Dimensionals. Another sentiment and one image which was stamped 3 times to use up all of the ink. 


Tuesday 27 December 2022

Technique Tuesday - Decorative Borders

 Today's card is similar to yesterday's in as much that I created a background onto a mat using a few of the stamps from the Decorative Borders stamp set. Today's was about making a very simple card using a very simple technique of masking the centre of the card then stamping around the sides. I took a piece of White Crinkled Seam-Binding and using a Stampin' Write Marker pen, I drew all along the length covering it with the same bright green ink of Granny Apple Green. That's another fantastic thing that can be done with the Stampin' Up! ribbons, they can be coloured with the marker pens or Blends pens too. If you don't have the right coloured ribbon for your project, take some of the white and colour it! Adding the sentiments on the inside mat and the front then both mats were stepped onto the ink pad to show the borders. 


Monday 26 December 2022

Make It Simple Monday - Decorative Borders

Hello and thank you for joining me. I hope that you are all having a wonderful Christmas holiday and I wish you well for the New Year.  This week I will be using the new stamp set called Decorative Borders. It is one of the new stamp sets that you'll be able to see coming from the Seasonal Catalogue for Spring 2023. I have coordinated today's cards with the Charming Sentiments from the annual catalogue. This simple card for today I have only used the 1 stamp for the images. I stamped the image across the mat in both directions to form a border in the centre. This gives a really effective space for the sentiment. Simplestamping is... 1 ink pad, 1 card base and stamp set/s. Most stamp sets have sentiments with but I chose one without any this time.


Friday 23 December 2022

Fun fold Friday Beautifully Happy

 Hello and welcome 😀 Today is my final post for this week using the gorgeous Beautifully Happy stamp set . This set is one that is available Free yes Free! From January 5th 2023 with a qualifying order from Stampin' Up! Now if you're in the UK,  Republic of Ireland,  Austria,  Germany,  France , the Netherlands or Belgium and don't already have a demonstrator we'd love to help  with all your Stampin' Up! Needs. 

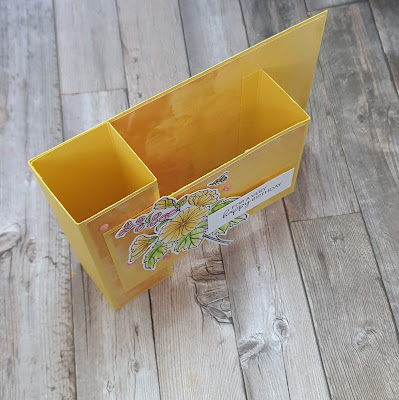
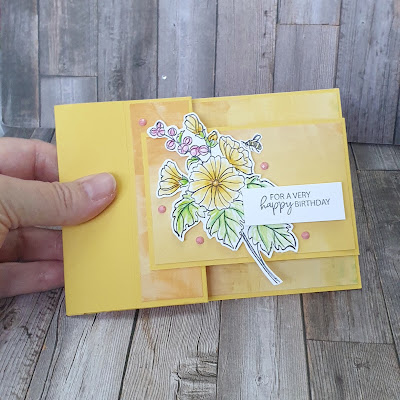
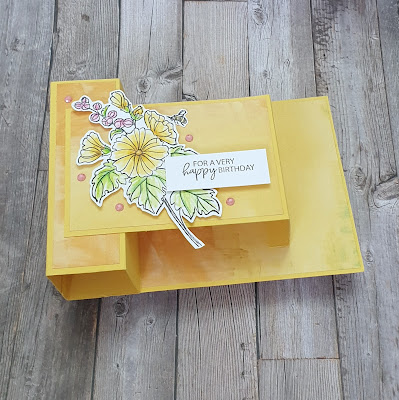
I've had lots of fun creating inspiration for this week using the Beautifully Happy stamps. I am as always finishing the week with a fun fold. Called a double box fold it is much easier than it looks.

Beautifully happy stampin up double box fun fold birthday card

It starts with a piece of cardstock measuring 10.5cm x 29.7cm.  You score it at 14.85cm,  18.35cm,  21.85cm, 25.35cm and 28.85cm. All the folds are mountain ones and create the first box. 

Now take another piece of cardstock measuring 7cm x 15cm. Score it at 10.5cm and 14cm. Both these folds are mountain ones.

Decorate the main card base before adhering the second panel. Make sure that you line everything up so that when flatten it remains withing the card base. 

Beautifully happy stampin up double box fun fold birthday card

Beautifully happy stampin up double box fun fold birthday card

I decorated the back with too so that you've got somewhere to write your message.

Beautifully happy stampin up double box fun fold birthday card

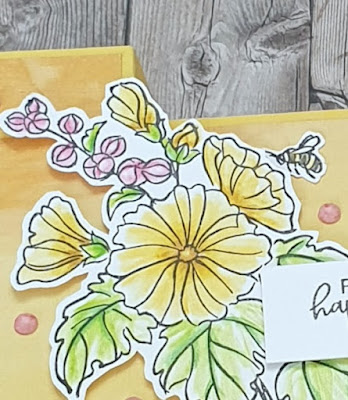
I used my trusty Watercolour pencils to add colour to the stamped images. I also employed Gill's favourite technique of fussy cutting for the images, even the little bees 🐝!!

Beautifully happy stampin up double box fun fold birthday card

Beautifully happy stampin up double box fun fold birthday card

Well that's  all from me for not only this week but this year!! Gill will be sharing her creations with us next week . Please join me here to see her posts.

Have a wonderful weekend and Merry Christmas .

Have fun 

Cary xx

Beautifully happy stampin up double box fun fold birthday card


Thursday 22 December 2022

This or That Thursday Beautifully Happy

 Square or rectangle?  That is the queation for today's inspiration! Using the Beautifully Happy stamps I created 2 focal points. One on a square of card the other on a rectangle. Then  I couldn't decide which to use ! Sooo I made 2 cards!!

Both cards use the same stamps and ink colours. A lovely shade of orange called mango melody, a deep blue called night of navy and a gentle green called pear pizzazz. In keeping with the stamped focal panels I used orange and navy cardstock along with basic white for the card bases and mats.

The design of both cards is clean and simple and really showcase the stamps well. 

Here is the first card. 

Beautifully happy stampin up clean and simple get well card

I like the layout of the rectangular card very much. With it's  clean and defined layers it allows the images to shine.
Here is my square version.


Beautifully happy stampin up clean and simple get well card

The square version has a really fresh look to it with the orange and white with dashes of navy colour palette. 
Both cards feature a ribbon bow but I'll tell you a little secret. Both bows started life as a pale peach ribbon!! I used my alcohol markers to alter the colour to fit my projects 😅  Don't you just love it when you can make your stash work for you?
So which do you prefer the square of the rectangle? 


Wednesday 21 December 2022

Watercolour Wednesday Beautifully Happy

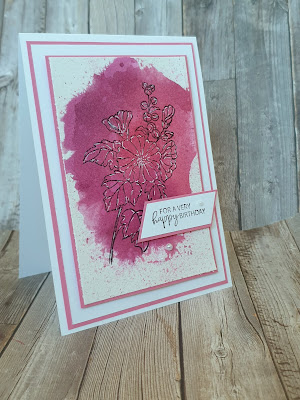
 Today I'm sharing a project that I created that involves a "messy" background.  Now if you've been here before you'll know that I like to get messy when crafting 🤣 After all as the saying goes... Creativity is messy and I'm  very creative!! So I made this messy background to show case the outline stamp from the Beautifully Happy stamp set. 

How did I get messy ? Well I started out with fluid 100 watercolour paper, a water spritzer filled with water, an acrylic block and 4 different coloured reinkers. Oh and don't forget some kitchen roll! It helps keep the mess under some level of controll 😉

I start by choosing my colours. I love shades of punk and damson so went with those. I popped a drop of each reinker onto the acrylic block and added a drop or 2 of water onto each. 

I then spritzed the watercolour paper and using a waterpainer I added the wet ink to the wet paper. I use my kitchen roll to dab the areas that became waterlogged and to prevent the stronger colour taking over completely. I contimued to add and dry till I was happy. 

I then flicked water and spritzed water over the piece dabbing it straight away.  This gave the piece some speckles which I find appealing. 

Now you have to wait untill the piece if completely dry. I would also recomend using a Stamparatus or other stamp positioning tool to stamp your image. This allows you to stamp more than once onto the textured paper. This means you get a clearer image. 

I then took a white gel pen and added highlights to the image. I was a little nervous about this nut I'm so glad I went for it. The finished result is lovely 😍 

Beautifully Happy stampin up watercolour background white highlights birthday card
 
What do you think? Do the white highlights give the finished card a little something extra?

Beautifully Happy stampin up watercolour background white highlights birthday card

Now I'm  not saying it's perfect but I do think a  white gel pen makes a good addition to my tool kit!

Beautifully Happy stampin up watercolour background white highlights birthday card


Tuesday 20 December 2022

Tips tricks and techniques Tuesday Beautifully Happy

 Today I'm  sharing a really important tip about how to get the most from your stamps. I'm lucky because as a demonstrator I get to see and buy products before they become available for customers!! So for today's inspiration I've used the gorgeous Beautifully Happy stamp set.

Now on to my top tip. Look at your stamps and see what else you can see. Now when you look at the Beautifully Happy stamps what do you see?

Beautifully happy stampin up make the most of your stamps card

Now what I saw was that the leaf infill stamp looks a lot like vine leaves..... and what do vines make? Grapes 🍇 so what about the infill stamp for the buds? Well it was worth a try. 

Beautifully happy stampin up make the most of your stamps card

Well what do you think? Do they look like vines with luscious purple grapes ?
I use the crisp green called granny apple green for the leaves. And the rich and bold purple called gorgeous grape of course!!!
I added a few vine leaves and grapes to a basic white mat for the inside too.

Beautifully happy stampin up make the most of your stamps card

I created a 2 layer tag for the front using dies from an upcoming set  that are called Something Fancy. I  also used embossing folders to give texture to the layers.
The sentiment is from a set called Something Fancy  sound familiar?  That's because they coordinate with the lables.
I aslo thought the sentiment could be a little bit punny 😉 Grateful for the everyday magic of you... might relate to what the grapes make 😉


Monday 19 December 2022

Make it simple Monday Beautiful Happy

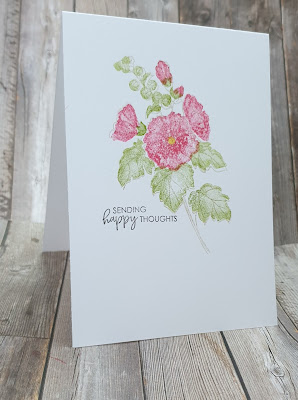
 Ready for Christmas?  What no!!! Me either 🤣🤣🤣 but I have had time to play with a new stamp set 😉 So for today's #makeitsimplemonday I've gone for a simple and elegant SIP card using a stamp set from the upcoming Sale-A-Bration offering called Beautiful Happy.

Beautifully happy stampin up Sale-A-Bration  2023 simple easy stamping card


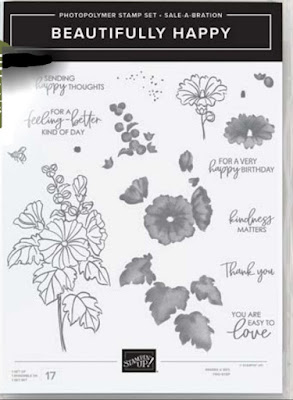
The stamps a a gorgeous floral set with both outline and infill stamps as well as lovely sentiments. So with the stamps chosen on to the rest of the parts of the acronym. 

SIP stands for Stamps, Ink and Paper.  So with the stamps chosen I started with a simple basic white cardbase. I then decided what colour inks to use. 

I knew I wanted to make a card that was not only simple but also elegant.  To achieve this I wanted to keep the colours gentle in tone. So I started by stamping the large outline image using a light beige called sahara sand.

I made the colour even lighter by stamping it first onto a piece of scrap paper before stamping it onto the front of my cardbase. This created a very soft image.

One of the great things about photopolymer stamps is that it's  so easy to line them up when you want them to. I inked up the flower infill stamp with a bold pink colour called polished stone. I also stamped this onto scrap paper first. Then stamped it onto the flower portion of the image.

I continued with the leaf infill in green. The colour is called granny apple green and is rather bright so I used the stamping off first technique again.

Beautifully happy stampin up Sale-A-Bration  2023 simple easy stamping card

I love the fonts used as well as the words in the sentiments that are part of this stamp set.


Beautifully happy stampin up Sale-A-Bration  2023 simple easy stamping card

I love the way this card turned out. The very light outline image almost disappears. It gives a very elegant effect.


Beautifully happy stampin up Sale-A-Bration  2023 simple easy stamping card

So join me every day this week when I'll be sharing more inspiration using this lovely stamp set.


Friday 16 December 2022

Fun Fold Friday - Adorable Owls

 For my last card this week using the Adorable Owls stamp set, obviously I have made another of my go to favourite folds. This is made with 1 half piece of A4 card. I folded the card base (14.85cm by 21cm) in half at 10.5cm. I lightly pencilled the centre point on the bottom edge of the card at 14.4cm. The at each side on the front edge, I marked every 3.5cm. I then scored from the centre mark on the bottom edge to the edges on the centre fold creating the first V. I then repeated the actions from the edges at every 3.5cm to the bottom and finished them all. The scored marks were all folded back and forth on each side creating the V shape you see. I placed some tear n tape to the back of some of the folds to keep them crisp.

I used some of the papers from Tea Boutique  6" by 6" papers to match with the lovely Fresh Freesia card base. I stamped the 3 owls and coloured them in using the Stampin' Blends pens and die cut the 'circle' from the Painted Labels set of dies. 


I finished off by adding sentiments once again from the Go To Greetings stamp set 

 
Thank you for popping by this week, Cary will as always be back on Monday to share her creations. 
I will be back the week after as always too so until then please
 
TAKE CARE, KEEP WELL, STAY SAFE 
 
and as always, 
 

KEEP ON CRAFTING! 

😍😍 xx Gill xx 😍😍

Thursday 15 December 2022

This and That Thursday - Adorable Owls

Today's cards I went overboard for. I really love the owls and know a few people who will certainly love them. I paired the Adorable Owls with some of the In Colour glimmer paper. I chose the gorgeous green of Parakeet Party and the beautiful blue of Starry Sky to make my cards. I coordinated them both with some of the dies from Pretty Pop-Ups set. I love the way they just pop from the sheet and you get so much dimension from them all. 

The only difference from both cards is the colour. Please let me know which you prefer. 


Wednesday 14 December 2022

Watercoloour Wednesday - At The Pond

Hello again and thank you for stopping by. Today's watercolour I have cheated a little. We have a new range of Designer Series Papers called Fancy Flora and the sheet I chose reminds me so much of the Monet's bridge. So I have paired it with the At The Pond stamps. The cute little frogs are really gorgeous and I think the paper is perfect for the frogs too.

I did water colour some white paper by soaking it in water and then some watered down ink washed all over. Once it was dry, I stamped the images using the Saddle Brown Stazon Ink Pad. I think the brown looks more realistic against the black ink. I fussy cut all of the images out, yes, I know that I'm crazy but I find it very therapeutic and relaxing.