Friday 29 September 2023

Fun fold Friday Merriest Trees

 For my final project of the week I thought I'd share 2 fun super quick non card ideas. Of course they're made with the uber useful and fun Merriest Trees bundle. As well as continuing the ideas using not so traditional colour palettes. Although this one is a little more usual....

I've gone for a black and gold colour palette. It is one of my all time favourites for it's elegance and ease of use. In fact my own Christmas tree at home is black!

So here you have my super quick and simple gift tag...

Merriest Trees stampin up elegant black and gold gift tag table gift box

I've die cut the 2 largest trees in basic black cardstock.  I then heat embossed in gold on to the smaller one before using 3d foam to adhere it to the largest tree.
I also used the 2nd largest tree die and cut one from vanilla cardstock and adhered it to the back of the tag.

Merriest Trees stampin up elegant black and gold gift tag table gift box

All the gold glittery parts are also die cut using dies in the bundle but the best bit is the glittery paper is self adhesive 😁. Called Gold and Silver adhesive backed glimmer paper it's perfect for those small or fiddely die cuts 😀.
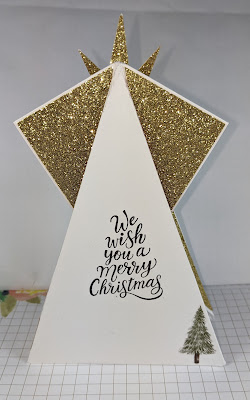
Next is my small but perfectly proportioned table gist box. It's made with 2 die cut , larfest sized, trees and a small tray adhered between them.
The tray is a piece of basic black cardstock measuring 9cm x 7cm scored at 2cm on all sides. 


Merriest Trees stampin up elegant black and gold gift tag table gift box

I used the star layers dies to hold the tops together and then decorated the front with the string of beads and bauble dies. All cut from the fab self adhesive gold glimmer paper.


Merriest Trees stampin up elegant black and gold gift tag table gift box

The gift box tray is the perfect size for an after dinner treat.
Well that's all from me for this week I do hope you'll join me here next week when Gill will be sharing her creations with us all.
Have a crafty weekend if you can but whatever you're upto I do hope you'll 
Have Fun 
Cary xxx

Merriest Trees stampin up elegant black and gold gift tag table gift box


Thursday 28 September 2023

This or That Thursday Merriest Trees

 I think you might have notice a theme running this week 😉 My choices of colour palettes have not been your usual green and red that's for sure. And today's cards are no different 🤣. The cards are of course made using the fabulous Merriest Trees bundle of stamps and dies .

I wanted to use 2 colour combo's that I've recently discovered for those unusual Christmas cards.. one's for men!

So here we go with This version. The colours are 2 shades of teal and navy blue.

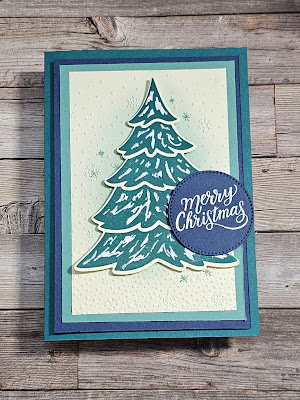
Merriest Trees stampin up masculine Christmas card

Merriest Trees stampin up masculine Christmas card


The That version is made with 2 shades of brown and red.

Merriest Trees stampin up masculine Christmas card

Merriest Trees stampin up masculine Christmas card


So which do you prefer This or That?

Merriest Trees stampin up masculine Christmas card


Wednesday 27 September 2023

Watercolour Wednesday Merriest Trees

 Well so far this week I've  shared cards that have quite soft, if nontraditional,  colour palettes. But for today's card I wanted to switch it all up and use the tequnique I shared in a video last week. I am of course using the fun Merriest Trees stamps and dies.

So let's start with the splash technique video


So once I'd made a mess and created a background for my card I set it to dry. For this card I used watercolour paper as I wanted the texture that fluid 100 paper gives.

I then took another piece of watercolour paper and die cutbout all 5 layers of the tree. The dies that coordinate with the Merriest Trees stamp set are just fab 👌 

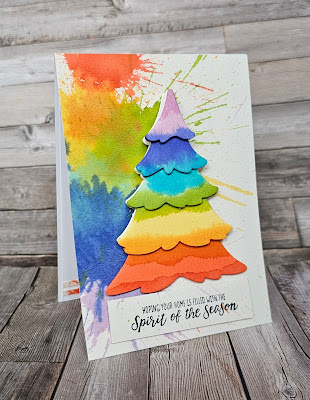
Merriest Trees stampin up rainbow watercolour splash Christmas card

So once I'd  die cut out the layers I used the left over ink to colour the different layers.

Now my colour palette was inspired by my wonderful grandson.  He is 5 and 3/4 and has always loved rainbows 🌈 sooooo I present to you my rainbow Christmas tree card..

Merriest Trees stampin up rainbow watercolour splash Christmas card

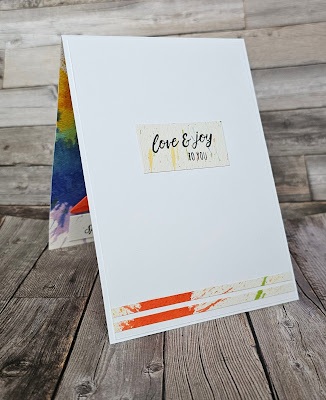
I had to use some of the left over pieces of the background to add a little interest to the inside of my card.

Merriest Trees stampin up rainbow watercolour splash Christmas card

So what do you think? I know it's a bit of a a marmite concept... you'll either love it or hate it! ( for those who don't know Marmite is an umami yeast extract spread that is very popular here in the UK... and I love it 😋)

Merriest Trees stampin up rainbow watercolour splash Christmas card


Tuesday 26 September 2023

Tips tricks and techniques Tuesday Merriest Trees

 Do you have a large stash of pattern papers? But no Christmas ones? Then just use non Christmas paper for Christmas!  That's what I've done for today's card. I have used paper from a fab stack called Delightfully Eclectic . And the fun Merriest Trees stamps and dies.

The card  uses a fun subtle colour palette following on from yesterday's colour combos. 

Merriest trees stampin up fun subtle Christmas card

The inside of today's card features a version of yesterday's card because no  surface should remain unstamped!


Merriest trees stampin up fun subtle Christmas card

Just a quick post today as it's busy busy here. 

Monday 25 September 2023

Make it simple Monday Merriest Trees

 Happy Monday everyone.  Well our Christmas crafting started on Saturday with one of  our  Christmas all day crafting events. It was a fantastic day full of crafting and laughing with some of our favourite people... crafters!! 🤣 So with Christmas crafting started I'm going all out this week using a fun bundle called Merriest Trees.  

As it's #makeitsimplemonday I have only used the great stamps only.  The cards I'm sharing are what we call SIP cards. They are made using simply Stamps, Ink and Paper. Which with these stamps isn't hard!

Merriest trees stampin up Christmas easy simple stamping

My cards feature rather unusual colours for trees but you know me I rather like colour 🤣

My first card here is stamped using 3 shades of sea green/turquoise. 

 
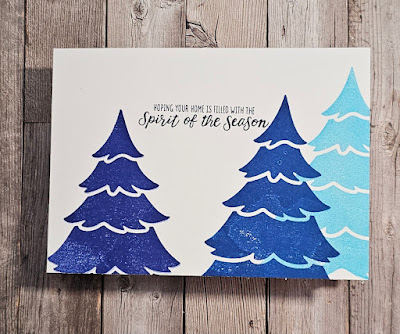
The next card uses three shades of bright and bold blues.

Merriest trees stampin up Christmas easy simple stamping

 And finally a purple version!

Merriest trees stampin up Christmas easy simple stamping

As you can see these are very simple cards that prove that simple doesn't have to mean boring 😀
Please pop back tomorrow for more inspiration using this great set.

Merriest trees stampin up Christmas easy simple stamping


Friday 22 September 2023

Fun Fold Friday - Designer Series Paper - Traditions of St Nick DSp - Merriest Trees

 Well, it's Friday once again and today's card is another of my favourites. I haven't made it for about a year so I have really enjoyed making it again. I started with a 10.5cm wide piece of card by 29.7cm long and scored it at 14.85cm. I marked the centre point on the centre fold and pencilled a small mark 7.5cm down on all 4 sides from the centre fold. Starting at the centre pencil mark, I scored down to all 4 of the 7.5cm marks and then again to the 4 corners of the card. The DSP I used today is the Traditions of St. Nick DSP and Silver and Gold Adhesive Glimmer Paper. The stamp set is Merriest Trees

The piece of card in Imperial measurements is actually half a sheet of A4 card lengthwise. In the UK, that would be 8,1/4" by 11,3/4" that would mean that the piece of card will be 4,1/8" by 11,3/4" and scored at 5,7/8". The pencil marks on the sides will therefore be at 3".You will need another piece of card measuring 6cm by 10.5cm. score 1cm on both of the long sides and another along the centre of the length. Fold this on both of the 1cm measurements in a valley fold and the centre one, fold as a mountain fold. These 1cm folds attach to the inside of the card base on each side providing you with the stand. To prevent it showing along the outside, trim the centre of the stand into a V shape.

TRADITIONS OF ST. NICK 12" X 12" (30.5 X 30.5 CM) DESIGNER SERIES PAPER


The folds are as written on the diagram, the 7.5cm score lines are all valley folds and the ones to the corners are all mountain folds. When you go to fold the edges in, start by folding the 7.5cm ones first. Push those in but not the top, centre edge. Burnish all of the folds really well.


Above, the cutting and scoring chart and Below is the sample card where you can see how the folds go into the centre. I added the DSP to the front and Gold glimmer paper to the inside folds. I also made a star from a scrap too. I fussy cut a Santa from the Traditions of St Nick DSP


That's it from me for the week. Cary and I are holding our 1st Christmas class of the Season tomorrow so it's an early start in the morning. 

Thank you so much for joining me this week and I hope that you have been inspire in some way to make your own projects. 

Until I get back, as always, STAY WELL, KEEP SAFE but as always....

KEEP ON CRAFTING. 

😍😍 xxx Gill xxx 😍😍
 

Thursday 21 September 2023

This or That Thursday - Designer Series Paper - Go To Greetings and So Sincere

 Today you get 2 for the price of one with the This and That projects. My first card is THIS, Thinking of You. I have used a piece of Night of Navy card base and some of Stargazing DSP on this one. I added some fussy cut planets from the papers too as without them the card would have been possibly usable as a different type of sentiment. A sad one! I used one of  my favourite greetings stamp sets on this, Go To Greetings. I love this set because there is only 5 phrases or sentiments but they are in lots of different sizes too. The best of both worlds in my opinion.


THAT

My THAT card is another card that used the Stargazing Designer Series Papers for only the difference is the stamp set that I used. So Sincere has some really great phrases or sentiments as you have possibly seen the earlier part of this week. This one is a standard upright C6 card but I have used 4 different pieces of DSP. I'm not one for using strips of paper but it was shouting for it to be done. From the gorgeous shades of pink paper with planets to the bright colours and the dark sky in the centre. I used another of the planets for this card which I think sets it off really well. 


Wednesday 20 September 2023

Watercolour Wednesday - Designer Series Paper - Happy Labels

 Today's card is a bit of a cheat to be honest! I took a White card mat, stamped an acrylic block onto Pretty Peacock ink pad and added some water to it. Once mixed up, I sprawled the watercoloured ink over the centre of the mat. I didn't delicately brush it on, I just swirled it over the mat and left it to dry. Once dry, I dry embossed it using the striped mat from the Stripes and Splatters set of 2 folders. I then used a silver marker pen that I had and ran it along the stripes of the embossed mat. It gives it a little sparkle.

I added the mat to a Pretty Peacock card base along with some scraps of DSP from the Delightfully Eclectic, large pack of papers. A few of the scrap flowers from another set of dies and the sentiments from Happy Labels stamp set completes this one. I love the special sentiment on the inside of this one...I just want to hug you... isn't that just gorgeous?


Tuesday 19 September 2023

Technique Tuesday - Designer Series Paper - So Sincere

 Hello again. Today's card is a follow on from yesterday's card. Like most crafters, we don't particularly like wasting papers so once again using the Countryside Inn papers, I cut these 3 frames down to blend together. I used the So Sincere stamp set again for the sentiments. I have many great sentiment stamp sets and this is one of them. It's one thing to make a card for someone but it's even better with the appropriate sentiment. 

I started with a Blueberry Bushell card base and adhered the frames to the base of the card. I used a small white mat for the sentiment and using the Stampin' Write Marker pen in Blueberry Bushell to add the dots all around it. The technique today is using the strips and shapes of DSP wherever you can as they really are so very useful.


Monday 18 September 2023

Make It Simple Monday - #simplestamping - Designer Series Paper - So Sincere

 Hello and thank you for stopping by. This week, I couldn't decide which stamp set to use so instead I am going to show you some project using Designer Series Papers and a Sentiment stamp set. Today's card was made using the So Sincere stamp set and papers from the Countryside Inn suite. The papers are really gorgeous and they are mostly shades of blues and as I rather like blue they are right up my street so to speak! Another thing that I like to use is all of the little bits of papers too. In this pack on a previous occasion, I had cut a small rectangle from a piece which left a frame. I have used some of the frames for today's card. Just by using a simple frame, or two, I had some fun and made this very easy card.