Wednesday 31 August 2022

Watercolour Wednesday Amazing Year

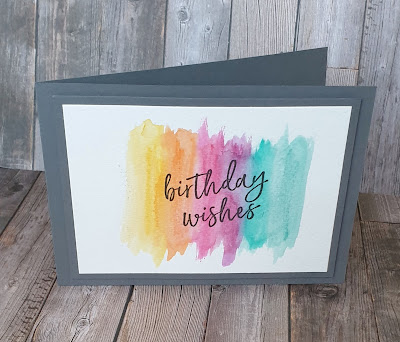
 Wow it's  Wednesday already! So happy hump day and welcome to a super simple multiple colour watercolour wash. Today's inspiration isn't just about the watercolour but also showcasing how you don't always need to use an image! This is especially true when they are as great as the ones in the Amazing Year set. 

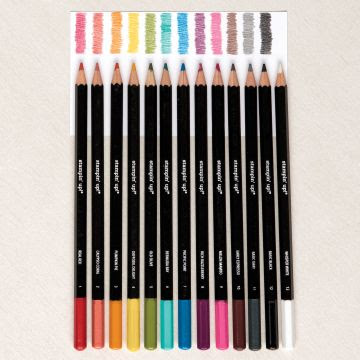
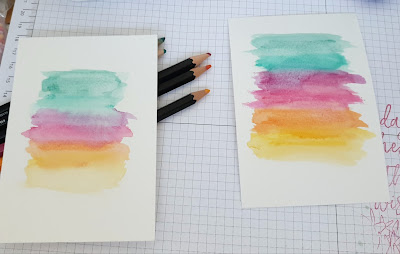
For my watercolour wash today I started with some Fluid 100 watercolour paper , Watercolour pencils and a waterbrush.  

Amazing year stampin up watercolour pencil wash birthday card


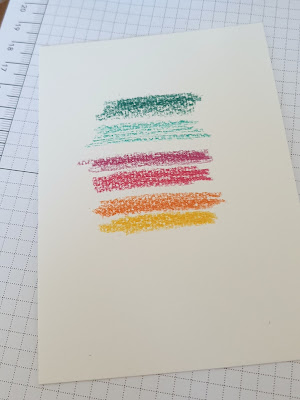
I started by scribbling the pencils in different colours onto the paper. I chose to used a dark and light shades of blues, pinks and orange/ yellow. 

Amazing year stampin up watercolour pencil wash birthday card
 
I left a gap between each colour because as rhe water is applied the colour spreads ...

Amazing year stampin up watercolour pencil wash birthday card

I love the way the colour almost melts as you add water with your waterbrush 😍

Amazing year stampin up watercolour pencil wash birthday card

These colours work so well together but if there was no gap to start with they might have run together and ended up with a muddy appearance. Also not using too much water is key. I started with dry paper then added water just to the pencil.

Amazing year stampin up watercolour pencil wash birthday card
 
As so often happens when I'm in my happy place... ummm messy place might be a better description 🤣, I like to make more than just 1!! 
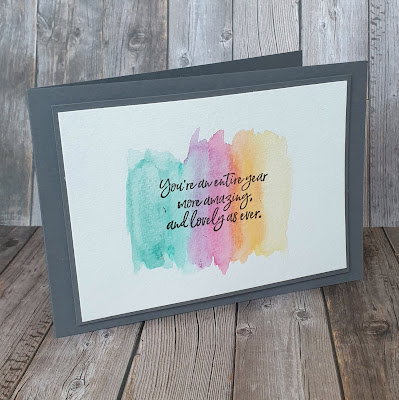
So after waiting for the panels to dry completely,  a quicker way is to use your heat tool,  I took out my Stamparatus . The Stamparatus is the stamp positioning tool from Stampin' Up! That is invaluable for stamping onto watercolour paper.  
Watercolour paper has a texture that can make stamping onto tricky. With the Stamparatus you are able to stamp multiple times in exactly the same place. This means that you can get a greater depth of colour as well because watercolour paper absorbes ink multiple layers give you more impact.
I chose to only use sentiments for my cards as they are the perfect size in the Amazing Year stamp set. As well as being in beautiful fonts!
So for both my samples I have kept it simple with just basic grey mats and card bases. They are the same grey as the ink I used for the sentiments. 

Amazing year stampin up watercolour pencil wash birthday card

Amazing year stampin up watercolour pencil wash birthday card
 
I am really happy with these cards. The colourful backgrounds just make me smile. I do so love a bold colour 😍 

Amazing year stampin up watercolour pencil wash birthday card


Tuesday 30 August 2022

Tips tricks and techniques Tuesday Amazing Year

 Today I'm sharing a much loved technique using the gorgeous Amazing Year stamps. Called masking its a very simple idea. Your going to be covering one stamped image and stamping another over parts of it.

The effect this gives is to have things appear behind the first stamped image. Now don't panic its really easy especially if you have a fab product called Masking paper.  

Masking technique amazing year stampin up birthday card

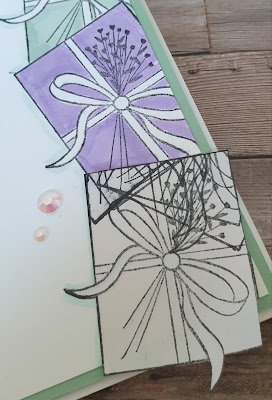
This unassuming white paper is magic! It has a shiny side and a mat side. You are going to stamp your image, I've  used the parcel image from the Amazing Year set, onto the mat side. I stamped in black as it's what I am planning on using on my card. 

Once you've stamped the image fussy cut it out. For this technique I always cut on the line. This helps minimise any white halo around the images.

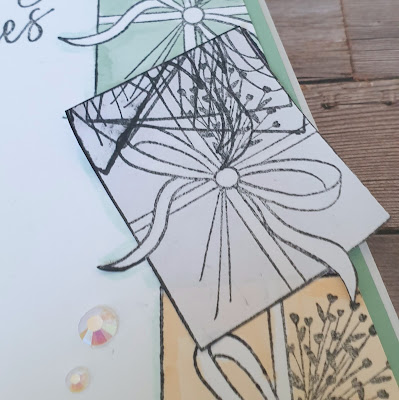
Now I took a mat of cardstock to fit on the front of my slimline/dl card base. I stamped my first image at the bottom of the mat. Then placed the mask over the image and stamped again. With the mask in place you don't have to worry about your first image being over stamped.

Masking technique amazing year stampin up birthday card

Now as you can see in the pictures I forgot to take pictures as I went 🥴 so please use your imagination 😅  
I continued masking and stamping until the parcels tumbled all along the edge of my card.
The mask gets a bit covered but works brilliantly as it's  repositionable. 

Masking technique amazing year stampin up birthday card

Next it was time to colour the parcels. I used my alcohol markers in softer shades of lilac, green and peach. I left the bows white and added a very light shade of blue around the outer edges to add a little depth to the overall image.

Masking technique amazing year stampin up birthday card
 
Because I chose to do a slimline/dl card I had plenty of room to stamp lots of parcels 😉. But my trusty mask still had life left in it! So my tip is to place it inside your stamp case. That way you have a mask ready if you need one in a rush!

Masking technique amazing year stampin up birthday card

All my sampled needed to finish it was a few of my all time favourite sparkle iridescent rhinestones. 
I do hope you'll give this fun technique a go. It sure is made easy with the fab masking paper.


Monday 29 August 2022

Make it simple Monday Amazing year

 Hello and welcome to a week of inspiration from me, Cary,  using a fantastic stamp set called Amazing Year.  I do hope you're all having an amazing year yourselves. I sure am! If you're seeing this on the 29th of August I'm in New Orleans ( fingers crossed because I'm  writing theis weeks posts before I go 🤣) I  am very fortunate to be able to attend a Stampin' Up! Event in this amazing city so am staying a few extra days to explore.

So enough of that lets get back to the card inspiration!! As it's  #makeitsimplemonday my samples are of course #simplestamping.  I am sharing a very simple tip for colouring my stamped image though 😉.

So what does the Amazing Year stamp set look like? It's  a great set of open line images and great sentiments. 

Amazing year stampin up fun easy stamping card making

As you can see the stamped images just shout to be coloured in.  There are lots of ways to add colour but when keeping it simple I like to work with watercolour pencils.  They aren't expensive but give you a little more flexibility than just a colour pencil. 

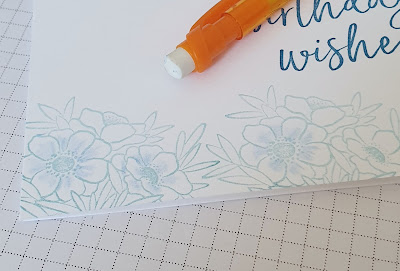
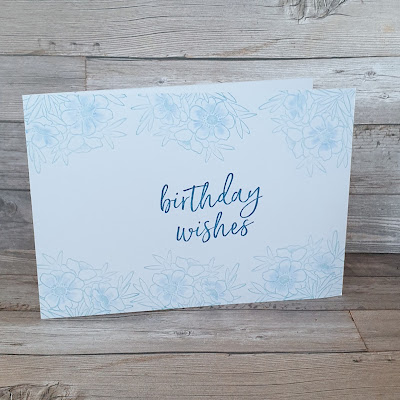
So I started my samples by stampin the bouquet in a pretty blue ink. I stamped along the long edges of my card base but with the stems off the cardstock. 

Next I took my blue watercolour pencil and added colour just to o the center of the flowers. Next is my top tip... grab yourself a pencil with a  rubber on the end! Look at the darker flower to the right of the image below.

Amazing year stampin up fun easy stamping card making

Now just make sure the rubber is clean before you start gently blending the colour you've  applied. I worked in both a circular motion and in a flickering motion from the center out. Another tip is to rub the colour off the eraser often to stop any colour transfer. 

Amazing year stampin up fun easy stamping card making
 
The effect  is to add gentle colour to the image as I've chosen to keep the outline and the infill the same colour. 
This card came together really quickly all I added was the lovely bold sentiment and I was done.

Amazing year stampin up fun easy stamping card making


In fact it was so fast I whipped another up just because I had the spare time!! This time I went a pink colour 💗 
Amazing year stampin up fun easy stamping card making

I'm really happy with how  these very gentle feminine cards  came together.  I  like both colour ways and can see it done in so many colours. Which colour would you go with 🤔


Friday 26 August 2022

Fun Fold Friday - Heron Habitat Bundle

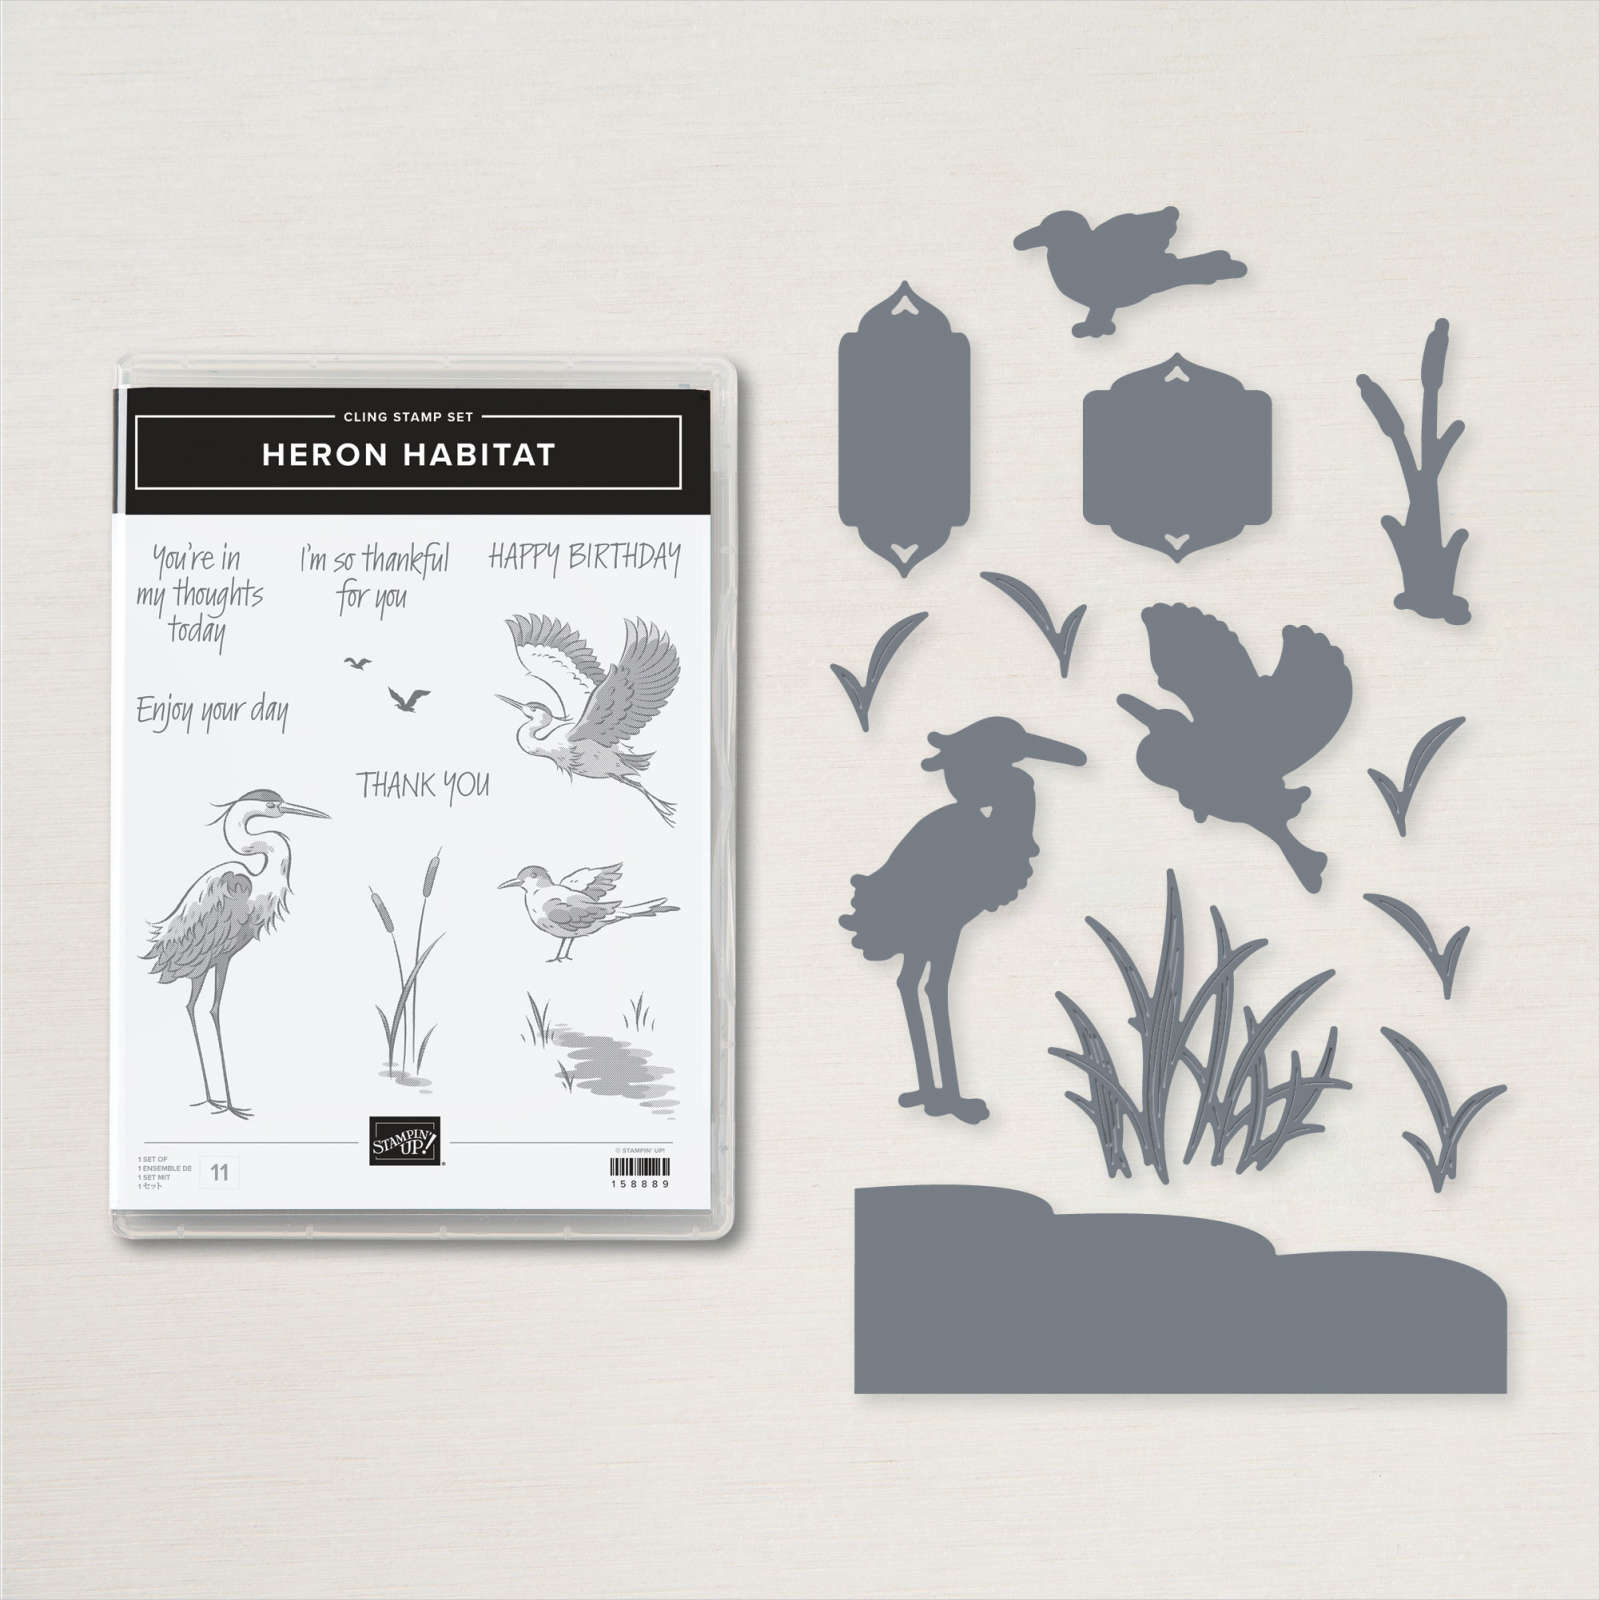
Wow! It's Friday already! Time flies when you're having fun and fun I have had this week again. :)) Using the Heron Habitat Bundle today I have made a card that I have done several times in the past. I started by taking a whole sheet of A4 card in Polished Pink and scored both pieces at 3.5cm and 5.5cm from each side. Approximately 1,3/8" and 2,1/4". Then using the Layering Diorama Dies, I cut a hole in the centre of one of them. 

I took another piece of DSP from the retired, New Horizons Designer Series Papers and cut it at 14.4cm high by 13.5cm wide. I cut that into 3 pieces. 1.8cm then 9.9cm which left me with another piece of 1.8cm wide. I added the 2 narrow strips to the narrower, outer front edges of the piece which I had die cut. Using low tack tape, I lined the other piece up on the inside of the front and die cut through the aperture. That way, I know that the pattern lines up! I had a piece of the Pink, Supple Shimmer paper in my stash which I added to the centre back piece. I realised after I had used it on the card that it also retired at the end of the last seasonal catalogue! I continued as I had already adhered it. Then lining the diorama shape of DSP through the aperture on the front piece, I adhered it to the Shimmer paper. I then added the rest of the DSP over the front of the card following the shape and pattern. 

I then had some fun with the stamping and die-cutting of the herons, birds and bull-rushes. I used the Stamparatus to get the reverse images on some of the birds. To finish off, I added some more of the shimmer paper to the sides and 2 die-cut pieces from the Delicate Edges dies. A few sentiments for the front and the back finished this card off. 

I am sorry that I have used a few pieces of retired DSP this week. Some of it had to be used as it coordinated with the projects so well this week.


HERON HABITAT BUNDLE (ENGLISH)

That's it from me for another week, thank you so much for stopping by to see what I have been up to. Cary is in New Orleans this week but has made some gorgeous projects to share with you for next week ahead of time. Please look out for her amazing projects next week.    

Until I return, please keep well, stay safe 

but most of all.....

KEEP ON CRAFTING!!

Love from Gill 

xxx😍😍xxx 

Thursday 25 August 2022

Throwback Thursday - Heron Habitat

 Another fun card with the Heron Habitat stamps again today. I have found them so much fun and very easy to work with. They are great! This time, using the stitched circle dies from the Stylish Shapes dies, I die cut the circles out from a piece of Coastal Cabana card mat.  I used another of my retired DSP's for this card and they are called Waves of the Ocean. The link will take you to the stamps and dies in the catalogue. Stunning shades of blues, greens, yellows, pinks and oranges. So easy to match the papers with the card too. The stamps and Dies are still available but sadly the papers aren't. I added a piece of the DSP to the back of the die cut holes using Dimensionals then stamped the heron and the bull-rushes before die-cutting them out. A sentiment and die-cutting them out and this was completed. 

Stamps-N-Lingers Waves of the Ocean Special Bundle | Stamps ... 

 Above are the beautiful Waves of the Ocean DSP. You can see all of the amazing colours used within them. 


Wednesday 24 August 2022

Watercolour Wednesday - Heron Habitat

I really had fun making this card for today with the Heron Habitat stamp set and dies . I had a piece of Fluid 100 watercolour paper and using a tablespoon of water and a few drops of Balmy Blue ink refill. I washed the blue right across the whole piece of paper. I dried it with my heat gun and repeated the process again using a stronger mix of colour. I continued to do this again but this time using Pear Pizazz and quite a wide, dry brush. Just building up colour and adding drops of ink to the water, I eventually got a muddy sort of colour where the trees and the riverbank came from. I did add a little more colour by squishing my Crumb Cake ink pad and adding a little more colour. Ink refills are absolutely brilliant!

Now as a young girl and one of 5 children, I remember my big brother Trevor, drawing swans and riverbanks. He used to stick his tongue out around his lips while he was drawing! We still take the mickey out of him for doing it. :)) I was remembering him as I was painting the card, it still brings a smile and a chuckle to my face! He's so far away now as he lives in Canada with his family and sadly I haven't seen him for about 4 years. :(  One day...

I continued this time but this time I used the Heron dies and found it really quick too. I cut the legs from the lower heron to show that she's nesting. I hope she is anyway! I cut the paper down to 10cm by 14.4cm and mounted it onto an Old Olive card base.


Tuesday 23 August 2022

Technique Tuesday - Heron Habitat

Today's card is another simple-ish card. Now I do not like the fact that because something has retired, I cannot use it so..... waste not want not, I do use many things as I have them and really love them. Today's card with the Heron Habitat stamp set I used a piece of the New Horizons Designer Series Paper 9 (DSP). As I said, it has retired but I'm sure that many, many of you still have some. The images are gorgeous and lend themself perfectly to the Heron stamps.

The technique of course is using DSP and add images onto the paper. Obviously, I can't stamp straight onto the paper unless it's a silhouette, which I initially forgot about! Yes, like everyone else, I make mistakes but thankfully, I can cover them up nicely. I stamped the 2 herons onto white card and fussy-cut them out. Yes, I do have the dies but I didn't want to use them. I adhered the paper straight onto the Starry Sky card base.

 Grassy grove watercolour backgrounds masked background thank you card

 Above, are the gorgeous papers of the New Horizons. I used the 5th one from the left on the bottom row. The back of that is the next one along in shades of pinks, and blues. Aren't they gorgeous?


Monday 22 August 2022

Make It Simple Monday -#simplestamping - Heron Habitat

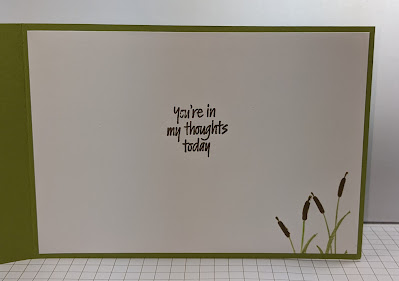
Cary made the most beautiful cards last week didn't she? How do I follow that? Well, I will have a go. This week I am using the Heron Habitat bundle, this includes the amazing dies too but for today it's a #simplestamping card so no dies. I wanted it to be slightly different to my normal Monday cards and I hope I have succeeded. I started by stamping the Herons in flight and stamped the Happy Birthday stamp above them all. Nope! I didn't like that! So, I chopped the top 2 off. I had half a sheet of Smoky Slate on my desk so I mounted it onto a C6 piece of that. 


Friday 19 August 2022

Fun fold Friday grassy grove bundle

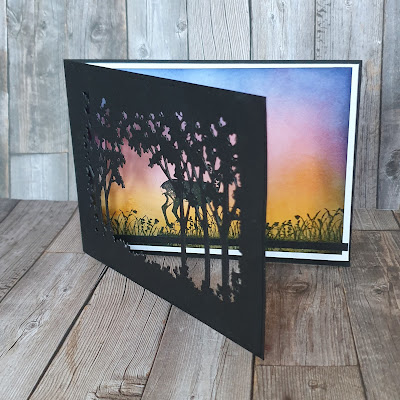
 Woo Hoo it's  Friday who's ready for the weekend? I certainly am as next week I'm going to New Orleans for a Stampin' Up! Event 😁 so the weekend is going to be filled with packing and getting organised! In preparation of going away I've been busy creating samples for blog posts and classes. So today is my final post of the week using the gorgeous Grassy Grove bundle. And as it's Friday it must be a fun fold.

Grassy grove bundle stampin up fun fold supportive card


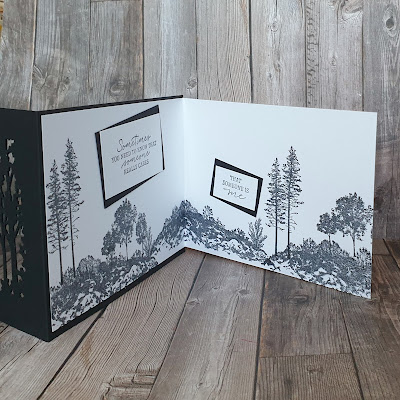
The fold for today is very easy it's  basically 2 cards stuck together ! So it starts with a piece of black  cardstock that measures 10.5cm x 29.7cm and scored at 14.85cm. You also need a piece of white cardstock measuring 10cm x 29.2cm scored at 14.6cm.

Cut a piece of black cardstock measuring 10.5cm x 14.85cm.  Line up the die centrally and pass it through the die cutting machine. Next take the black piece of cardstock and put it on top of the front of the card base and place the die back in place. Pass it though the machine so that the die cuts in exactly the same place. Next adhere the 2 pieces together. This makes it stronger than just one layer.

Grassy grove bundle stampin up fun fold supportive card


Next cut a mat of thick white cardstock measuring 13.9cm x 9.5cm. Now take your ink pads and blending brushes and create a background.  I used an orange called mango melody , a pink called polished pink and a blue called night of navy. 

Once the panel is dry I used a Stamparatus ro help me stamp in black ink the deer and grassy stamp to create a scene that can be viewed throught the card front.

Grassy grove bundle stampin up fun fold supportive card


Next I took the white card base and stamped in black all along the bottom of the entire length of the cardstock.  This in turn becomes the inside of the white card. 

Grassy grove bundle stampin up fun fold supportive card


With the fold on the right-hand side , so opening the opposite way to the black card base,  adhere the blended panel on the front. 

Adhere the white card inside the black card so that it opens from the inside. Please look at the pictures as I don't think it makes much sense in the written form but a picture tells it all!!

Grassy grove bundle stampin up fun fold supportive card

I love how this card came together.  It is a very simple fun fold that packs a punch with the bold colour palette  and the strong black and white accents.

Grassy grove bundle stampin up fun fold supportive card

Well that's all from me for this week. Please join me here next week when Gill eill be sharing her creations with us all.

Have fun

Cary xx

Grassy grove bundle stampin up fun fold supportive card