Tuesday 31 October 2023

Technique Tuesday - Joy To You and Gift of Giving

 Hello again. Today's card is similar to Monday's card in that I used the same stamps from both sets again but placed them slightly differently. This one has the Joy To You stamp on the front which was stamped and added to a deep red piece of card called Cherry Cobbler. I then decided to chop it up! So using the Patchwork Pieces dies, I used the simple curvy shaped one on this. Now using the dies was not necessary but I like the texture that it has. Once the pieces were back together, I placed them onto a Cherry Cobber card base which I embossed with the gorgeous Christmas Tidings Embossing Folder. It embosses Christmas words all over in different directions and sizes. I love it. 

I then stamped the Hot Chocolate cup onto a white mat and used my blends pens to colour this one in. 


Monday 30 October 2023

Make it Smple Monday - #simplestamping - Gift of Giving and Joy To You

 Hello. First I must apologise for being late today! Life!! My card today is made using the 2 stamp sets. I have used the Gift of Giving which is a perfectly wonderful stamp set that will function on it's own and I have matched it with the Joy To You. 2 wonderful stamp sets that are great on their own as well as being co-ordinated together too. A simple card, I stamped the cup in a very light grey ink as I dont want too much definition and I want the colour to show. I have used my watercolour pencils today as my grand-daughter has acquired her pencils back to do some homework! Tut! Tut! I haven't used the watercolour brush, I literally used them as pencils.


Friday 27 October 2023

Fun fold friday Joy of Christmas Stamped With Love Saint Nicholas Brightest Glow

 Happy Friday 😁 who's up for a great weekend? Me... I'll  be having a very busy fun filled one with my 5 year old grandson. So you know it's gonna get crazy ðŸĪŠ . He's such a joy and keeps me young ðŸĪĢ. 

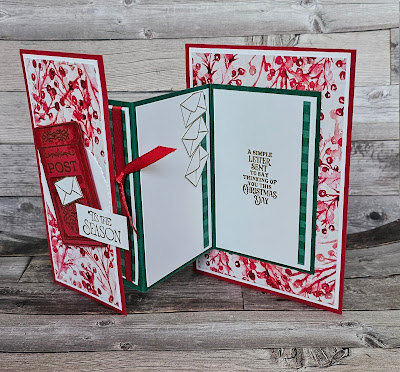
So for my final card I've gone with a traditional red and green colour palette using the Joy of Christmas pattern paper as my starting point.

Joy of Christmas stampin up


I've used not 2 but 3 stamp sets! Crazy right? 2 are from my stash and 1 is a newly acquired one.  The 2 from my stash are Brightest Glow and Stamped with Love. The stamped with live set isn't even a Christmas set but the post box image sparked my imagination.  The post box works really well with the sentiment in the new set called Saint Nicholas.


Christmas card fun fold stampin up

So lets get on with the card. It starts life as 3 pieces of cardstock.  The first piece measures 14.85cm x 10.5cm.  The second is 14.85cm x 7cm. I then decorated these 2 panels with pattern paper.
The 3rd piece of cardstock measures 21cm x 10.5cm. Score this at 7cm and 14cm.  Now fold the panel from the left towards the right with the 1st scoreline becoming a mountain fold. The second line is the folded as a valley fold.  
When folded together place it in the middle of the  larger piece. Adhere the panel . Next decorate the top facing panel keeping in mind that most of the panel will be hidden by the 2nd piece.
Once decorated adhere the second panel over the center panel.

Christmas card traditional red and green postbox stampin up fun fold

Christmas card traditional red and green postbox stampin up fun fold

I then added white panels and stamped a sentiment and fussy cut out some extra envelopes. 

Christmas card traditional red and green postbox stampin up fun fold
 
You could write a message to the recipient on the white panels or you can add a panel on the reverse of the card.

Christmas card traditional red and green postbox stampin up fun fold

I hope you've enjoyed this weeks inspiration mixing and matching old and new stamps and papers.
Next week Gill will be sharing her creations so please join us here.
Have a great weekend and remember
Have Fun!
Cary xx

Christmas card traditional red and green postbox stampin up fun fold


Thursday 26 October 2023

This or That Thursday Regal Reindeer and

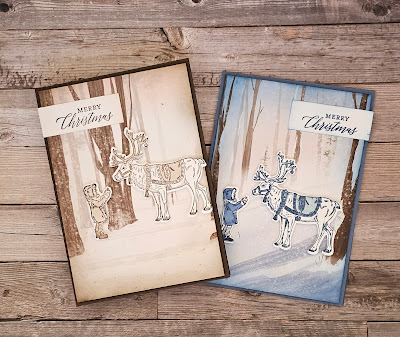
 A quick post for today with 2 cards to chose from. Are you team This? Or team That? Both cards feature the Regal Reindeer stamp set and the One horse open sleigh pattern papers .

Regal Reindeer one horse open sleigh paper stampin up Christmas cards

The papers are an online exclusive and not in any paper catalogue incase you're looking for them 😉 

My This card is the blue version. This card was made using one of my least favourite shades of blue. Misty Moonlight. But you know sometimes you have to push yourself to go outside the box 😉

Regal Reindeer one horse open sleigh paper stampin up Christmas cards

The That version is one of my least used colours. Which is sad as its a shade of brown that I really like! Early Espresso.

Regal Reindeer one horse open sleigh paper stampin up Christmas cards

For both cards I blended the same colour ink around the edges of the pattern paper as the card base. This helps to give the piece more depth and highlights the main focus. 

I also added some wink of stella for a subtle shimmer.. they are Christmas cards after all 😅

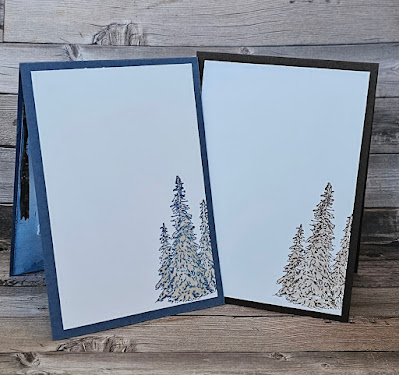
The insides are decorated as well.

Regal Reindeer one horse open sleigh paper stampin up Christmas cards

The highlight colour on both cards is a soft shade of peachy pink called petal pink.

Regal Reindeer one horse open sleigh paper stampin up Christmas cards

So which do you prefer This ( blue) or That (brown) ?

Wednesday 25 October 2023

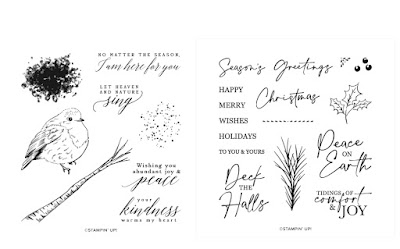
Watercolour Wednesday Perched In A Tree and Christmas Classics

 Well the weather has certainly matched the theme for today... water...colour everywhere! But the water here is at least bright and cheerful 😊.  The mix and match today is not just stamps but dies and embossing folders as well! The stamps are from the Perched in a tree stamp set and the Christmas classics stamp set.

Perched in a tree and Christmas classics stampin up
 The die I've used is from the Christmas pinecone set and the embossing folder I've used is the Snowflake Sky one.

Christmas pinecone dies snowflake sky embossing folder stampin up

Again I've  mixed and match latest release and well loved items from my stash.

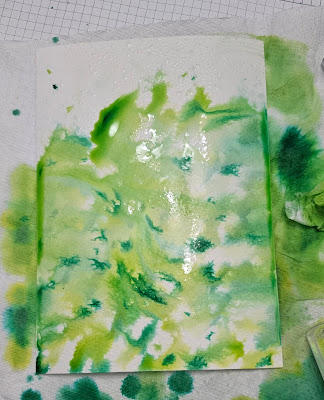
But the cards all start with a wonderfully vibrant and fun watercolour background. Starting with a piece of Fluid 100 watercolour paper which I spritzed liberally with water. I then added splodges of 3 shades of green on to the wet paper and watched them swirl and move around the paper.

Watercolour Christmas card stampin up

As you can see it is a wet one! ðŸĪĢ so please make sure your area is well covered and you have plenty of kitchen roll to hand to mop up with!
I then dried the piece with my heat tool and went back in to add more colour . 

Watercolour Christmas card stampin up

This time I did leave the piece to dry naturally.  In fact I left it overnight to dry completely.  The reason for this is that I knew I wanted to use quite an intricate die with it that would tear the wet fibers if used too soon.


Watercolour Christmas card stampin up

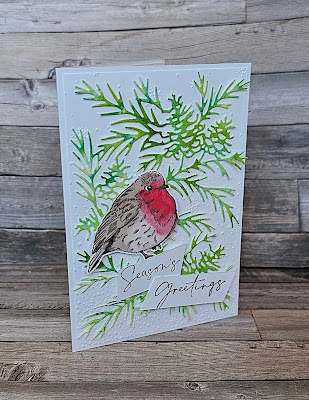
I kept the cardbase and mat crisp white. I used the Snowflake Sky ❄️ embossing folder for the mat which I attatched the die cut foliage panel to.
I stamped and coloured my robin then fussy cut him out. The sentiment and robin were adhered with 3d foam.
I used a scrap of the watercolour panel to help decorate the inside of the card.

Watercolour Christmas card stampin up

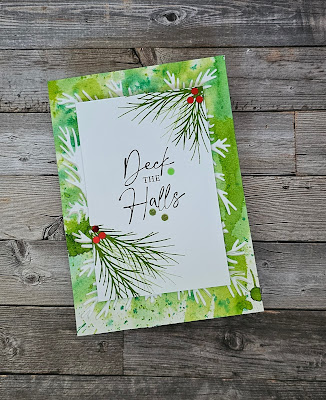
As I was tidying up I looked at the remains of the watercolour panel and thought that's too good to waste and whipped up a second card!

Watercolour Christmas card stampin up

Got to love a 2-4-1 😃...

All I added was a simple white mat that I stamped onto and done!

Watercolour Christmas card stampin up


Tuesday 24 October 2023

Tips tricks and techniques Tuesday Snow Crystal and Sparkling Snowflake

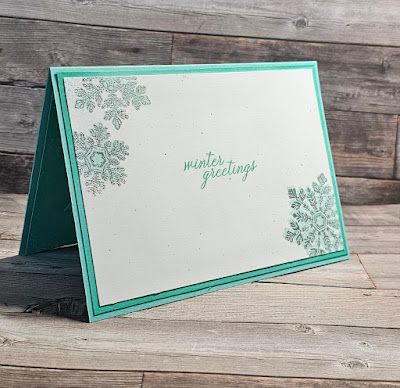
 Hello and welcome to another mix and match your stash day. Today's card features the simply stunning Snow Crystal background stamp. As well as the gorgeous Sparkling Snowflakes from this years September to December mini catalogue.  These 2 stamps are just made for each other!

Sparkling snowflakes snow crystal stampin up Christmas card

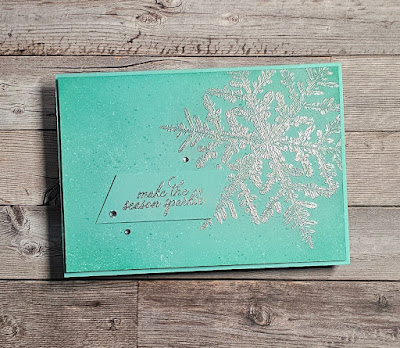
So for today's inspiration I have created a card that features tone on tone blending. It all starts by stamping the Snow Crystal stamp using versamark ink on to a mat in the same beautiful turquoise coloued cardstock as the card base. I then used silver embossing powder and heat embossed the image.

Next I pulled out the same colour ink as the cardstock and a blending brush and blended the ink from the out side edges inwards. Where the ink goes over the heat embossed areas I simply took a soft cloth and buffed the colour gently off the embossed areas. I didn't apply colour all the way in. Leaving the center portion its original colour acts as a natural highlight. 

Next I used one of my favourite techniques.  I splattered the same colour onk over the panel. To do this I took a coordinating marker pen and using the brush tip and the lid flicked the ink over the panel. 

I then put a few drops of craft white ink refill on to an acrylic block and added a drop or 2 of water and mixed them together.  I then took a paint brush and splattered the ink over the panel too. I love how the fine speckles added so much extra to the piece without being super obvious. 

Snow Crystal sparkling snowflakes stampin up elegant Christmas card

For the sentiment I used silver embossing powder again onto a small panel. 

Snow Crystal sparkling snowflakes stampin up elegant Christmas card

I decorated the inside of the card with a layer of the same colour cardstock that I blended tone on tone around the edges to give a darker shade.
I then stamped using the 2 layer Snowflakes from the Sparkling Snowflakes set. I stamped the infill stamp using the turquoise ink and the out line stamp I again used silver ebossing powder on.

Snow Crystal sparkling snowflakes stampin up elegant Christmas card

I love how ink can create so  many shades and tines of the same colour when used in conjunction with the coordinating cardstock. 

Snow Crystal sparkling snowflakes stampin up elegant Christmas card

A simply elegant card that can be recreated in so many colour ways 😍 

Monday 23 October 2023

Make it simple Monday Christmas Classics and Brightest Glow.

 Hello and welcome to another week of inspiration with Cary. This week I'll be sharing projects that feature both new and old products.  We all love the new goodies when they come out but sometimes its a good idea to not forget what we already have in our stash. So this week is all about mixing and matching!

I'm starting off with one of my all time favourite sentiment sets called Brightest Glow. Although this set has been around a few years the sentiments are just the ones I keep coming back to. The font and size work so well for me 

Brightest Glow stampin up Christmas card

The second set I was drawn too is a new one that features lovely sentiments and some really useful images. I decided that the images in the Christmas Classics would work amazingly with my choice of sentiment .

Christmas classics stampin up Christmas card

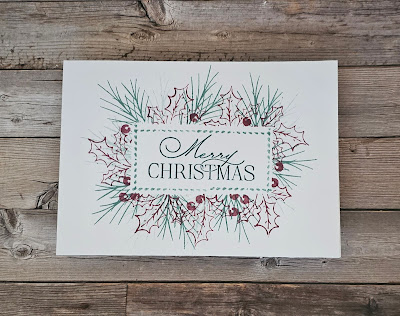
As it's #makeitsimplemonday I have just used stamps, ink and paper. I started by stamping my sentiment in the center of my card front. I then took a sticky note and covered it up!

I then stamped the sprig and holly leaves all around making sure that they went over the sticky note. I then took the berry stamp and stamped that too.

Buy covering the sentiment and stamping around and over the note you create a frame for your sentiment.

Simple christmas one layer sip card

To highlight the frame area I used another of the stamps from the Christmas Classics set. After covering the foliage with sticky notes I stamped the image repeatedly to create a frame.
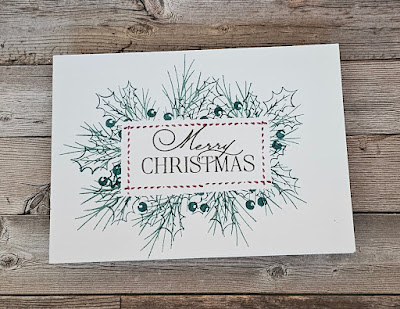
I enjoyed making the card so much I made another version!  This time with a slightly different colour combo.
Simple christmas one layer sip card

This is a fun technique that is super easy and perfect for those who are just starting their stamping journeys,  those who need a card in a hurry and those who need to make lots of cards at a time. No 2 will ever be exactly the same but they will all look gorgeous 😍 

Friday 20 October 2023

Fun Fold Friday - Beary Christmas

 For my last card this week, I have made a fun, half accordion, folded card. I started with a basic C6 card base in White card and added a C6 mat onto the inside of the card and added a rectangle of white for the writing to go onto. Using the Beary Christmas DSP once again, I cut a piece of the dark blue paper and folded it in half. I fussy cut the polar bear and the Christmas tree and using dimensionals,  added him to the front of this panel. I used some scraps of DSP for the reverse side of the dark blue and fussy cut another polar bear and baby bear and added them to the reverse. I then scored the front of the card base at 2.6cm, 5.25cm, 7.87cm and 10.5cm which is the centre fold . I fan folded them all starting with the first one a mountain fold then valley and mountain. Once completed you will have a W fold on the left and a flat half card on the right. I cut 2 pieces of DSP and added them to the front-facing, folded panels. I then adhered the dark blue panel over the first and 4th panels just fixing the edges of the paper to the card base. Just to finish it off, I added another strip of the Balmy Blue sparkle ribbon to the inside of the card. A really quick fun fold card this week.


Well, that's all from me for this week. 
Cary will be back again next week with some gorgeous cards to inspire you. 
Thank you for stopping by this week. Until  I return the week after, Take care, Stay safe but as always...

😍😍 xx KEEP ON CRAFTING xx 😍😍


Thursday 19 October 2023

This or That Thursday - Beary Christmas

This week for my This or That cards I have made 2 completely different cards. I have had so much fun working with this fun stamp set and I didn't want to do any more in a similar fashion. So making THIS card, I used the Beary Christmas papers alone. I cut the glaciers out of one last piece of the sheet of paper. Having used all of the glaciers from the bottom of the DSP and as the top is all sky, I cut a C6 mat from the sky or ocean that was left and placed the cut shapes onto the paper then arranged them as I have.

 I also fussy cut the polar bears with the glaciers too and randomly added them over the mat. All that left me then was a sentiment.


THAT
My That card, as I said earlier is completely different!
This one is a fun fold. I used a long piece of card at 29.7cm by 10.5cm high and scored it 11cm and 25.5cm long the whole width of it. I added some mats of the DSP on the front 2 sides and placed a strip of card across to a large, retired, stitched circle die cut. This then became the focal point for the centre of the card. I stamped and die cut the polar bear, tree and the presents which are from the DSP once more. These papers are so amazingly versatile! A piece of White card in the centre with another sentiment and some more presents finished this one. 


Wednesday 18 October 2023

Watercolour Wednesday - Beary Christmas

Yesterday's card is a similar card to yesterday's. I took some scraps of watercolour paper and washed them with Balmy Blue ink using my waterbrush. Once they were dry, I started to pencil some shapes across the paper and added some more colour onto the edges to accentuate the edges and shading of the glacier pieces. I placed adhesive onto the back of the 'glaciers' and once on the card base, I used a white gel pen and added some lines to show some movement on the water. I stamped the polar bears using a Smoky Slate ink pad. I like to use a lighter colour when working with a very light item. 

I added a little fun by stamping the hats and scarf in different colours and adhering them to the bears.