Showing posts with label #freshfreesiacard. Show all posts

Friday, 3 May 2024

Fun Fold Friday - Grassy Grove

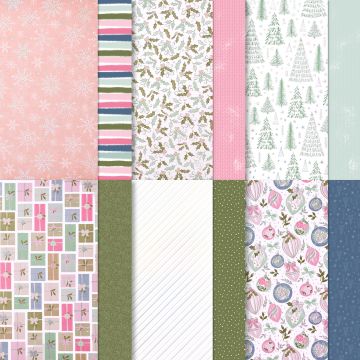
 Hello, here we are already on Friday! Why I don't make myself more adventurous and splash colour around when making scenes, I have no idea. I love the colours in today's card. Using the Grassy Grove stamp set and dies, today I have coordinated the stamps with some of the brand NEW designer series papers. They are called Thoughtful Journey. A pack of 48, 6" x 6" papers! They are stunning as you can see from the card today! The papers have so many gorgeous colours in and the designs too are gorgeous. Look out for them now in your NEW catalogues. You don't have a copy? Please leave us a private message at the bottom of the page and we will be happy to send one out to you. 

The fold for today is one that I have made before and it's really lovely and simple. An A5 or C5 piece of card folded in half and then each half in half again. Sound simple? It really is. Then marking 2.5cm from the top and the bottom through the centre panels and the same from the edges of the centre panels to add the Fresh Freesia card. The card was embossed with the NEW So Swirly embossing folder. A few reindeer and some trees completes the card. 


As always, that's it from me for another week. Cary will be back to inspire you on Monday and I will return the following Monday. 

Until then, take card, stay safe but as always

KEEP ON CRAFTING!!

Take care, Gill 

xxx 😍😍xxx😍😍 xxx

Tuesday, 27 June 2023

Technique Tuesday - Translucent Florals

 The cards for today are using the technique of using Vellum cardstock. It's called cardstock vellum as it's quite weighty in comparison to something like greaseproof paper which looks very similar but is not as beautiful to work with as the vellum is. Using the Translucent Florals stamp set, I stamped the images of the flowers in a water based ink and/or Memento Tuxedo Black. Most of what I have done is in coloured inks as the stamps show so much of the whole image. The first card is white on white with a little added colour. This was based on some elements that one of the demonstrators were using on Sunday. I had a scrap, strip of the spotted vellum and added a small white mat over it which had been embossed using the Splatters embossing folder. It is one of 2 folders in the pack called Stripes and Splatters. I die-cut the petals from some more of the spotty vellum from the Vellum Basics papers.I added some Calypso Coral Blends pen to the back of the smaller flower and some of the individual leaves using the Granny Apple Green, both in the dark shades. The sentiment was die-cut from the Deckled Rectangles dies and the little flower centres were also di-cut from the scrap of coloured vellum. 

The second card is on a Fresh Freesia card base with another of the Deckled Rectangles die cut in white card. I embossed another of the pieces of white with the Splatters folder once again and added the sentiment landscape this time across the card. A simple spotty, clear, vellum, flower and some leaves, complete this one. 


Card 2


Wednesday, 17 May 2023

Watercolour Wednesday - Cheerful Daisies

 Hello again, I am so pleased that I chose the Cheerful Daisies this week as the weather has been so very lovely here, it's been what I call lovely smiling weather. Today's card is one that I have seen done several times but I never had the luck of making it turn out right. I started by choosing 3 similar colours. The first is Fresh Freesia, then it's Highland Heather and finally Gorgeous Grape. I first of all spritzed the piece of Fluid 100 water colour paper in water really well. Then starting with the lightest, I stamped a Stampin' Up! acrylic Block C onto the ink pad and made sure it was covered in ink. I spritzed the block with water and placed it onto the paper. Where I had gone wrong before was that I lifted the block off. I shouldn't have. I tipped the block lightly from side to side and top to bottom so that the ink on the block covered the whole of the square that I wanted covering. I repeated with the other 2 colours but as the Gorgeous Grape ink is quite strong, I didn't over ink it. All 3 blocks were overlapped and dried really well. 

I stamped the large and small line images and inside colours onto white paper then die cut them all out. I mounted the small daisies using Dimensionals and the centres of the flowers were rounded/stretched a little and added with Dimensionals too. The whole of the mat was placed on Adhesive foam sheet so that it straightened out and laid flat well before placing them all onto the Fresh Freesia card base.


Friday, 16 December 2022

Fun Fold Friday - Adorable Owls

 For my last card this week using the Adorable Owls stamp set, obviously I have made another of my go to favourite folds. This is made with 1 half piece of A4 card. I folded the card base (14.85cm by 21cm) in half at 10.5cm. I lightly pencilled the centre point on the bottom edge of the card at 14.4cm. The at each side on the front edge, I marked every 3.5cm. I then scored from the centre mark on the bottom edge to the edges on the centre fold creating the first V. I then repeated the actions from the edges at every 3.5cm to the bottom and finished them all. The scored marks were all folded back and forth on each side creating the V shape you see. I placed some tear n tape to the back of some of the folds to keep them crisp.

I used some of the papers from Tea Boutique  6" by 6" papers to match with the lovely Fresh Freesia card base. I stamped the 3 owls and coloured them in using the Stampin' Blends pens and die cut the 'circle' from the Painted Labels set of dies. 


I finished off by adding sentiments once again from the Go To Greetings stamp set 

 
Thank you for popping by this week, Cary will as always be back on Monday to share her creations. 
I will be back the week after as always too so until then please
 
TAKE CARE, KEEP WELL, STAY SAFE 
 
and as always, 
 

KEEP ON CRAFTING! 

😍😍 xx Gill xx 😍😍

Friday, 6 May 2022

Fun Fold Friday - Happiness Abounds

Friday already! Wow! That has come around quickly hasn't it? Cary and I have had some fantastic news this week. We have been added to the Making Cards and Papercraft Magazine as a Blog to watch!That's fantastic isn't it? Well, we think so! We are extremely delighted! My last card this week is with another of the new stamp sets and products from the BRAND NEW Stampin' Up! catalogue which was released on 3rd of May, this week. Using today the Happiness Abounds stamp set I've made this really fun fold! It started as a simple gate-fold card and I've just added a few doors to it! The typeset or font of the sentiments is beautiful. I do like a really good font! I started by choosing the card base colour of Fresh Freesia. It's a really lovely pinkish, shade of lilac. This is one of the In Colours for 1 more year before it will be replaced with new colours. 

I took a piece of A4 card and cut it at 14.85cm high by 29.7cm wide. Then scored from each end at 9.9cm, then just under 4.5cm on the 2 outer panels. I burnished the folds really well and cut 2 mats in the Fresh Freesia card of 9.9cm by 14.85cm. I cut 2 white mats 9.5cm by 14.4cm and instead of embossing, this time I used the Stitched Greenery die. It pierces little pin holes in the leaf pattern all over the card. It gives a beautiful background. Add each of the extra panels to each side of the card base on the external panels. 

I cut 2 types of DSP in the Hue of Happiness DSP which matches the stamp set. 2 pieces of each design both 4.5cm by 13.85cm. I had some spare, white, Stitched Greenery mats that I cut down to fit onto the DSP and adhered them to the DSP strips and then onto the inside panels of the card.  I used another piece of DSP to cut out the flowers from. The dies also fit most of the flowers so if you have or buy the dies, you'll be able to save time on fussy-cutting. It was then down to the decorating of my card. I curled the flowers at the outer edges and fixed them by using Dimensionals or foam shapes. I also added the flowers from the edges of the paper and glued them to the edges of the mats too. Waste not, want not! A few sentiments and the card was complete.


Thank you for stopping by this week. I hope you've had some ideas for cards of your own. 

Cary will be back on Monday to share her creations. 

Until I return, TAKE CARE, STAY WELL and KEEP ON CRAFTING!!!

Thank you once again,

😍 xxx Gill xxx 😍

Monday, 29 November 2021

Make It Monday / #simplestamping - Whimsical Trees

Hello on this bright and sunny day. It's gorgeous here...if you are indoors! It's VERY cold outside. A typical winters day. It's a good job then that I'm here crafting. This week I am going to show you some of the cards that I've made using this gorgeous stamp set, Whimsical Trees. It actually comes in a whole suite of products called Whimsy and Wonder. It includes not only the stamp set but dies, ribbon, die cut snowflakes and DSP (Designer Series Paper or as many believe too, Double Sided Paper) Each sheet IS double sided but one side on all of the 12 sheets has a silver foiled effect on. Those of you who have been able to get it are extremely fortunate as it has currently been put on stop for ordering due to high demand. 😞

WHIMSY & WONDER 12" X 12" (30.5 X 30.5 CM) SPECIALTY DESIGNER SERIES PAPER 

As it is make It Simple Monday or #simplestamping I have made this very simple card. Using the lovely shade of lilac in Fresh Freesia, I took a piece of sponge and smooshed some ink in the same colour over the front of the card mat then using the amazing really dark green of Evening Evergreen stamped the tree and a message to the front. I also added a little simple feature of a line all around the white mat to 'frame' the image. I used my trimmer for this and just scored the lines. I repeated the sponging and added another message to the inside. I decided then to step up the card and made another similar.


Again, I used the trimmer for the score lines around the front mat, the sponge for the background colour and this time I stamped one of the smaller trees over the sponging using the same colours. I then took another piece of white and stamped the big tree onto it. This time I added the spotty stamp over the top to look like the lights and added it to the mat. A strip of the matching Evening Evergreen ribbon, a few Rhinestones and a message to complete the second card for today. 


This only shows that with a little extra, you can dress a card up very easily.