Showing posts with label #eveningevergreencard. Show all posts

Tuesday, 1 November 2022

Technique Tuesday - Santa's Delivery

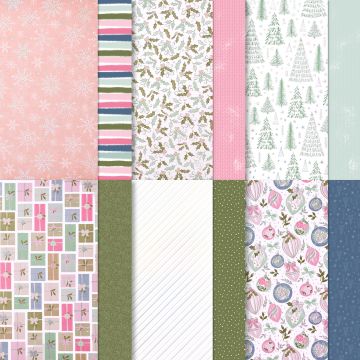
 Welcome to some more of Christmas. Today's card is a very simple card but it's clean and fresh in my opinion. I have used a card base in one of the very dark greens we have. It's called Evening Evergreen and is from our In Colour range. Using the Santa's Delivery stamp set, I stamped a Merry Christmas. onto a scrap of white card and punched it out using the Label Me Fancy punch and punched another in the Evening Evergreen too. I then took a C6 white mat which is 10cm by 14.4cm and using one of the Charming Landscapes embossing folders which has the hills on and I embossed the white card. I decided to add a little more snow on the front of the mat so using the Snowfall Accents Puff Paint, I dotted a little all over and then heat set it with the glue gun. The heat gun makes the puff paint pop up! It's brilliant! All I did after that was punched a fancy circle using the Decorative Circle punch and die cut a circle from the Designer Series Paper, Santa's Express. That's that! I hope you like it. 


Tuesday, 25 January 2022

Tips, Tricks and Techniques Tuesday - Happy Hedgehogs

 Today's project is a simple technique of layering. I stamped the image of one of the hedgehogs from Happy Hedgehogs and coloured it in. I put that to the side and picked 2 colours that enhance each other and chose the soft peachy, orange of Pale Papaya and the really dark green of Evening Evergreen card. I wanted an Hello card this time so using the Pale Papaya, I embossed the little Hello folder from Thanks and Hello. Then mounted it onto some thin strips of White card, then a mat of Evening Evergreen card and the pieces were all added to the card base using foam shapes, Dimensionals. 

I die cut the hedgehog out with a Layering circle die but it can also be cut out using punches. This too was added to the card using Dimensionals. I highlighted the Hello in the centre of the embossed mat and as I love fussy cutting, I embossed another in Evening Evergreen and fussy cut the letters out. I wouldn't recommend doing that as it is a very time consuming fiddly job! That's a first for me to admit that!!


Wednesday, 1 December 2021

Watercolour Wednesday - Whimsical Trees

 This week we are supposed to be experiencing snow here in the South of England. Watch this space for whether it will come or not! Today's card using the Whimsical Trees stamps I did my favourite thing. I spritzed a basic white card mat with water and scribbled onto a cello bag using several colours of my Stampin' Write Marker Pens and then spritzed the ink thoroughly. I took the wet, white mat and laid it onto the wet ink. I lifted it, dried it using a heat gun and laid it onto the the ink once more ans let it soak some more of the ink again and then dried it for the final time. I stamped the baubles several times on a piece of white and coloured them in. I stamped a block onto the ink pad to pick the ink up and used my water brush to colour them in. 

I then fussy cut them out! I can some of you saying Oh No! Not again!! As I have said many times before, I do like to fussy cut images out. I find it very relaxing and therapeutic. I know, I'm odd! Once they were all cut out, I first curled the bauble with a ball tool and placed a foam shape on the back then arranged them in position on the water coloured mat. I added the mat to a piece of Evening Evergreen. I embossed the card front with the snowflakes from the Wintry embossing folder and added the bauble coloured mat to it. A message or 2 and some rhinestones complete this card.


Monday, 29 November 2021

Make It Monday / #simplestamping - Whimsical Trees

Hello on this bright and sunny day. It's gorgeous here...if you are indoors! It's VERY cold outside. A typical winters day. It's a good job then that I'm here crafting. This week I am going to show you some of the cards that I've made using this gorgeous stamp set, Whimsical Trees. It actually comes in a whole suite of products called Whimsy and Wonder. It includes not only the stamp set but dies, ribbon, die cut snowflakes and DSP (Designer Series Paper or as many believe too, Double Sided Paper) Each sheet IS double sided but one side on all of the 12 sheets has a silver foiled effect on. Those of you who have been able to get it are extremely fortunate as it has currently been put on stop for ordering due to high demand. 😞

WHIMSY & WONDER 12" X 12" (30.5 X 30.5 CM) SPECIALTY DESIGNER SERIES PAPER 

As it is make It Simple Monday or #simplestamping I have made this very simple card. Using the lovely shade of lilac in Fresh Freesia, I took a piece of sponge and smooshed some ink in the same colour over the front of the card mat then using the amazing really dark green of Evening Evergreen stamped the tree and a message to the front. I also added a little simple feature of a line all around the white mat to 'frame' the image. I used my trimmer for this and just scored the lines. I repeated the sponging and added another message to the inside. I decided then to step up the card and made another similar.


Again, I used the trimmer for the score lines around the front mat, the sponge for the background colour and this time I stamped one of the smaller trees over the sponging using the same colours. I then took another piece of white and stamped the big tree onto it. This time I added the spotty stamp over the top to look like the lights and added it to the mat. A strip of the matching Evening Evergreen ribbon, a few Rhinestones and a message to complete the second card for today. 


This only shows that with a little extra, you can dress a card up very easily.