Showing posts with label #santasdelivery. Show all posts

Friday, 4 November 2022

Fun Fold Friday - Santa's delivery

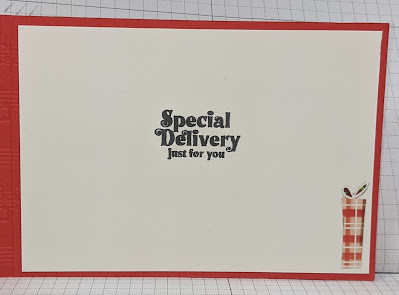
 Fun Fold Friday is back already! For today's post I have made a much simpler fold card. It's an easy gate-fold card. I used a piece of Shaded Spruce for the card base and some more of the Designer Series Paper called Santa's Express. I really do like the range of papers in this set. I cut a sheet of A4 in half at 14.85cm by 21cm and scored it at 5.25cm from each of the 2 sides. Before I burnish the edges, I make the 2 outer edges meet in the centre and then burnished them on both sides. Doing that,  you don't have any gaps in the middle or any of them overlapping either. I decided that I wanted a little sparkle on the card so added 2 mats measuring 4.9cm by 14.7cm using some of my retired Supple Shimmer papers. It's almost gone now sadly but it's really pretty. 2 more DSP mats on top of that measuring 4.5cm by 14.4cm. I die cut a Shaded Spruce circle from the Layering Circles dies and another in Real Red and matted them together. I die cut 2 wreaths from Shaded Spruce and glued them together then added a few little red spots and the die-cut bow on the centre. I didn't add a sentiment on the front as I liked it as it is. A simple mat on the inside and then the card and I am finished for this week. 


That's it from me for another week, Cary will be back on Monday posting her creations from Vienna!
Thank you once again for popping in to see what's going on. 
Until we return from Vienna, 
Take care, 
Stay safe and 

KEEP ON CRAFTING.  

xx Gill xx


Thursday, 3 November 2022

This or That Thursday - Santa's Delivery

Here we are already and it's Thursday again! Wow! Cary, me and many hundreds of demonstrators are all going to Vienna next week for our annual 'conference'. I must say I am really looking forward to going too! However, there's lots to do first! Today's choices are 2 that I made using in part some of the Memories and More cards. I have used a large card mat on one which has colourful spots on and added Santa and Mrs Claus dancing on the ice. They were both cut from the Designer Series Paper called Santa's Express. It has a really great selection of designs too. I completed this first one with another M & M card which I had cut around and used it for the sentiment to go on. My second card is made from a Real Red card base which I embossed the front with the Merry Melody Embossing Folder. I love embossing folders as they give such a lovely feel to a card so if  you can't see the effect, you can certainly feel it. This one I die-cut  a rectangle from the Scalloped Contours and embossed it with the Charming Landscapes embossing folder again. This time, I cut out the larger Santa and Mrs Claus from the DSP and it genuinely looks like they are having fun!


Here is the 2nd card.


Now it's up to you. Which do you prefer?


Wednesday, 2 November 2022

Watercolour Wednesday - Santa's Delivery

Well, I have discovered that I cannot for the life of me, watercolour Santa and his train! I tried 4 times and eventually gave up! So back to the drawing board and I made a background. Using the Fluid 100 watercolour paper and 3 drops of the pale blue of Balmy Blue ink refil into a tablespoon of water, I mixed it up then washed it across the paper and let it dry. Then I added some Orchid Oasis ink refil, a soft purple and mixed that into the blue and washed that across the top portion of the card and let that dry. Once that was dry I then went on to use the Starry Sky ink refil. I repeated the same process with only a few drops of the refil but added it to the previously coloured water. That was also washed across the whole of the paper and again left to dry. 

I decided to add a sky full of snowflakes to the now dry mat. Using Versamark, I stamped the snowflake stamp from the Christmas Scottie stamp set all over the blue paper and poured some white embossing powder all over before I heat set it. Once done, I added the Santa's train over the top. As I had such a disaster with my colouring the train, I used the Blends pens to colour it all in. A sentiment at an angle and this card is completed.


Tuesday, 1 November 2022

Technique Tuesday - Santa's Delivery

 Welcome to some more of Christmas. Today's card is a very simple card but it's clean and fresh in my opinion. I have used a card base in one of the very dark greens we have. It's called Evening Evergreen and is from our In Colour range. Using the Santa's Delivery stamp set, I stamped a Merry Christmas. onto a scrap of white card and punched it out using the Label Me Fancy punch and punched another in the Evening Evergreen too. I then took a C6 white mat which is 10cm by 14.4cm and using one of the Charming Landscapes embossing folders which has the hills on and I embossed the white card. I decided to add a little more snow on the front of the mat so using the Snowfall Accents Puff Paint, I dotted a little all over and then heat set it with the glue gun. The heat gun makes the puff paint pop up! It's brilliant! All I did after that was punched a fancy circle using the Decorative Circle punch and die cut a circle from the Designer Series Paper, Santa's Express. That's that! I hope you like it. 


Monday, 31 October 2022

Make It SImple Monday - #simplestamping - Santa's Delivery

 Well it's only around the corner now so I hope you are all getting ready for Christmas too? This week I will be showing you some cards that I have been making using the Santa's Delivery stamp set and occasionally, the Santa's Delivery Memories and More cards here and there. Today's one of course is a very quick and simple card. I literally stamped the Christmas tree all around the edges of the card mat and added a few Candy Canes in too. Something aimed at a beginner crafter or one that the children can replicate too. I was going to add some more on the front but remembered that it is a simple stamping card.

I have added a card made with the Memories and More cards. This centre card is only C7 or 3" by 4" to start with and on their own make a lovely card in itself. This one, all I did was cut around the border of the card and mounted it using dimensionals. It was that simple!


Here is the Memories and More version