Showing posts with label #stitchedgreenerydie. Show all posts

Thursday, 8 September 2022

Throwback Thursday - Family & Friends

 The card today is another that I made a while ago. Using the Family and Friends stamp set and the Picture This dies, I die cut the circles from a piece of white card. I then used the Stitched Greenery die to add the leaf design to it. I added acetate on the inside of the mat and then added some of the foam adhesive strips around the edge of the circles. I die cut circles in DSP from the Santa Express papers and using some of the circles that I die cut and stamped the images and sentiment across them. Unfortunately, I used too many of the Effervescent Elements inside the circles! Another lesson learned! Don't use too many sprinkles! 

Once they were added, I placed the card base over the die cut mat with sprinkles in. I added a rim of Tombow Multipurpose glue to the tops of the circles so that I had a few moments to adjust it once it was added to the card base.  The card base is made from Shaded Spruce card. Inside, I added the strings of lights and another sentiment to complete it.


Friday, 6 May 2022

Fun Fold Friday - Happiness Abounds

Friday already! Wow! That has come around quickly hasn't it? Cary and I have had some fantastic news this week. We have been added to the Making Cards and Papercraft Magazine as a Blog to watch!That's fantastic isn't it? Well, we think so! We are extremely delighted! My last card this week is with another of the new stamp sets and products from the BRAND NEW Stampin' Up! catalogue which was released on 3rd of May, this week. Using today the Happiness Abounds stamp set I've made this really fun fold! It started as a simple gate-fold card and I've just added a few doors to it! The typeset or font of the sentiments is beautiful. I do like a really good font! I started by choosing the card base colour of Fresh Freesia. It's a really lovely pinkish, shade of lilac. This is one of the In Colours for 1 more year before it will be replaced with new colours. 

I took a piece of A4 card and cut it at 14.85cm high by 29.7cm wide. Then scored from each end at 9.9cm, then just under 4.5cm on the 2 outer panels. I burnished the folds really well and cut 2 mats in the Fresh Freesia card of 9.9cm by 14.85cm. I cut 2 white mats 9.5cm by 14.4cm and instead of embossing, this time I used the Stitched Greenery die. It pierces little pin holes in the leaf pattern all over the card. It gives a beautiful background. Add each of the extra panels to each side of the card base on the external panels. 

I cut 2 types of DSP in the Hue of Happiness DSP which matches the stamp set. 2 pieces of each design both 4.5cm by 13.85cm. I had some spare, white, Stitched Greenery mats that I cut down to fit onto the DSP and adhered them to the DSP strips and then onto the inside panels of the card.  I used another piece of DSP to cut out the flowers from. The dies also fit most of the flowers so if you have or buy the dies, you'll be able to save time on fussy-cutting. It was then down to the decorating of my card. I curled the flowers at the outer edges and fixed them by using Dimensionals or foam shapes. I also added the flowers from the edges of the paper and glued them to the edges of the mats too. Waste not, want not! A few sentiments and the card was complete.


Thank you for stopping by this week. I hope you've had some ideas for cards of your own. 

Cary will be back on Monday to share her creations. 

Until I return, TAKE CARE, STAY WELL and KEEP ON CRAFTING!!!

Thank you once again,

😍 xxx Gill xxx 😍

Friday, 28 January 2022

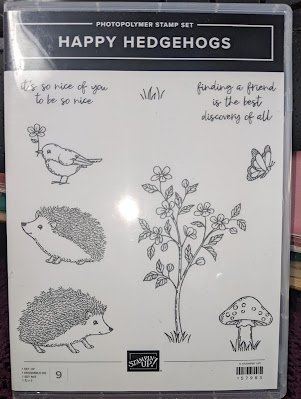
Fun Fold Friday - Happy Hedgehogs

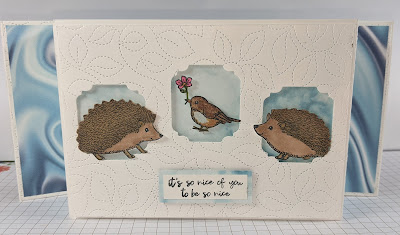
 I have had some real fun this week playing with the Happy Hedgehogs they are so cute! Now cute cards are not usually my thing and I generally leave cute to Cary but I had a play and loved it! 

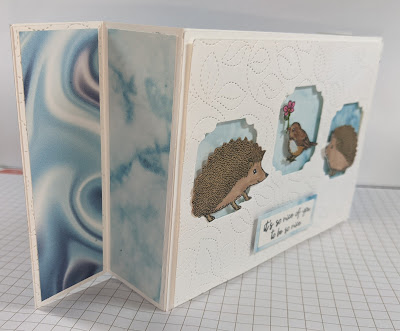
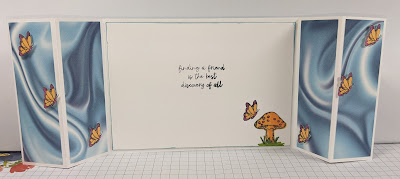
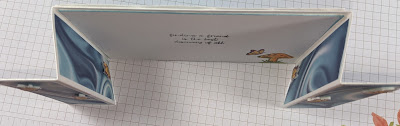
Today's card is half an A4 sheet of paper cut down the long length (portrait) of the card. In the UK that is 10.5cm by 29.7cm. Using Basic Thick White card, once cut, I turned the card piece to landscape and scored lines down the 10.5cm length at 3.7cm and 7.4cm on each side. 

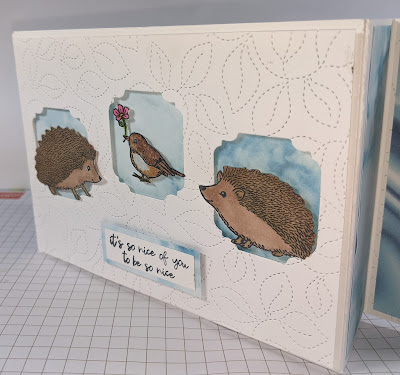
Using next a piece of standard white card 10cm by 14.4cm I put it though my Stampin' Cut and Emboss machine with the Stitched Greenery die. It leaves the lovely effect that you can now see all over the card. I then cut out the 3 small frames by using one of the dies from Ornate Frames dies.

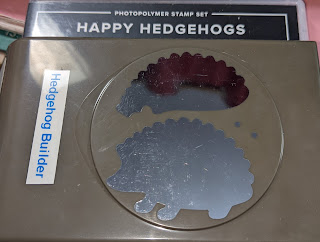
I always have lots of scraps of white card on my desk, I never throw them away if they are a usable size. I stamped and then punched out the larger hedgehog, the smaller hedgehog, butterflies and bird were all fussy cut of course. I added a piece of DSP from the new Saleabration papers called Simply Marbleous which I managed to get for free by placing an order for only £45. With Saleabration there is always extra special items available for every £45 ordered or multiples of. This was one that I happily chose. On one side it's like a silky image as you can see on the sides and on the other side a more cloudy effect of the colours. The papers come in 6 different colours but coordinate with 12 colours plus white of course.

Once all of the images were cut out I added the die cut mat to the front of the card using foam shapes or Dimensionals. Then the characters were added as you can see. I have since added a few Rhinestones since I took pictures to show you.


That's it from me for another week, I do hope that I have given you some ideas to make your own cards? Cary will be back on Monday with another lot of projects to share with you so please stop by and join  her here too. 
 
Until I return please TAKE CARE, STAY SAFE AND WELL but most of all
xxx  KEEP ON CRAFTING  xxx
 
Thank you once again, Gill xxxxx 😍😍😍