Showing posts with label #saleabration. Show all posts

Friday, 26 January 2024

Fun Fold Friday - Sale-a-bration - Sunny Days DSP

Hello again on another cold and wet Friday. My card today is a slight follow on from Cary's post last Friday. Cary's card last week was an easel card and mine is a twisted easel card. There are many different types of easel cards around so it's always just a case of chosing which design you like to make. My sale-a-bration today is the beautiful DSP Sunny Days. It has some really beautiful designs in the papers as well as the gorgeous colours too!

I started by making a basic white card base and cut a green mat 21cm x 10.5cm and scored at 14.85cm. I cut a Shaded Spruce mat 10.5cm x 14.85cm and put it aside for a few minutes. I laid the white card base face down on the trimmer and on the right hand side of the card, scored between the top right corner and the bottom centre. 

see the picture:  

 
The picture above shows the route of the adhesive with the score line directly above the diagonal tape. 

 
This image above shows the angle of the card base before the separate mat is adhered to it.


This image shows moments before the mat is to be adhered to the corners of the triangle on the right hand side of the card base. After adding adhesive around the edge of the triangle, place the seperate mat on top of the scored triangle, match up the outer corners and fix into position. That is the version of my card that I made today. Here it is for real.


I used the Countryside Corners Dies for the Blueberry Bunches stamps, the Double Oval Punch for the raised stand and my Stampin Blends for colouring the blueberries in Blueberry Bushell ink colour.


That's it from me for the week. Thank you once again for joining us this week, I do hope that you have found some thing to inspire you to make yourself some cards this week.  

Cary will of course return on Monday with more projects to inspire you. 
Until I return the following week please take care, stay well and as always....
 

 😍😍 xxx KEEP ON CRAFTING xxx 😍😍  


Thursday, 25 January 2024

This or That Thursday - Sale-a-bration - Flight and Airy DSP

 Hello again. As it's Thursday I have, of course, 2 cards for you. For these cards I have used some more of the gorgeous Flight and Airy DSP again. I coordinated it with the Heartfelt Hellos stamp set once more. Either of the 2 products are available for FREE when you place an order worth £45 or more. In fact for every £45 you spend on products you get another Saleabration, so, £90, £135 etc etc. This time it's all about colour. I used a coloured card base. 

THIS card is in Lost Lagoon card stock and the birds on the DSP the patterned paper is the reverse of the front ones. I used the Nested Essentials dies for this one and I only fussy cut out the one bird which is on the inside of the card.


For my THAT card I used the gorgeous In Colour Boho Blue card stock for the card base and inkpad. I started by taking a strip of the DSP which happens to go in a line going across the page. I then sort of fussy cut around, very slighlty, around the birds and branches until I had a shape that fitted onto the page. I used a scrap piece of the DSP and using the Deckled Circles I die cut out a half circle by placing the die across only a folded half of the DSP. When it was unfolded, I had a wiggly oval which was perfect for the birds to go onto. The pink DSP behind the blue is Bubble Bath and is the reverse of the birds that I used on the front.  Using a mask, I stamped 3 little birds for inside to complete this one. This little bird many of you will recognise as coming from Happy Hedgehogs.


Monday, 22 January 2024

Make it Simple Monday - Sale-a-bration - Detailed Dogwood

 Well here we are again on Monday morning once more. I'm so pleased to be here too as all of last week we were moving thinkgs from one room to the other. My son Jonathan and Daughter-in-law Jemma have recently had an orangery built for me for my crafting. They also decided to replace all of the flooring downstairs except my room! OH BOY!! It's been chaotic! I am so glad to be here creating once more as I've missed it! So this week I am going to show you some projects that I will be making with some of my Sale-a-bration items. The first one is Detailed Dogwood stamp set. 

I have co-ordinated it with another SAB, the Heartfelt Hellos as well as Biggest Wish one of my favourites from the annual catalogue. A simple card today for and I have used another SAB piece of the designer series paper called Softly Stippled DSP.


Friday, 28 January 2022

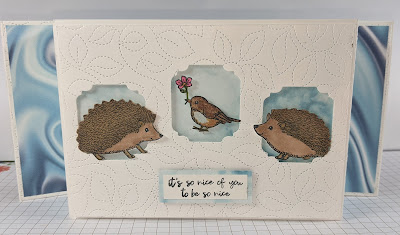
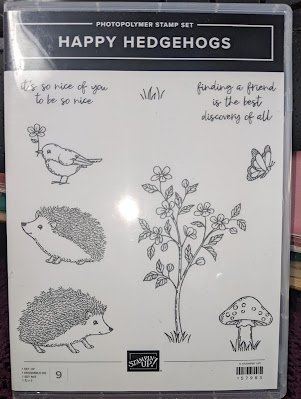
Fun Fold Friday - Happy Hedgehogs

 I have had some real fun this week playing with the Happy Hedgehogs they are so cute! Now cute cards are not usually my thing and I generally leave cute to Cary but I had a play and loved it! 

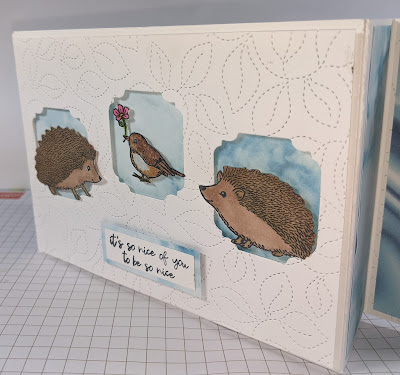
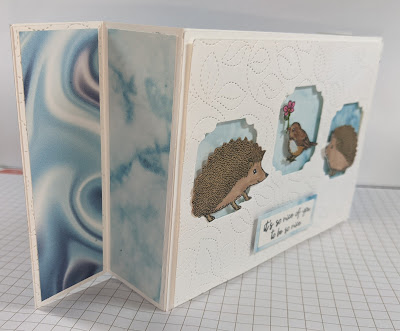
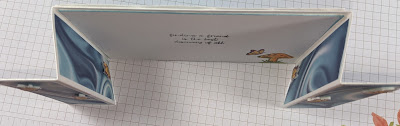
Today's card is half an A4 sheet of paper cut down the long length (portrait) of the card. In the UK that is 10.5cm by 29.7cm. Using Basic Thick White card, once cut, I turned the card piece to landscape and scored lines down the 10.5cm length at 3.7cm and 7.4cm on each side. 

Using next a piece of standard white card 10cm by 14.4cm I put it though my Stampin' Cut and Emboss machine with the Stitched Greenery die. It leaves the lovely effect that you can now see all over the card. I then cut out the 3 small frames by using one of the dies from Ornate Frames dies.

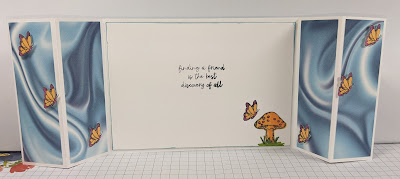
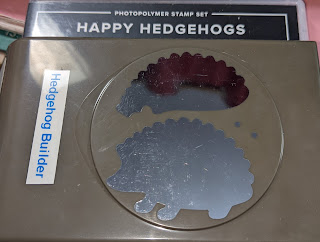
I always have lots of scraps of white card on my desk, I never throw them away if they are a usable size. I stamped and then punched out the larger hedgehog, the smaller hedgehog, butterflies and bird were all fussy cut of course. I added a piece of DSP from the new Saleabration papers called Simply Marbleous which I managed to get for free by placing an order for only £45. With Saleabration there is always extra special items available for every £45 ordered or multiples of. This was one that I happily chose. On one side it's like a silky image as you can see on the sides and on the other side a more cloudy effect of the colours. The papers come in 6 different colours but coordinate with 12 colours plus white of course.

Once all of the images were cut out I added the die cut mat to the front of the card using foam shapes or Dimensionals. Then the characters were added as you can see. I have since added a few Rhinestones since I took pictures to show you.


That's it from me for another week, I do hope that I have given you some ideas to make your own cards? Cary will be back on Monday with another lot of projects to share with you so please stop by and join  her here too. 
 
Until I return please TAKE CARE, STAY SAFE AND WELL but most of all
xxx  KEEP ON CRAFTING  xxx
 
Thank you once again, Gill xxxxx 😍😍😍

Friday, 24 September 2021

Fun Fold Friday - Sale-A-Bration - Peaceful Prints DSP

 Hello for the last time from me this week. Being Friday, I have made a fun fold for you to play with. In fact, I made 2. The first one is using the FREE set, Counting Sheep. The 2nd card is using the FREE product that I used is the gorgeous papers called Peaceful Prints. I coordinated them with the matching stamp set called Peaceful Deer. There is also a matching punch that goes with the stamp set but me being me, I fussy cut my deer out! No surprise there then!  Instructions below the card pictures.

For more information on all of the products that I have used today and the rest of this week, please click HERE and it will open up a new page for you to take you to our shop. If you live in the UK please shop with us. 

During Sale-A-Bration, there is always a brilliant recruiting or joining offer. This time you can choose any of several brilliant stamp and die or punch BUNDLES for FREE once again! If you would like to join our amazing team of demonstrators we would welcome you with open arms. Again, you can click HERE and this will take you to the Stampin' Up! joining page. 

Card no. 1 Counting Sheep


Pulling the little tabs on the outside open... The sheep are different on the reverse!


I was inspired by a card that Jo Blackman made. click here for the link to HERE card

Card no. 3 Instructions

Take a piece of A4 card (UK A4 is 21cm by 29.7cm) and cut into 3 pieces 21cm by 9.9cm. 1 of these cut to 20cm long. Score the other 2 pieces 1cm and 11cm from one end. Using glue or tape, fix the 1cm bands to either end of the 20cm wide piece on the inside of the piece as below. 
Cut 4 squares 9cm by 9cm. Take 2 of them and gut or cut out so you have a border 1.5cm from the edges (below) The other 2 pieces adhere to the reverse of the frames. Once dry, cut out the centre using a craft knife or scissors. On the card base, fold out the 2 pieces that will become the gates on the card. 
 
Place the strengthened frames over the centre of each of the front halves of the card. Mark lightly with a pencil, just the inner edges as shown.
Cut 1 piece of card 8.8cm by 16cm long and score along both long sides at 1.5cm. Turn cross ways and score 1cm on one end, then keeping within the core lines, score at the 2.5cm mark on both edges of the card pieces then cut off at 4cm. Repeat this 3 times for the rest of the length of card. A total of 4 pieces. These will become the frame arms so that it will move left to right. Cut off the 1cm long strip on each of the 4 pieces within the score lines as shown taking the outer edges at an angle as my picture shows. Cut a V at the 2cm marks on both sides. The 2 tabs on each side will become the fixing points, so they can be bent and burnished.
Lay the 1st piece where the 1cm piece has been removed and place it with the pencilled lines on the card front. Before glueing both pieces in on each side, place both of the panels within the marked area  to make sure that they both fit. This is the best time to make any trimmings on these pieces so that they will lift and not overlap when moving the mechanism left and right. I found that I needed to trim 1mm or 2mm off when I made mine.
Once glued or taped in place, the arms will look like those below. Do the left hand side first then turn the card over and repeat the process. The arms will then be facing opposite to each other. 
Lay the frame over the arms to position and check that you don't need to trim any more off. If they move well in both directions, glue the frame onto the little squares so they will look like the pictures below.

This shows the frame now glued into position with movement each side. Use an eraser to remove the pencil marks at this point. On the other version below, I placed DSP onto the front of the card before I added the arms. I like being able to see the design as the arms are moved sideways. These arms will be where the images will be adhered to. There will be images on both sides of each arm.


Cut 4 pieces of card 5.8cm by 5.8cm. Stamp onto these and decorate. Once complete I placed my images 1 behind the other with the images facing out and cut them both at 2.9cm from top to bottom (as I show in the bottom right image) at the same time. I know then that they are the exact size as the other. 

I chose to use the Penguin Place stamp set which coordinates with the next Sale-A-Bration product! They were coloured in using Stampin Blends pens.

  
Laying one half at a time, checking they are in the correct positions, I added the top and bottom images onto the arms. I used different images behind each of the front ones. So when the arms are pulled, it will show the different penguins on each pair of arms.

It was at this next point that I used the Penguin Playmates DSP to decorate my card base. They are also FREE Sale-A-Bration product!


When the card is closed, the images should look nice and flat.


I really do hope that you decide to have a go at making these cards, they really are great fun to make. 

My decorated Card No. 2 using the Peaceful Prints DSP and Peaceful Deer stamp set


Thank you so much for joining me this week. I hope that I haven't bored you too much but instead given you some inspiration to make your own cards too. 
Cary will be back for next Monday to show you her creations. 

Until I return, please stay safe, be well and KEEP ON CRAFTING!
Thank you so much, Gill  x😍x😍x😍x😍x😍x