Showing posts with label #legendaryridedies. Show all posts

Thursday, 13 June 2024

This or That Thursday - Legendary Ride

Today's cards are both rather bright. One has lots of different colours on the DSP (THAT) and the other has only a few very bright 
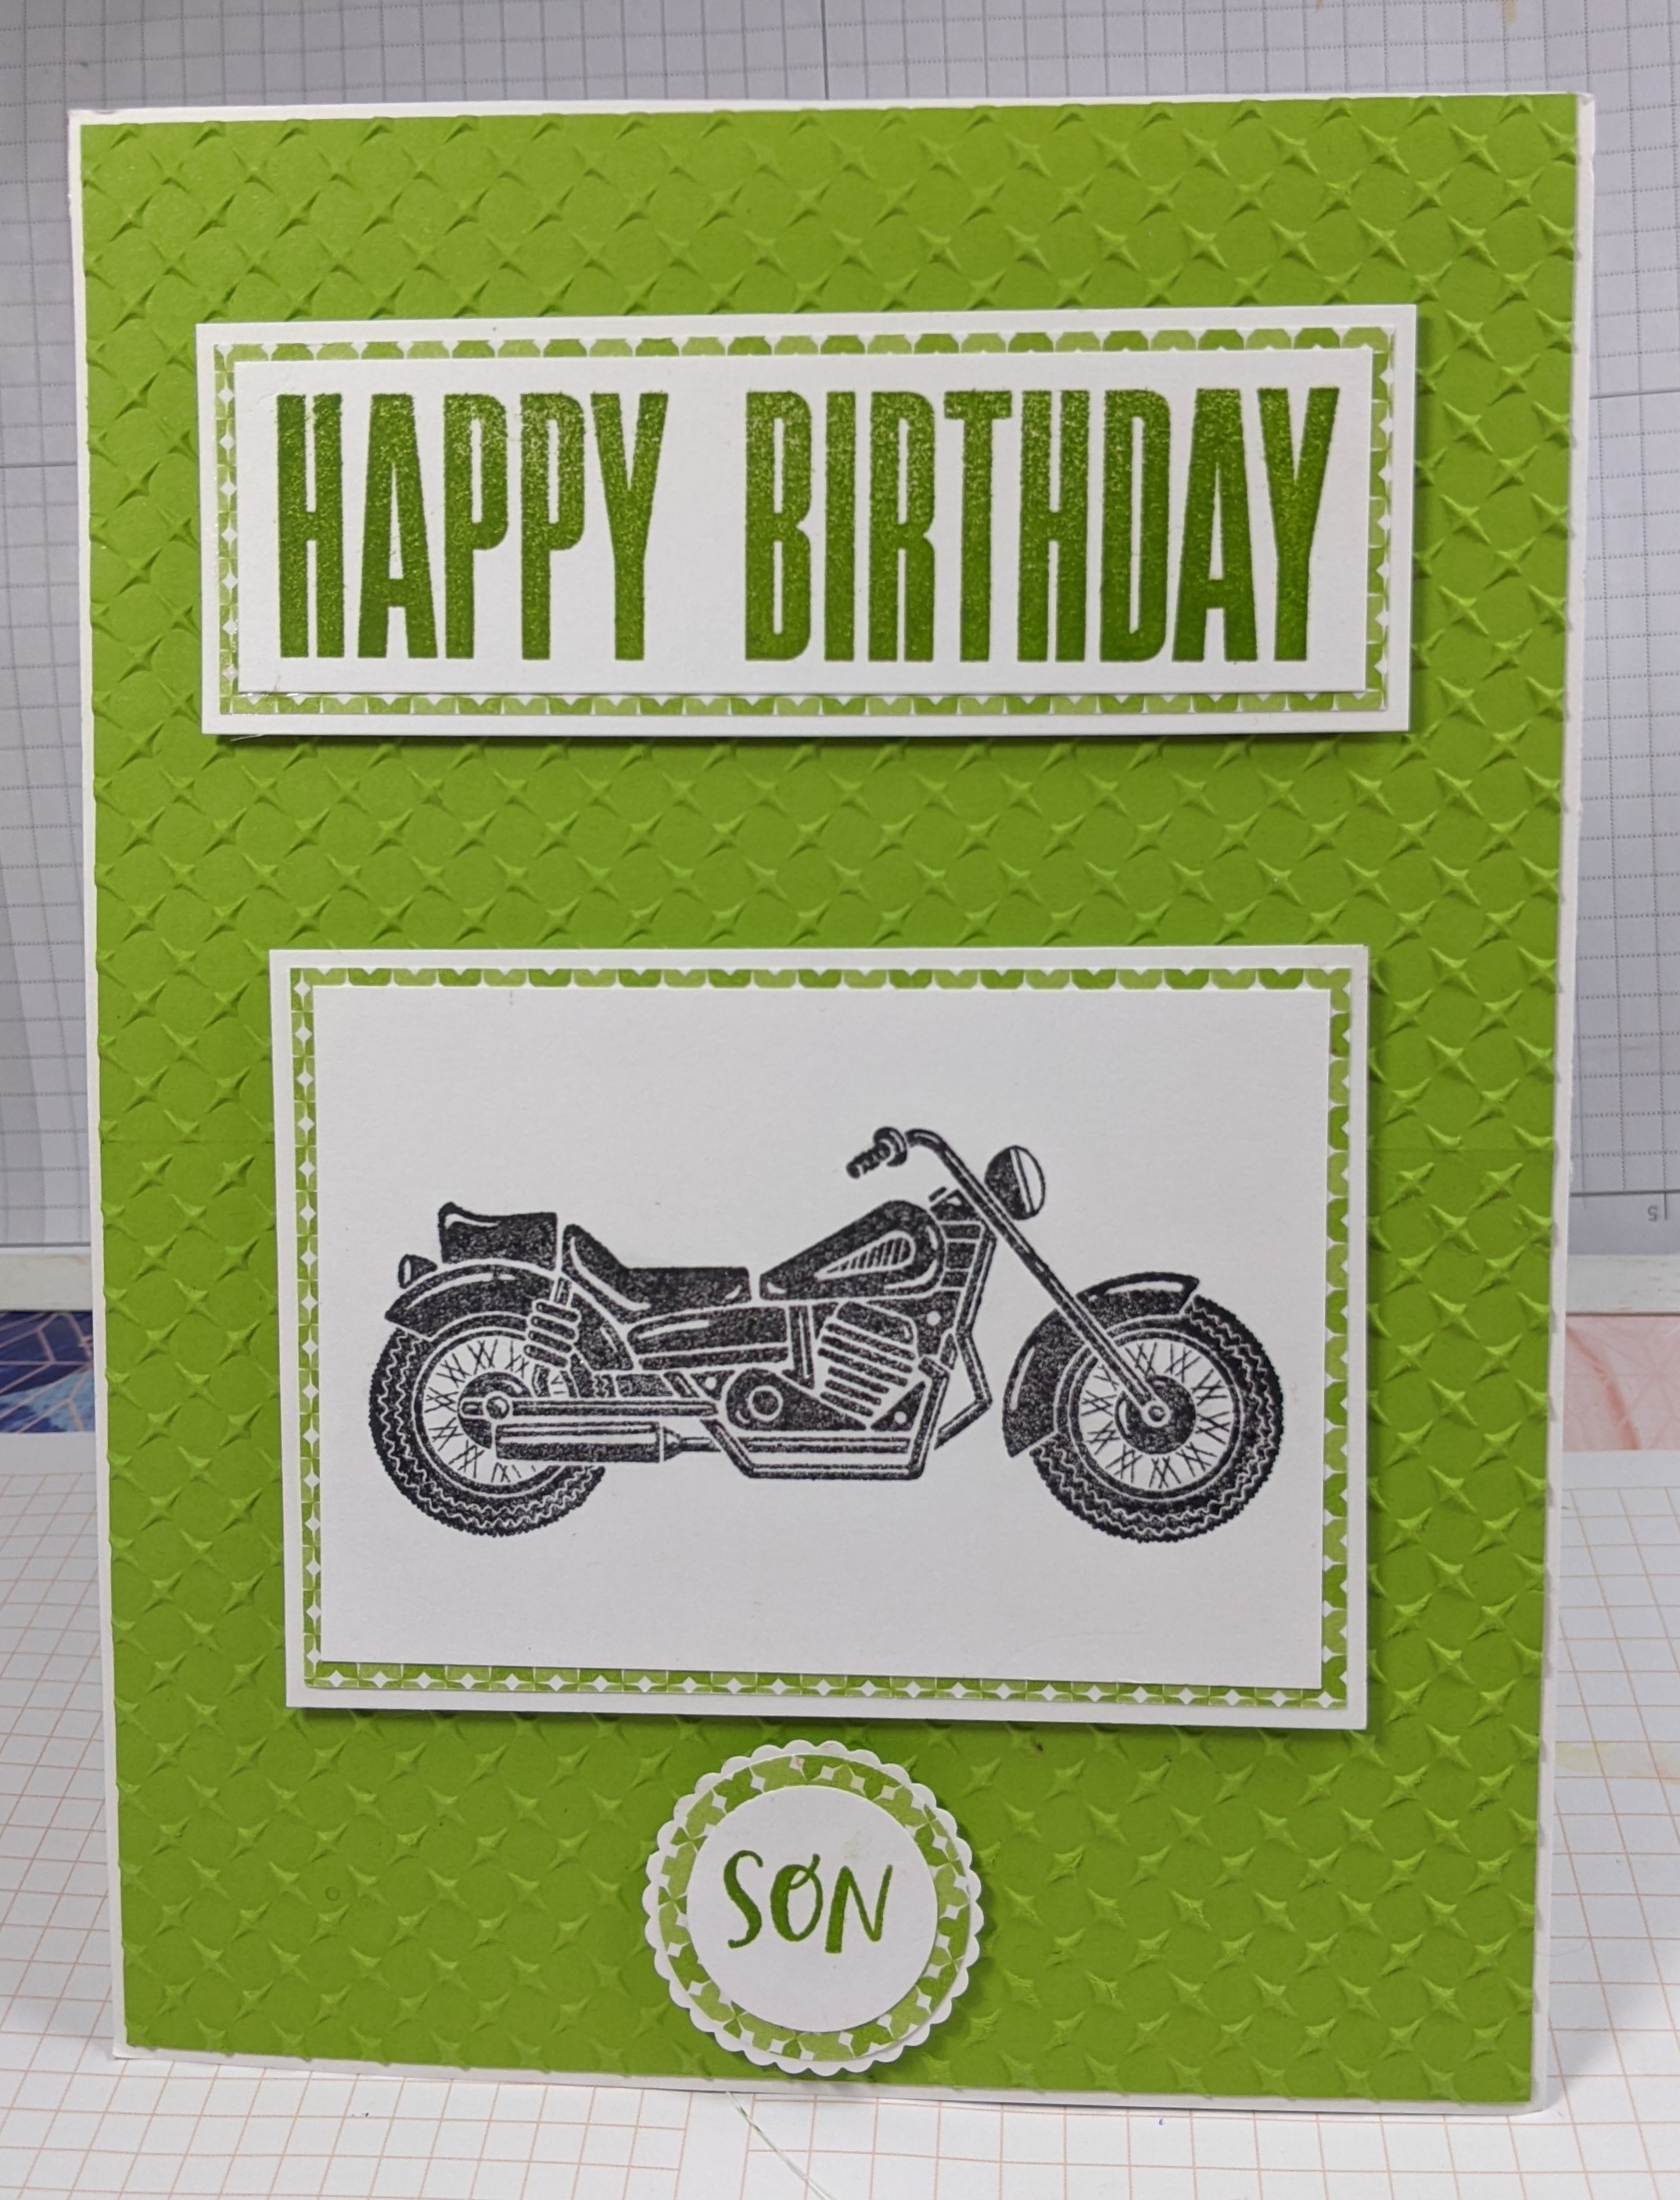
colours on. Using the Legendary Ride again today, I had heat embossed the larger motorbike onto a pale pink background wash that I made yesterday for the Watercolour Wednesday but never used. Then I stamped several of the smaller bikes in some of the colours on the Lemon Lime Twist card. (THIS). The colours that I used were Pumpkin Pie, Calypso Coral and Lemon Lime Twist ink pads. The links here show you the actual colours in more detail than you will see in the ink refil or ink pad.

I wanted to follow the line of the colour wash on the paper. The papers I used today are from the Full of Life pack of DSP.  So very bright but gorgeous! I stamped the bikes in the same colours as the stripes straight onto the DSP and then stamped the motor bikes in the 3 main colours onto white card and die cut them all out. As the paper has diagonal stripes on it was difficult to cut the paper to fit the card but I really don't mine the gaps on some (2) of the corners which I filled up with some of the flames and smaller ones across the card.

THIS


THAT

My THAT card is much simpler. As I had the embossed bike and decided that I wanted some more of the bright colours which along with thousands of others, love this beautiful sheet of paper! I added the motorbike using Dimensionals (foam shapes) to give some dimension as I had done with the first card and the small motorbikes. The only extra thing was on the inside, As I had used a white mat for the inner sentiments, I matched the coloured border from the front onto the edges of the white mat too.


Here are the beautiful papers that I used today. Full of Life DSP

FULL OF LIFE 6" X 6" (15.2 X 15.2 CM) DESIGNER SERIES PAPER
 

Friday, 24 February 2023

Fun Fold Friday _ Legendary Ride

 Well, it's Friday again already! Time really does fly when you're having fun doesn't it? Sunday was my oldest son's birthday and we didn't go out for it like we usually do, we went out for an ice cream lunch! Oh my! It was amazing!!! Waffles and ice cream are a match made in heaven. As I had used the Legendary Ride stamp set for Jonathan's birthday that's the reason I have used it all of this week. It's not just a set for the man in your life but as Tuesday showed, it can also be used for ladies too.

My card for him is a Twist and Pop card. He loved it thankfully too!

I started off making an A5 size card rather than the normal A6 sizes. For the A6 size, you need a piece of card, 10.5cm by 29.7cm (the full height and half the width of an A4 piece of card) This was scored in half at 14.85cm.  I cut a mat in Granny Apple Green card 10cm by 14.4cm and embossed it using the Metal Plate embossing folder before adding it to the card front. I repeated this for both of the inside panels to add a little more detail. Obviously, this was optional.  


Then it was onto the long piece and the mechanism for inside the card. I cut another mat 10cm by 29.7cm and scored it at 7.4cm from each side and 14.85cm for the centre decorative piece. Then another piece which is 20cm by 8cm or 8" by 3,1/4". I then scored along the centre in horizontally and vertically. I marked the panel using a pencil at 6cm or 2,3/8" from each of the 4 corners. I scored between each of the opposite side marks so the piece looked like below.

 Now there are 2 crosses in the centre of the mat. On the top right and bottom left, I marked 2.5cm along from the outside edge and removed a triangle of card from this point to the centre of the long, horizontal fold. To fold it, I pushed the 2 long folds togetherand folded one side back and the other side folded forward. This now shows the centre triangles, one on each side. Holding the bottom of this long piece, I pushed the 2 triangles down into the centre of the panel. Then seperated, the 2 sides to show this shape a little like a house. As the embossed piece of card has been added to the card base, the triangle of the piece below is covered in adhesive. Wet glue or tape, it's your choice. Then open the card and place the top of the triangle onto the centre point, just below the score line, on the bottom of the card base. Repeat this with the upper triangle and this time close the card down onto the piece. Here is your mechanism now. 

 
I decorated my panel before adding it to the mechanism. Once it's been added, it will look like this below and when closing the card, it will twist the card arounf to go into the centre and fold away. 


That just left me to add sentimenents and images onto the rest of the card, As my son is into his motorbike, it was an obvious choice for him. I will be using it again later in the year for my best friends birthday as she would love to be able to ride her motorbikes again!
 
Thank you for joining me again this week. Until I return, take care, stay well but as always

KEEP ON CRAFTING! 

Don't forget too, that this is the last few days to get the fantastic offer to join Stampin' Up! as a demonstrator or just because you llove to craft. £99 gets you £170 to spend on yourself from the current catalogues. The £125 you get the same £170 worth of products plus the option to have a Mini Cut 'n Emboss machine in either white or the NEW BOHO BLUE one for half price!  It truly is a fantastic offer. 
Lots of love
😍😍😍 xxx Gill xxx 😍😍😍


Wednesday, 22 February 2023

Watercolour Wednesday - Legendary Ride

 Did I have fun with today's card!!!! I really did too. I took 3 ink pads all in shades of blues and one by one, I swiped them across a cello bag in different directions. I then spritzed the bag with lots of water to make sure that all the ink was soaked. I then place a white mat across it and made sure that it was well soaked. I even had enough ink for another mat which I will use another time. Then, using Legendary Ride stamps and Pacific Point ink pad, I stamped another motorbike. The image is so crisp and clear. With the bike laying across the watercoloured mat, it looks like it's flying. a few sentiments and then matted onto Pacific Point card and a white card base to complete this one. 

I added a smaller motorbike to the centre of the card and placed a sentiment mini card over the top.