
The box only takes one 12"×12" sheet of card plus paper to decorate ☺
So here is the cutting guide.

I've marked the score lines with a broken line, ------ and the cut lines with a solid line, first score the card at 5" and 7".
Then rotate the card 45% and cut at the 5" mark to the first score line then from the 9.5" mark to the first score line.
Turn the card 90% and repeat the cuts.
Turn the card 45% and cut 1" out from the score line on each side to create the tabs. Turn the card 90% and repeat.
I've used black card so have shown the lines in white below
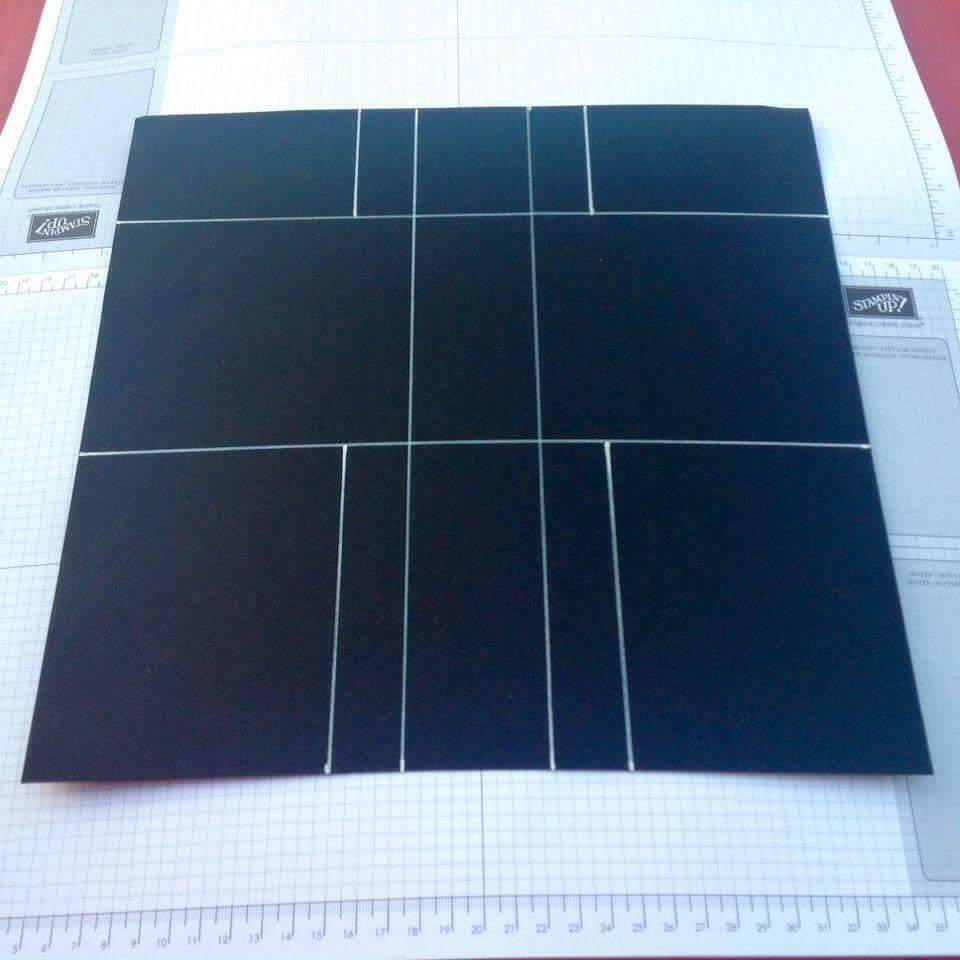
Here is a photo of what the template looks like once all the cutting and scoring have been done


This is my finished example


Well that's it from me next week's inspiration will be provided by Gill ☺
Have a crafty weekend
Have fun
Cary ☺ xx
This is awesome... thanks for sharing!
ReplyDeleteMaryEllen
Hi Mary Ellen thank you for your kind words ��
ReplyDeleteKeep watching because Gill and I will be posting more tutorials over the coming months ��
Have fun
Cary ��