Thursday 30 September 2021

Throwback Thursday Be Jolly

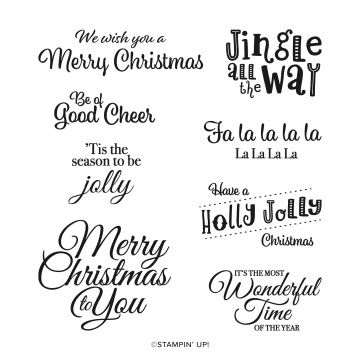
 Today I'm sharing a throwback fun fold . This is one of the simplest folds out there and one that most card makers make when they being.  I have also created one of the first background tequniques that I learned which I called a one sheet wonder using the Be Jolly stamp set.

Called a Z fold the fold is created simply by folding back the card front.  This then gives you lots of areas to decorate which is always a big bonus 😉 

Be jolly Stampin up easy simple fun fold z fold car Christmas

As you can see above I have created a small one sheet wonder for the background using the stamps. I coloured them in using a subtle colour palette to create a softer look. 

Be jolly Stampin up easy Christmas card

I then embossed a panel of white cardstock for the front of the left hand side. I then stamped, cut and coloured a santa and attatched him to the front with a simple sentiment and my card was complete.

Be jolly Stampin up easy Christmas card simple fun fold


Wednesday 29 September 2021

Watercolour Wednesday Be Jolly

 Well today I have no watercolour card to share 🙄 instead I have a quandary! I have made 2 versions of one card and can't decide which I prefer.  Now they both use the  cute Be Jolly stamp set and some of the fun Gingerbread and Peppermint pattern paper.

Gingerbread and peppermint dsp stampin up Christmas card

But the quandary arises around which colour version 🤔  Now I'm not really into traditional red and green for Christmas  especially in cards but sometimes you just have to challenge yourself to work out side your own box!

So which is better the green version...

Be jolly Stampin up Christmas card

Or the red....

Be jolly Stampin up Christmas card

I think the design of the card is fab, it was inspired by one I saw on Pinterest but sadly didn't save so can't give named credit to sorry 😐.  

I think I'm  leaning toward the red version.... but then again the green has its merits.... oh I don't know!! What do you think? Red ? Or Green? 


Be jolly Stampin up Christmas card


Tuesday 28 September 2021

Tips, Tricks and Techniques Tuesday Be Jolly

 Twinkle,  twinkle little star 🌟 .... and that is what inspired today's card 😅 My 2 year old niece is a real performer singing, dancing, making everyone laugh. She's  a real cutie pie! She loves to sing baa baa 'heep and winkle, winkle  and for some reason her singing jumped into my mind as I looked at the Be Jolly stamp set and inspired today's card.

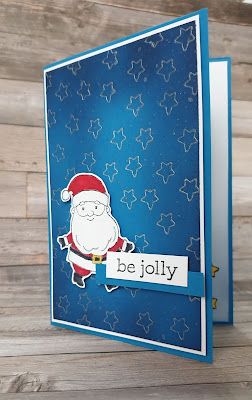
As it's  Tips,  Tricks and Techniques Tuesday  here at 2 Big Girls Crafting I have used a very popular technique called embossed resist.  This technique is where you stamp your image in versamark and use embossing powder which you heat set to create a resistant image. You then apply colour over the top with waterbased ink which colours the cardstock but rubs off the stamped image.

Well usually I do the embossed resist technique onto white or vanilla cardstock and then add colour by blending or watercolouring over it.  But my tip today is for speed you can create your resist onto coloured cardstock!

I started with a vibrant blue coloured cardstock mat called Pacific Point. I stamped the star image in versamark all over the mat and then heat embossed them with silver embossing powder.  I then took a darker shade of blue ink called Night of Navy and blended from the edges inwards. 

Make sure you have a soft tissue to hand to gently buff the colour off the embossed parts. I also find that a little gentle huffing over the embossed areas before buffing helps 

Once I was happy with the ink blending I decided to splater Wink of stella which sadly doesn't show up too well in my photos but in real life adds a real sparkle to the project.

Be jolly Stampin up wink of stella embossing resist

I then I stamped, coloured and fussy cut out one of the Santa's from the stamp set. Added a simple sentiment and mat and layered my blended background and the front of the card was complete.

The inside of the card has a sentiment from another fun stamp set called Holly Jolly Wishes

Holly jolly wishes Stampin up embossing resist technique

I also did a little blending on a corner in the lovely night of navy ink. I  then stamped, coloured and fussy cut out 3 of the stars and adhered them to add a little something to the inside of my card.

Be jolly holly jolly wishes Stampin Up embossing resist technique

With thw inside mat adhered to the bright blue card base I then adhered the front piece to the card base and was happy with the end result. 

Be jolly Stampin up embossed resist technique

I love the combination of a slightly more grown up background with a cute image it will be pefect to send to my niece Rya for Christmas this year.

Have you started your Christmas cards yet? I have now 😉 

Be jolly Stampin up embossed resist


Monday 27 September 2021

Make it Simple Monday Be Jolly

 Wow what a weekend was that??? We held an all day class on Saturday,  our monthly Christmas Craft-a-long and I attended an all day training session on Sunday!!! So I'm  all zoomed out and grateful that today's Make it Simple Monday here at 2 Big Girls Crafting. So as always we'll start the weeks inspiration with some #simplestamping projects. But the best thing about today is that I get to share with you a fun cute Christmas stamp set called Be Jolly 

Be jolly stampin up simple stamping easy card making

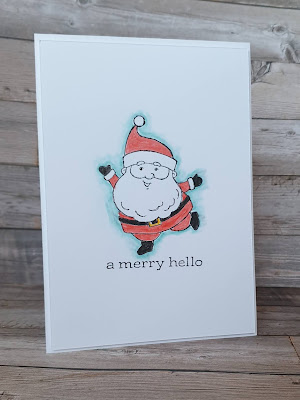
These cute line drawn images are perfect for colouring with all types of colouring tools . For today's inspiration I've chosen to use watercolour pencils.  Watercolour pencils have a nice creaminess to them that makes colouring with them a real treat. To help smooth out the colour I've used a blender pen rather than a water painter as it's less messy 😉

So I started by creating 4 A6 card bases in basic white thick card.  I then cut 4 mats each 10cm x 14.4cm. Next I stamped the images, one per mat, in black ink.

Then the fun began the colouring in!! Do you find colouring soothing? I believe that all crafting is good for our mental health.  It is a great way to promote mindfulness.  And allowing ourselves to let our creative side out is good for us all!

Sooo back to the colouring after colouring all 4 images I used a light blue colour to go around the images to help create the illusion that they are grounded on the page. It also helps the image to pop off the page too.

Be jolly Stampin up easy Christmas cards simple stamping

Be jolly Stampin Up simple stamping easy card making

Whilst the first 2 cards are traditional Santa's, the second 2 images are a fun Christmas tree with a star on top...

Be jolly Stampin up easy Christmas card simple stamping

...and a cute sled with parcels. I topped the parcels with the bird image and coloured him as a Robin redbreast a traditional Christmas image here in the UK. 

Be jolly Stampin up easy Christmas card simple stamping

The fun cards are both traditional and contemporary at the same time. The images are traditional subjects but the designs have a contemporary twist which I like a lot.

As always on a Monday I shall be doing a Facebook Live at 4pm BST over on our page and would love to have you join us. If you can't I'll  post a link to it here once I've been live. 

Be jolly Stampin up easy Christmas card simple stamping


Friday 24 September 2021

Fun Fold Friday - Sale-A-Bration - Peaceful Prints DSP

 Hello for the last time from me this week. Being Friday, I have made a fun fold for you to play with. In fact, I made 2. The first one is using the FREE set, Counting Sheep. The 2nd card is using the FREE product that I used is the gorgeous papers called Peaceful Prints. I coordinated them with the matching stamp set called Peaceful Deer. There is also a matching punch that goes with the stamp set but me being me, I fussy cut my deer out! No surprise there then!  Instructions below the card pictures.

For more information on all of the products that I have used today and the rest of this week, please click HERE and it will open up a new page for you to take you to our shop. If you live in the UK please shop with us. 

During Sale-A-Bration, there is always a brilliant recruiting or joining offer. This time you can choose any of several brilliant stamp and die or punch BUNDLES for FREE once again! If you would like to join our amazing team of demonstrators we would welcome you with open arms. Again, you can click HERE and this will take you to the Stampin' Up! joining page. 

Card no. 1 Counting Sheep


Pulling the little tabs on the outside open... The sheep are different on the reverse!


I was inspired by a card that Jo Blackman made. click here for the link to HERE card

Card no. 3 Instructions

Take a piece of A4 card (UK A4 is 21cm by 29.7cm) and cut into 3 pieces 21cm by 9.9cm. 1 of these cut to 20cm long. Score the other 2 pieces 1cm and 11cm from one end. Using glue or tape, fix the 1cm bands to either end of the 20cm wide piece on the inside of the piece as below. 
Cut 4 squares 9cm by 9cm. Take 2 of them and gut or cut out so you have a border 1.5cm from the edges (below) The other 2 pieces adhere to the reverse of the frames. Once dry, cut out the centre using a craft knife or scissors. On the card base, fold out the 2 pieces that will become the gates on the card. 
 
Place the strengthened frames over the centre of each of the front halves of the card. Mark lightly with a pencil, just the inner edges as shown.
Cut 1 piece of card 8.8cm by 16cm long and score along both long sides at 1.5cm. Turn cross ways and score 1cm on one end, then keeping within the core lines, score at the 2.5cm mark on both edges of the card pieces then cut off at 4cm. Repeat this 3 times for the rest of the length of card. A total of 4 pieces. These will become the frame arms so that it will move left to right. Cut off the 1cm long strip on each of the 4 pieces within the score lines as shown taking the outer edges at an angle as my picture shows. Cut a V at the 2cm marks on both sides. The 2 tabs on each side will become the fixing points, so they can be bent and burnished.
Lay the 1st piece where the 1cm piece has been removed and place it with the pencilled lines on the card front. Before glueing both pieces in on each side, place both of the panels within the marked area  to make sure that they both fit. This is the best time to make any trimmings on these pieces so that they will lift and not overlap when moving the mechanism left and right. I found that I needed to trim 1mm or 2mm off when I made mine.
Once glued or taped in place, the arms will look like those below. Do the left hand side first then turn the card over and repeat the process. The arms will then be facing opposite to each other. 
Lay the frame over the arms to position and check that you don't need to trim any more off. If they move well in both directions, glue the frame onto the little squares so they will look like the pictures below.

This shows the frame now glued into position with movement each side. Use an eraser to remove the pencil marks at this point. On the other version below, I placed DSP onto the front of the card before I added the arms. I like being able to see the design as the arms are moved sideways. These arms will be where the images will be adhered to. There will be images on both sides of each arm.


Cut 4 pieces of card 5.8cm by 5.8cm. Stamp onto these and decorate. Once complete I placed my images 1 behind the other with the images facing out and cut them both at 2.9cm from top to bottom (as I show in the bottom right image) at the same time. I know then that they are the exact size as the other. 

I chose to use the Penguin Place stamp set which coordinates with the next Sale-A-Bration product! They were coloured in using Stampin Blends pens.

  
Laying one half at a time, checking they are in the correct positions, I added the top and bottom images onto the arms. I used different images behind each of the front ones. So when the arms are pulled, it will show the different penguins on each pair of arms.

It was at this next point that I used the Penguin Playmates DSP to decorate my card base. They are also FREE Sale-A-Bration product!


When the card is closed, the images should look nice and flat.


I really do hope that you decide to have a go at making these cards, they really are great fun to make. 

My decorated Card No. 2 using the Peaceful Prints DSP and Peaceful Deer stamp set


Thank you so much for joining me this week. I hope that I haven't bored you too much but instead given you some inspiration to make your own cards too. 
Cary will be back for next Monday to show you her creations. 

Until I return, please stay safe, be well and KEEP ON CRAFTING!
Thank you so much, Gill  x😍x😍x😍x😍x😍x

Thursday 23 September 2021

Throwback Thursday -Sale-A-Bration - Feels Like Home

 Well the sun is sort of shining, the sky is still covered in cloud but it's warm here thankfully, so that's a bonus for being stuck indoors today. Today I have used one of the most gorgeous stamp sets from this round of Sale-A-Bration stamp sets, it's called Feels Like Home. It is just the one main image, 2 smaller ones and 5 sentiments. It's just brilliant. I love it. 

I stamped the image onto a white card mat and then had fun colouring it in using the Stampin' Blends pens. I was going to colour the wall but decided in the end to leave it as it is. I die cut the 2 frames and the scalloped edge of the card using the amazing Scalloped Contours dies.  I used the beautiful bright red of Poppy Parade as the background mat and love the way that the picture just pops off the card. The Poppy Parade mat inside was first stamped with the vines and 1 of the sentiments from the same set and the inside ones are from In Your Words stamp set once again. 

For more information on the products and Sale-A-Bration information, please click on the link HERE and it will open up in a new page for you so you don't lose your place.