Tuesday 30 November 2021

Technique Tuesday - Whimsical Trees

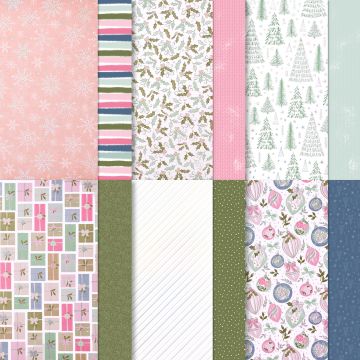
My card today is another straightforward one. Using the stamps from Whimsical Trees I started by stamping a number of the medium sized trees in the gorgeous dark green of Evening Evergreen. I did stamp too many as I only used the 3 in the end! I stamped them onto a scrap of Basic White card and then fussy cut them out. Then, I cut and scored a C6 card base and then cut off 4cm from the front. Using a C6 white mat, I started to score it diagonally from corner to corner every 0.5cm then moved it to the next 0.5cm mark until the end. I started in the middle so once 1 half was completed, I turned it around and continued the same on the other half of the card. Then I turned it around 180 degrees and starting in the centre I began scoring in the opposite direction. I completed it in both sides of the card and ended up with the small diamond shape pattern. Once this was complete, I cut the mats to size and added some of the Pale Papaya Open Weave Ribbon to both pieces of the white mats before adhering them to the card base.

After cutting the trees out, I fixed them with foam shapes (Dimensionals) to make them stand out more. A stamped image for the inside and a few messages and this card is complete.


I went crazy with the Rhinestones once again to complete this card.
 

Monday 29 November 2021

Make It Monday / #simplestamping - Whimsical Trees

Hello on this bright and sunny day. It's gorgeous here...if you are indoors! It's VERY cold outside. A typical winters day. It's a good job then that I'm here crafting. This week I am going to show you some of the cards that I've made using this gorgeous stamp set, Whimsical Trees. It actually comes in a whole suite of products called Whimsy and Wonder. It includes not only the stamp set but dies, ribbon, die cut snowflakes and DSP (Designer Series Paper or as many believe too, Double Sided Paper) Each sheet IS double sided but one side on all of the 12 sheets has a silver foiled effect on. Those of you who have been able to get it are extremely fortunate as it has currently been put on stop for ordering due to high demand. 😞

WHIMSY & WONDER 12" X 12" (30.5 X 30.5 CM) SPECIALTY DESIGNER SERIES PAPER 

As it is make It Simple Monday or #simplestamping I have made this very simple card. Using the lovely shade of lilac in Fresh Freesia, I took a piece of sponge and smooshed some ink in the same colour over the front of the card mat then using the amazing really dark green of Evening Evergreen stamped the tree and a message to the front. I also added a little simple feature of a line all around the white mat to 'frame' the image. I used my trimmer for this and just scored the lines. I repeated the sponging and added another message to the inside. I decided then to step up the card and made another similar.


Again, I used the trimmer for the score lines around the front mat, the sponge for the background colour and this time I stamped one of the smaller trees over the sponging using the same colours. I then took another piece of white and stamped the big tree onto it. This time I added the spotty stamp over the top to look like the lights and added it to the mat. A strip of the matching Evening Evergreen ribbon, a few Rhinestones and a message to complete the second card for today. 


This only shows that with a little extra, you can dress a card up very easily.


Friday 26 November 2021

Fun fold Friday Happy Holly-Days

 Today is fun fold Friday here at 2 Big Girls Crafting except this time! Sadly my partner was taken into hospital yesterday before I had finished my project for today.  So I'm  sad to say there is no project to share just a picture of the mess that I left my work space in!...


So I'm  sorry to say that I've got to end my week of inspiration using the lovely  Happy Holly-Days stamps on a bit of a duff moment. But as always there's always next time.

Next week please join me to see what inspiration Gill shares with us here on our blog.

Have a nice weekend and I hope you get to have some crafty fun.

Cary xx

Thursday 25 November 2021

Throwback Thursday Happy Holly-Days

 What were the first tools you brought when you started your creative journey? One of the first crafting tools I brought was a punch. I loved how it cut things out with no fuss and bother and they aren't too costly.  Both things that matter when you first start out. The punch I'm using on todays project is one that coordinates with the Happy Holly-Days stamp set and is called Holly Border punch.

Holly Border punch stampin up Christmas card

This punch is so versatile.  You can punch out a continuous piece,  you can use the negative as well as the positive and you can also do what I did for this piece and use it in specific areas. Another nice thing about this that if you purchase it with the coordinating stamps as a Bundle you save 10%! 

The other thing that I enjoy about using punches is that you can use inlay techniques. For my project today I punched some from a bright red cardstock called poppy parade. I then used just the red berries. 

I took a mat of white cardstock and punched just one sprig at each corner. To achieve this I suggest working from the reverse of the punch so that you can see where you're  punching.

I then stamped my sentiment and adhered the mat to a mat of a beautiful rich green cardstock called shaded spruce. Next I inlayed the red berries into the spaces in the punched spaces. I then matted that onto a white mat and placed it onto a shaded spruce card base.

I next stamped the robin onto a piece of white cardstock in memento black ink. To colour my robin I used my Stampin Blends which are alcohol markers. Next I fussy cut him out and adhered him to the front of the card. 

Holly Border punch Stampin Up Christmas card

 For the inside of the card I added a white mat. Then al used some of the white punched holly leaves and red berries to decorate the bottom right hand corner. It isn't particularly visible in the picture but in real life adds a touch of elegance to the project.

Holly Border punch Stampin up Christmas card


All in all a rather traditional card using some older techniques and traditional colour palette. But strangely I think it has quite a clean and contemporary feel to it! Maybe it's the crisp white 🤔 maybe it's the less fussy look 🤔 all I know is that it is a stricking card in its own way and one I'm happy with.

Holly Border punch Stampin up Christmas card


Wednesday 24 November 2021

Watercolour Wednesday Happy Holly-Days

 Ohh did I have fun making to days card 😁 I love making unique backgrounds for my projects and today's  watercolour inspiration was one such messy session. I created  backgrounds then chose the one which I was going to use with the Happy Holly-Days.  

Happy Holly Days Stampin up watercolour smoosh backgrounds

The picture above is of somw of the backgrounds I created. The technique is super simple but can get rather messy. It is also quite addictive so my tip is have a session making them the have a pile of beautiful backgrounds ready to use for another day.

First gather all that you need and make a clear space to work in. You'll need paper, reinkers, water spritzers, a waterproof mat , a heat tool if you're impatient 😉 and I always have kitchen paper to hand. The waterproof mat could be a  silicon sheet or a nonstick sheet or a piece of acetate.  

First spritz an area on the mat then carefully place a few drops of reinker into the drops of water. Next spritz it all again to get the colour to move around. 

Then take your piece of cardstock , pearlescent, watercolour or thick are best, and spritz it all over. Now with the wet side facing down dab it into the ink. You are going to be building the layers of colour up so don't be tempted to over do the first run. Let this first layer of colour dry . If you're impatient like I am you can use a heat tool to dry the layer.

Now if you're using just one colour add more reinker if necessary and dab the piece in again. If you're using more than one colour clean your sheet and repeat making sure to dry in-between layers.

Once you're happy and the piece is dry you're ready to move on to the next step. I chose to stamp in versamark then heat emboss using white powder but please remember to use an anti static bag before stamping and embossing.

I also stamped a robin on a seperate piece of background and heat embossed in white powder then fussy cut him out. 

I mounted the background  onto a mat of white cardstock.  I then layered the piece onto the card base at a slight angle.

I placed the fussy cut robin into place with his tail hanging over the edge.

Happy Holly-Days Stampin up watercolour smooshing contemporary Christmas card

A splash of ribbon and a bow and I was done. I am very happy with my contemporary, bright, tie-dye looking Christmas card.  I know it's  not to everyone's taste but I know just the right person for it 😉

Happy Holly Days Stampin up watercolour smoosh contemporary Christmas card


Tuesday 23 November 2021

Tips tricks and techniques Tuesday Happy holly- Days

 Today I'm sharing a card made using several techniques. These techniques are not new but they are good ones and sometimes thats what can make  cardmaking fun.  As soon as I saw the holly sprig in the Happy Holly-Days stamp set I had a colour palette in my minds eye. The colours are a subtle version of the traditional red and green.

First I created a background mat by stamping the holly sprig all over in black memento ink on basic white cardstock.  I then used alcohol markers in  a soft pink called flirty flamingo and a gentle shade of green called mint macaroon to colour them all in. This stamp is ideal for this type of stamping as it doesn't matter which way up they go so random stamping is easier 😉

Next I used a set of nested rectangular dies from a set called Scalloped Contours .This set of dies has several rantangles with  scalloped edges that nest together beautifully. 

Scalloped Contours dies Stampin Up

I used the second and third sized dies and placed them onto my stamped mat and cut them out together in 1 pass!. I then cut mats to fit behind each rectangle in the same mint macaroon coloured cardstock.  I then popped each layer up onto 3d foam. 

I covered the card base with the first layer then added the next slightly offset.  Then I added the next layer.  For the final plain layer  I used the fifth die as a cutting guide to cut a mint macaroon cardstock layer. This technique is called Triple stamping. My twist on it is to set the layers slightly offset or wonky 😉

I  then took a strip of vellum and heat embossed the sentiment in the middle with white embossing powder. My tip for how to secure vellum is to wrap it around your project and secure it there hidden from view 😉 

Happy holly days Stampin up layered Christmas card

I was really happy with the way this project turned out. The colour palette is just as I imagined it slightly mid century modern 🤔 well that's what I think 😅

The depth achieved by using 3d foam between the layers gives it just enough interest. Whilst the vellum allows the sentiment to not get lost amidst all the pattern!

Happy holly days Stampin up layered Christmas card

All in all a pretty contemporary take on a traditional card .

Happy holly days Stampin up layered Contemporary Christmas card


Monday 22 November 2021

Make it simple Monday Happy Holly-days

 Welcome to #makeitsimplemonday here at 2 Big Girls Crafting on this bright and oh so chilly Monday morning. I  love these bright, clear days in winter even if it is cold they just remind me that the sun hasn't gone away forever! Another reminder of hope for many is the robin. An old saying say's that when a robin is here a loved one is near. I thought of that saying as soon as I saw the beautiful line drawing stamp in the Happy Holly- days stamp set.  Robin's are such happy little birds with their bright red breast they can often been found in the gardens of many British homes.

Happy holly days Stampin up simple stamping easy card making

The robin image is just right for Christmas as well as all year round. Robins have featured on Christmas cards going back since the Victorian's began sending them. 

So for today's #simplestamping cards I have used 2 different card bases. The first is a basic white card. I stamped using memento then used watercolour pencils to colour the robin in. I used a light blue pencil to gently outline the bird and create a shadow/ puddle for him to stand in.

Holly Holly days Stampin up simple stamping easy Christmas card

A simple sentiment and the card was finished. I then decided to replicate the card but on a kraft coloured card base. I like this colour to stamp and colour on because it gives a lovely soft effect. I used the same watercolour pencils to colour the robin in. 

Happy holly days simple stamping easy Christmas card

Instead of using a light blue pencil to outline the bird I used my trusty Chalk marker pen. I love the effect of the soft white on the crumb cake.

How different do they look just by using different card bases? I love experimenting with stamping and colouring in on different coloured cardstock.  Have you ever tried different colours?

Happy holly days Stampin Up simple stamping easy Christmas card


Friday 19 November 2021

Fun Fold Friday - What A Year!

Well, what can I say? What A Year Memories and More cards are amazing! I have had a real blast this week making cards with them. Today's card has been has been really fun to make too. This whole week I have been using the cards to make greetings cards instead of journalling or scrap booking with them. They are so very versatile. The cards that I've made, I am very pleased with and if I want to, I can still do some scrap booking with the many cards that are left over. 

The pack contains 52 different cards and 4 sheets with peel off stickers on too. There are 26 each in 2 different sizes of which the small ones are 7.6cm x 10.2cm or 3" x 4" and the larger ones are 10.2cm x 15.2cm or 4" x 6". They are all double sided too so you get to choose from 104 different images plus the peel off stickers too. There are 46 images and 26 different 'weeks of the year' ones too. I have included picture of these at the end. Stampin' Up! also do the journalling pockets in the smaller size of 6" by 8" they call them Photo Pocket Pages

Today's card is and easel card. Once again I have used 2 more of the cards and cut into 2 others for the sentiments and one of the peel off sentiments too.  This card was made with a Polished Pink C6 card base 21cm by 14.85cm and scored at 10.5cm and 5.25 on one side and then was folded in half to form the 'hinge'. I cut another C6 mat 10.5cm x 14.85cm this is to become the 'board' on the easel. I added adhesive to one of the long edges on the board and onto the 2nd fold nearest to the edge on the main card. You can see how they go together best in picture 3 below. By adding adhesive on opposite edges of the 2 different pieces, they attach together very easily. Then I had the fun of decorating the card. As I mentioned before, I cut the 2 large sentiments from 2 other cards and mounted them onto some more of the Polished Pink card scraps. They were both added to the card using foam pads(dimensionals). I completed the card with some more of the gorgeous Artistry Blooms Sequins


I do hope that you find something to celebrate and enjoy the moment.

If you have ever wondered about becoming a demonstrator with Stampin' Up! now is the perfect time to join our amazing team of people. For this November only the JOINING fee is only £75 a saving of £24 on the normal cost. For only £75 you get to select a whole kit worth up to £130! ALL of your own choice, no one to tell you that you must order this or that. It's all chosen by YOU alone. On top of the £130 worth of products you will receive free of charge, a full kit of catalogues and all the paperwork you will need if you want to sell to your own customers. It really is an amazing offer! If you live in the UK or Europe, please consider joining our amazing team. We have, we believe the best group of people ever. Everyone is unique, individual and amazing in everything they do. There are no compulsory meetings or trainings whatsoever and once you have your kit, it's YOURS to keep. No further charges or persuading you to sell more. It is all run at your own pace. We believe you should demonstrate YOUR WAY

    Thank you for joining me this week and I do hope that I have been able to give you some ideas to make your own cards too. Cary will be back next week to share her amazing creations with you once again, please pop by and join her too. 

Until I come back, please take care, stay safe and well but most of all .....

KEEP ON CRAFTING 😍😍😍


Thursday 18 November 2021

Throwback Thursday - What A Year

Today I have done what I always find so very relaxing. I fussy cut out the pieces for not 1 card but 2! Taking a piece of paper or in this case, one of the cards from the What A Year Memories and More cards and cut it to pieces! The first card was in lots of little pieces too. I found one of these amazing cards that has Hello Sunshine printed on and added it to a Basic White C6 card base.The other card that I cut into had a swathe of flowers and leaves from one side, curving down along the bottom and slightly up to the other side. As you'll see I even cut the tiniest of leaves! Using the foam pads (Dimensionals) I stuck each piece back onto the new card. I added a few of the Artistry Blooms sequins once again, onto this time, the centre of the flowers and die cut sentiment from another of the smaller cards to complete this one.

Nothing complicated once again but the pleasure that I get from fussy cutting and making a card is just so rewarding, it's an amazing feeling.

Another amazing feeling is the buzz I get from being part of our amazing crafting family. For this November only, Stampin' UP! are offering a JOINING special offer of only £75 for your choice of £130 worth of product! That is such an amazing bargain! Just imagine the pleasure you can have by choosing your own kit, joining an brilliant team of crafters and most importantly sharing the love of making cards with friends and family. 

There is nothing better than giving or receiving a hand crafted card.   

In addition, from today until 18th November, there is a fantastic sale too! Just imagine stocking up on cardstock at 10% off, 15% off Ink Pads and a whopping HUGE discount of 20% off of Dies. ALL of the discounted products are in the ANNUAL Stampin' Up! catalogue. If you don't have one, contact either Cary or me and we will happily send you one. The quicker way to take benefit of the sale is to go online to this link HERE and see the annual catalogue in all its glory. GO ON, treat yourself...you know that you want to!


Below is the 2nd card that I made. Again, I used my scissors to cut the houses out and this time I raised some of the houses onto foam pads and the other 2 between them were fixed flat with Multipurpose glue. The What A Year cards also have several sheets of peel off labels and sentiments one of which was added to the front. On the inside, there wasn't a phrase to add so I cannibalised the letters from some of the days of the week on one of the cards and made the sentiment.


Wednesday 17 November 2021

Watercolour Wednesday - What A Year

Well, I am supposed to be showing you a watercoloured card today but I'm not perfect!! I cheated! As you may be aware, I am using the Memories and More cards this week and today's card reminds me of a watercoloured card. Using the What A Year cards I found that some of the cards have an image that looks like it's been watercoloured so I have used one of them. These cards are so varied and fun, pretty and strong, simple and vibrant, they are just brilliant! I have done a little scrap booking in the past but it's not something that I have ever kept up but thankfully I have kept all of the photos of the family and I hope that one day, I can sit and journal or scrap. The beauty of these cards too is that you can make greetings cards with them as I have here. I started with the misty sky background and placed it onto a C6, lovely soft grey colour of a Smoky Slate card base. To me it was calling out for the birds and one of the smaller sized cards had just that. I started cutting 1 or 2 of them and ended up with several ready to add to some of the cards. I used foam dots to raise the birds but I curled them first to give a softer effect. 

Another card was once again cannibalised for the 'Always' and I added a piece of the beautiful Pool Party Sheer ribbon over the centre. I was lucky too as there was another card that I was able to use for the inside to complete the card. Using the Artistry Blooms Sequins once again, I completed this one.        Not a stamp set in sight!!!


Tuesday 16 November 2021

Technique Tuesday - What A Year

Today's card is not really a technique, it is a very simple, quick card with a little added extras. Using the What A Year Memories and More cards, today I have used the gorgeous dark grey of Basic Gray as my card base and this beautiful card in the soft muted green of Pool Party and lots of bees. The added extras are the 2 hearts. These were both punched out using the brilliant Heart Punch Pack, a set of 2 heart punches. One has scalloped edges and the other is slightly smaller but has plain edges. They were also cut out in the Basic Gray and Pool Party card stock. 

In the pack of Memories and More cards are a number of sheets of die cut, adhesive labels ready to peel off and add to a card as I have done with the Hi Friend and the inside one of Lovel You So. There are many more shapes, sentiments and images, all ready to peel off and add as you want to. 

To complete this card, I added another of the double-sided cards to the inside before adding the peel off sentiment. Yes, that's the added bonus, ALL of the cards are double-sided! 2 for the price of 1. Some more of the lovely coloured sequins were randomly added to give a little sparkle to the card.


Monday 15 November 2021

Make It SImple Monday - What A Year

Hello and welcome back. This week Cary and I attended our team training and we were using the What A Year Memories and More cards. So as I had started to make some of them, I thought that I would continue for the rest of this week and show you what can be made using them. Yes the cards are originally made for journalling or scrap booking but they are equally as brilliant for making some amazing greeting cards. The cards come in 2 different sizes. 10.2cm by 15.2cm or in imperial measurements 4" x 6" are the larger cards and the smaller ones are 7.5cm by 10.2cm.

My first card is of course in red. Poppy Parade to be precise. Those of you who know me know that red is MY favourite colour of all time. It doesn't matter what colour red, I just love all reds! Ok, I digress! 

All I have added to the kit is my own card stock to make the card bases. There are cards and envelopes to go with the card images and messages but I don't have them. YET! All I have done is taken one of the smaller mats and added foam pads (Dimensionals) to the back of the card. I had a strip of White Glittered Organdy ribbon hanging around so I cut it in half and added a strip to the top and bottom of the card mat. A few sequins from Artistry Blooms and another mat was 'cannibalised' for the Happy on the inside. 

That's was it finished. The card took me only a few minutes to put together which shows that anyone can make a card quickly and simply and send to someone else.