Friday 29 December 2023

Fun Fold Friday - Detailed Dogwood

Hello again and here we are on the 2nd and last day of this week. Once again I am so sorry for the lack of posts this week and I am positive that Cary will be more than efficient than me in making projects for next week, even though it is New Year. My fun fold card for today is again using the Detailed Dogwood and I mixed it this time with the sentiments from the NEW stamp set called Heartfelt Hexagon. Yet another lovely stamp set again!

This one is a triple folded card that I have seen around on different sites by different designers. I started with a piece of Basic white thick card which was 25cm by 10.5cm (9,3/4" by 4,1/4"). Along the long back edge, I scored at 2.5cm, 5cm, 7.5cm and 10cm then using a pencil I scored a line to the first scored line from the left hand edge to 2cm along this first line. 

2cm in from the right hand-edge I scored a short line from the 2nd score line to the 3rd line.  The 3rd score line at 2cm from the right hand edge this time. See the picture below. I then cut a straight line between the pencil mark and the next scored line. I then have 2 short, straight lines that cross the original score lines. Starting at the right hand opening edge this time cut the first straight line as I have done on my card and then diagonally up to the next short straight line. Now cut a straight line then a diagonal line between the final 2 score marks. This will then form the backs for the mats to the fronts of each panel.  Fold the 4 edges in starting with a valley, then mountain, valley and mountain again. Use a bone folder to burnish each of the folds.


Choose the colours of your mats and cut them from back to front at 

10cm by 14.4cm (Back of card) 

12cm by 9cm (inside)

7cm by 10cm (front)

I used Lost Lagoon card and pieces of DSP from the Snowflake Magic 12" x 12" Speciality papers.


The flowers were all from the Detailed Dogwood stamp set and I used Bubble Bath pink, Lost Lagoon. Smoky Slate for the images and Lemon Lolly for the yellow.


Overhead view


That's it for me for this week. Have a truly magical and Happy New Year but as always.....

Take care, Stay safe and obviously 

😍 😍 xx KEEP ON CRAFTING! xx 😍 😍 

Thursday 28 December 2023

This or That Thursday - Detailed Dogwood - Happy New Year

 Hello, Happy Christmas to those who are still celebrating and hello to those of you preparing for the New Year celebrations too. I hope that you have all had a wonderful time with friends and family. I apologise for my absence this week so far. It has been very busy and lots of very excited little ones with all of the family here so please forgive me for not having posted this week? Now I am here today as everyone is beginning to go home and I now have room to craft once again. I am using one of the free stamp sets from Sale-A-Bration this week called Detailed Dogwood. It's a really lovely stamp set with what I would call a vintage style flower and branch on and it is rather lovely. 
I haven't managed to make the 2 cards as I should have done so once again I apologise. Today's is a simple flower stalk stamped onto a mat, coloured with my stampin' blends pens and I then fussy cut it out. You can just stamp it onto a mat rather than fussy cut out but I added mine using Dimensionals (foam shapes) onto a Fern, embossed mat. 

I have used the soft lemon of Lemon Lolly and soft green of Granny Apple Green card and ink colours on Basic White card. 

So here it is, my welcome back and Happy New Year card to all of you, the sentiment came from Horse and Sleigh


 Happy New Year


Friday 22 December 2023

Fun fold Friday Light the Sky

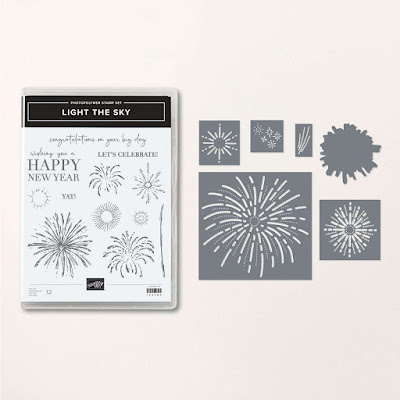
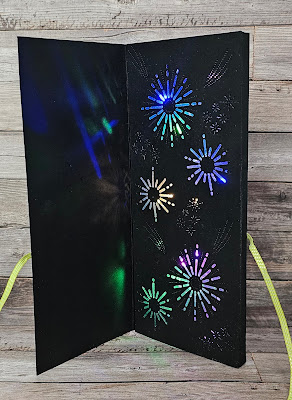
 For my final card for this week...and year in fact! I am sharing a fun card that features the amazing Light the Sky bundle. The dies in this set are amazing.

Light the sky stampin up fun fold fairy lights card

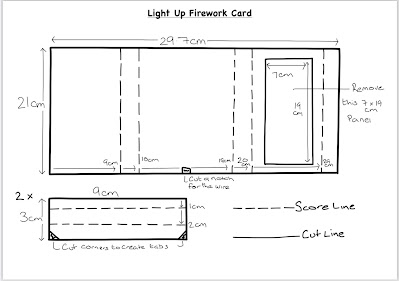
It all starts with a piece of cardstock measuring 21cm x 29.7cm,  a whole sheet of A4 cardstock. I then scored it at 9cm , 10, 19cm , 20cm and 29cm. I then cut a rectangle out of the 3rd large panel that measures 7cm x 19cm.  I call this gutting the center of the panel. It leaves a 1cm border on all 4 sides of the panel effectively making a frame.

I then created 2 end panel from 2 pieces of cardstock each measuring 9cm  x 3cm. Score each at 1cm and 2cm. On the 3rd panel cut the edges so that it creates a tab. 

On the bottom edge of the middle large panel snip a small divot out.

Light the sky stampin up fun fold fairylights card


Now adhere along the non tabbed edge one to the top and one to the bottom along the center panel of the card base. 

Next I took a panel of silver glimmer paper measuring 8.8cm x 20.8cm and adhered it to the center large panel. 

Cut a piece of cardstock measuring 9cm x 21cm and die cut the gorgeous firework details from the piece.

Then fold the card base up to create the box card. I adhered the long small panel by lining it up to the first score line. Then I folded the top extra panel in and adhered that. Next I threaded my micro led fairy lights through the divot in the bottom panel before closing the tab at the bottom of the card.

I used glue dots to arrange the fairy lights inside the card ontop of the silver glimmer paper. The battery pack I adhered to the back of the card with strong tape making sure the switch was easy to use.

Now adhere the die cut panel over the front of the frame turn the fairy lights on and watch them twinkle ✨️ 😍 

To decorate the front I took a panel of card measuring 7cm x 19cm ans stamped in versamark my sentiment.  I then heat embossed it with silver embossing powder. 

I then used the firework stamps and stamped again using versamark all over the panel.  This time I used white embossing powder and heat embossed the images.  I then took my alcohol markers and coloured the white embossed images. I love the effect this gives on the dark card base!

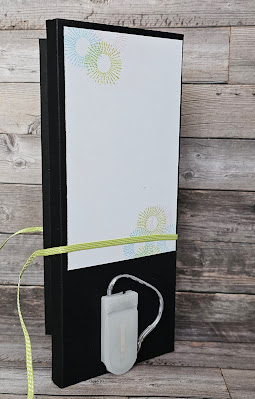
I then took another panel of cardstock measuring  8.5cm x 20.5cm and adhered the coloured panel on it. I then took a length of ribbon and adhered it around the card base so that it will tie the card shut. I adhered the colourful panel over top on the front of the card front using 3d foam.

Light the sky stampin up fun fold fairylights card


On the back I adhered a white panel measuring 8.5cm x 13.5cm so that a message can be written.

Light the sky stampin up fun fold fairylights card


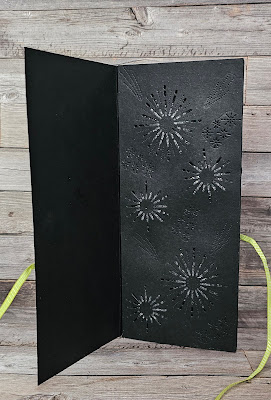
And finally the card was made! Here is the inside in daylight with the lights off..

Light the sky stampin up fun fold fairylights card

The silver glimmer sparkles throught the die cuts. But then turn the lights on and it look way more colourful...


Light the sky stampin up fun fold fairylights card

And here it is in the dark...

Light the sky stampin up fun fold fairylights card


So with this card I wish you a Merry Christmas and all the very best for this holiday season. 

Have a great weekend and please join me next week as we see what wonderful creations Gill will be sharing with us.

Have fun

Cary xx


Thursday 21 December 2023

This or That Thursday Light the Sky

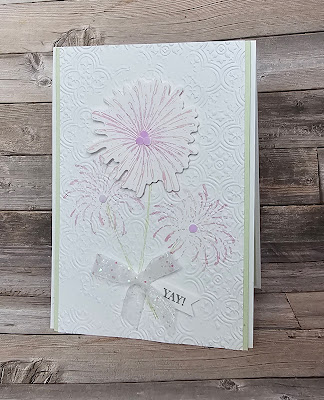
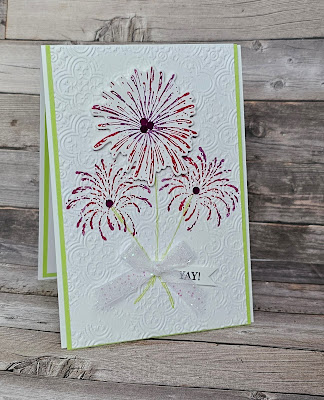
 Today's cards are inspired by my eldest daughter.  When she was just 2 the Seoul Olympics took place. She watched in wonder at the beautiful fireworks at the opening and closing ceremonies.  She was enchanted by what she called the "fire flowers" 🎆🎇. So for today's inspiration I've used the Light the Sky stamps to create flowers.

I started out by stamping my "flowers" onto a plain white mat. After using lots of bold colours this week I decided to use a subtler palette for my first card. After stamping onto the mat I also stamped onto a piece of scrap cardstock one of the flowers. 

I used the Coordinating light the sky dies to cut this single flower out. I then embossed the stamped panel with an embossing folder called distressed tile 3d.  

I then added a small mat of green cardstock behind the panel and added a sparkley ribbon bow and some shiny sequins and the card front was done.

Light the sky stampin up alternative uses card

Now I  just had to make a bolder version using stronger shades of the same pinks and greens.

Light the sky stampin up alternative uses card

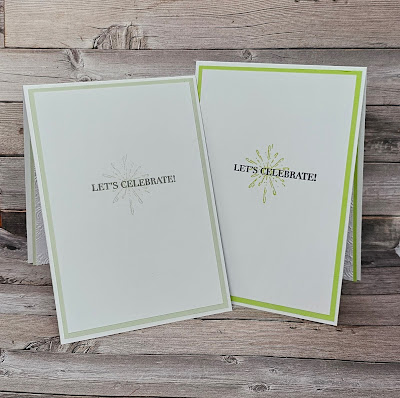
I also couldn't let the insides get left out so stamped,  matted and layered and adhered them to the inside of the cards. 

Light the sky stampin up alternative uses card

So now I am in a quandary which do I prefer? The soft gentle version? Or the bolder one?
Which do you prefer? 🤔 

Light the sky stampin up alternative uses card


Wednesday 20 December 2023

Watercolour Wednesday Light the sky

 Happy hump day 😃 . Today is watercolour Wednesday when we share inspiration that uses ink and water in it's many forms. Today I'm sharing a very simple technique that doesn't have to be messy! Using the fantastic Light the Sky stamps. 

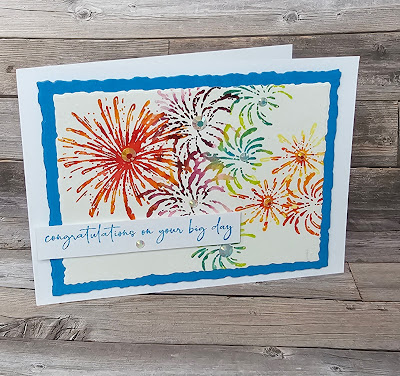
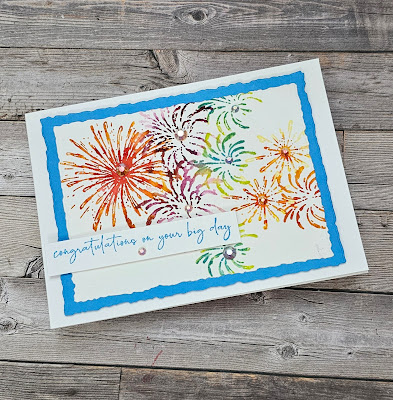
I think this congratulations on your big day card would be perfect for someone graduating. What other occasions spring to mind?

Light the sky watercolour stamping celebrations card

To create the images on the background all you need is a spritzer filled with water,  ink pads, stamps and watercolour paper. 
I inked up the stamps using 2 coloured inks. Ink with the lightest colour first then dab the darker colour over top either in the center or on the edges.
Now take your spritzer and gently mist the stamp. Immediately stamp onto the paper and leave the stamp in place for a few moments to allow the paper to suck up all the ink and water. Then repeat as desired making sure to clean the stamp between each inking to avoid cross contamination of inks.

Light the sky watercolour stamping celebrations card

I love the way the colours blend and sread on the paper. Once dried I die cut the paper using a deckled rectangles die.  I also die cut a coloured mat to go behind the background panel. A simple sentiment stamped in the smae coloured ink as the coloured mat and I was done.

Light the sky watercolour stamping celebrations card


Tuesday 19 December 2023

Tips tricks and techniques Tuesday Light the Sky

 An oldie but goodie today. Called the Joseph's Coat technique it is one that sprang to mind when I was looking at theLight the Sky stamp set. 

This technique starts with a colourful blended background. It doesn't have to be perfect just colourful. 

Light the sky stampin up Joseph's Coat technique celebration card

Next make sure the piece is dry. You'll have added quite a lot of ink so either let it dry naturally or use a heat tool.
Next gather your heat embossing kit. Then using an anti static bag make sure the piece is well dusted.

Light the sky stampin up Joseph's Coat technique celebration card

Now stamp using versamark all over your background and heat emboss using clear embossing powder. 

Light the sky stampin up Joseph's Coat technique celebration card

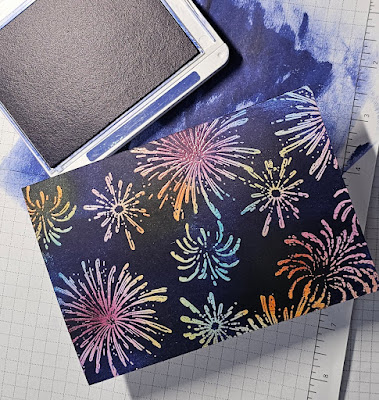
Now the magic starts ✨️ Using a dark coloured waterbased ink rub the ink pad directly over the piece. Top tip work on scrap paper and keep kitchen roll or a soft dry cloth to had.

Light the sky stampin up Joseph's Coat technique celebration card

As you work adding the ink use the kitchen roll or soft cloth to buff the ink from the embossed areas and the colours will shine through. Go over with the ink pad until the piece is covered well.


Light the sky stampin up Joseph's Coat technique celebration card

I then took a mat the same colour as the ink I applied over the top and blended a little ink tone on tone around the edges.

Light the sky stampin up Joseph's Coat technique celebration card

Then put the card together.  I used a strip of the same colour dark blue cardstock and stamped the sentiment using versamark and heat embossed with white powder .


Light the sky stampin up Joseph's Coat technique celebration card

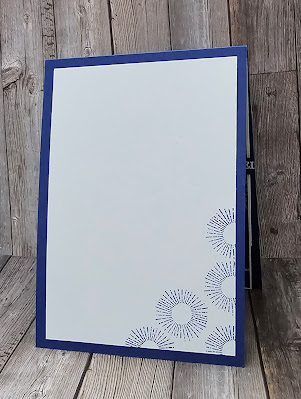
For the inside I used another stamp from the set and used the dark blue ink to tie it all together.

Light the sky stampin up Joseph's Coat technique celebration card

And there you have it a bright and fun celebration card using a great , if a little messy 😉,  technique . 
I do hope you'll give the Joseph's Coat technique a try it's  a real wow one!

Light the sky stampin up Joseph's Coat technique celebration card


Monday 18 December 2023

Make it simple Monday Light the Sky

 Helllo and welcome 👋 My name's Cary and with Gill we are 2 Big Girls Crafting. If you're new here thank you for stopping by and if you've been before thank you for coming back 😊 We post 5 day's  a week sharing our passion for papercrafting. We take turns too share our creations and this week it's my turn! So here we go..... this week I've decided to showcase a stamp set called Light the Sky This set does have a coordinating set of dies but for #makeitsimplemonday I'm just using the stamps.

Light the sky stampin up quick easy simple stamping new year card

Isn't it a fun set so many fun ways to use it! But for today's inspiration I've kept it , as always on a Monday,  super simple. 

Light the sky stampin up quick easy simple stamping new year card

Aren't these gold cards and envelopes just the most elegant things??? Called Brushed gold cards and envelopes they come in a pack of 20 cards and 20 envelopes . They are perfect for beginners and more avid crafters alike! As I've done a simple all you need is a sentand voila your card is made !

Light the sky stampin up quick easy simple stamping new year card

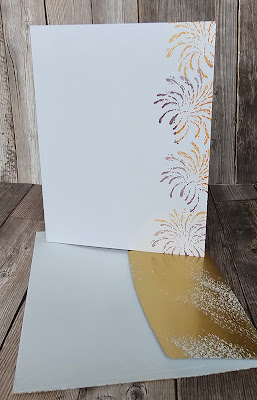
But for those of us who want a little more the plain white inside of the card offers lots of opportunity to get creative. I've just coloured and stamped one of the images along the open edge. A nice card doesn't need to be complex or full of stuff. Pop back for the rest of this week for more using this fun stamp set.

Friday 15 December 2023

Fun Fold Friday - Everlasting Beauty

 Well here we are once again and it's Friday already! Time flies when you're having fun doesn't it? I have really enjoyed working with this stamp set this week and I really do wish that I had played with it much sooner than now! Anyway, using the Everlasting Beauty stamp set, I've made my final card, a fun fold. I cut a piece of A4 along the length of it at 14.85cm or 5,7/8" and scored it at 10.5cm, 15.5cm and 16.5cm or in Imperial measurements... 4,1/8", 6,1/8" and 6,1/2".  The last piece on the left hand of the card is cut down to measure 10cm high or 4,15/16".

Once that extra piece was removed it's now for a case of DSP and coloured card. I iused the beautiful NEW Softly Stippled DSP. It's part of a really beautiful suite of products which you'll be able to see more of them in just a few weeks. To enhance the beautiful papers, I have layered them onto Pebbled Path card mats. I wasn't sure that it would work but I'm pleased to see that it really does.


Well, thank you once again for stopping by this week and I hope that my cards have inspired you to make some even better than mine. 

Cary will be here next week and I will return on the following week, (Christmas week).

Until then and as always, take care, keep well, stay safe and 

KEEP ON CRAFTING

Thank you, 

xxx😍😍 Gill 😍😍xxx


Thursday 14 December 2023

This or That Thursday - Everlasting Beauty

 Do you like to save money? We do. Today only Stampin' Up! are giving FREE SHIPPING on any order placed! Go on, spoil yourself!

 Hello. Using the lilac flower from the Everlasting Beauty stamp set, today's 2 cards are both very similar. I stamped 2 of the flowers and coloured them in using my blends alcohol marker pens. 3 simple colours and they were, Fresh Freesia, light and dark, Highland Heather light and dark, Shaded Spruce light and dark. I started just adding little marks with the darker pens and then added the lighter shades afterwards. 

Yes, I did fussy cut them out as always and layered them differently on the 2 card bases.

THIS

The first card is on a White card base and I made a Fresh Freesia mat which I scored at 0.5cm and 1cm al around the edges. The frame is a die cut from the Brilliant Backgrounds dies which I thinks makes a really lovely change to the card.


THAT
My second card or THAT card I have made on 1 of the Brushed Gold Card's and Envelope. These cards are stunning. The front and back of the cards and the envelope flap have a gorgeous gold pattern on. This card I die cut a mount from the Christmas Classics dies in a piece of gold card. I added simple sentiments onto both cards to complete them. I used Go To Greetings stamp set for the card sentiments on the front.


Please let me know which do you prefer?