Friday, 31 December 2021

Fun Fold Friday - Elegantly Said

Today's card is another throw-back to earlier this year. This is a pinwheel card. A pinwheel card can be made with as many or as few leaves as you like providing a...You use an even number of pieces and b... You have an envelope big enough! The last one sounds crazy but trust me...I once made one so big that I had to make a new envelope as I had nothing in the correct size! Silly me!! Anyway, for my last day this week, using the Elegantly Said stamps, I used the sentiments in the form of Thank You. I decorated the pinwheel card with images from the stamp set and some gold leaves from the Expressions In Ink Ephemera Pack and the matching double sided paper. I also used Smoky Slate Ink pad for the images along with strips of DSP from the Simply Elegant Speciality Designer Series Paper. I still have a gold ink pad which retired some years ago and using a dry very fine brush, I lightly painted some of the images. I like the way it highlights them. I punched the sentiments out with the Elegant Tab Punch and trimmed them down a little to show some of the gold foil from behind. 

My pinwheel is a hexagonal or 6 sided one. I used 6 pieces of Basic White card 14.85cm by 8cm and scored each of them 2cm in so that the image mat is left with 6cm. This way the whole card isn't too big and will fit into a 15cm or 6" square envelope. 


That's it from me for another week. Once again, I am sorry that I missed Monday and Tuesday but hope you have found something that you like to get you crafting again before this year is out.

Today is New Year's Eve and both Cary and I sincerely wish you all a fantastic Happy New Year. May all of your dreams become a reality in 2022.

Cary will be back on Monday with her creations so please stop by and see what she has been making. Until I return be healthy, stay safe and well but most of all ....

 😍😍KEEP ON CRAFTING INTO 2022 😍😍 

HAPPY NEW YEAR


Thursday, 30 December 2021

Throwback Thursday - Elegantly Said

 Today's style of card is one that I make quite often. A simple C6 card base which I cut half of the front of  the card off and then add another piece across the front. It's as simple as that! I started with a square of white card which was 9 x 9 cm or 3,1/2" square and stamped the flowers from the Elegantly Said stamp set from each of the 4 corners. I have kept to the monochrome theme for today's card too. 

Monochrome artwork in my opinion is so pretty. You can use any colourways you like and they will always look gorgeous when completed. Today, I used only the gorgeous, soft, peachy colour of  Pale Papaya. One of the In Colours for this year and next year. In Colours are with us for a maximum of 2 years at a time and then they get changed to another 5 colours for the following 2 years. 

 
Anyway, a few jewels and a length of ribbon and the card is complete.


Wednesday, 29 December 2021

Wednesday - Not Watercolour - Elegantly Said

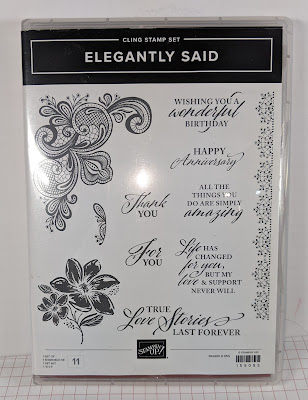
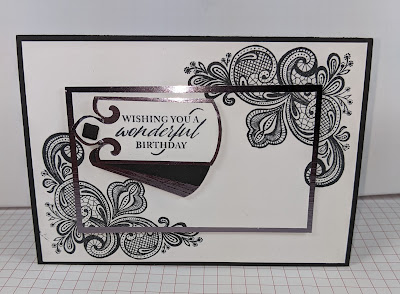
 Hello and welcome back. I do hope that those of you who celebrate Christmas had a very peaceful time. Apologies for not posting before today, life has got in the way I'm afraid as it often does at this time of year. This week I have been playing with a stamp set that I fell in love with as soon as I saw it, Elegantly Said. I love the corner decoration and the font and..... well all of it really! As I now have to write several thank you and Birthday cards, I thought I had better get started now while I can. I started with a Birthday duo as I have 2 cards to send out for the beginning of January. 

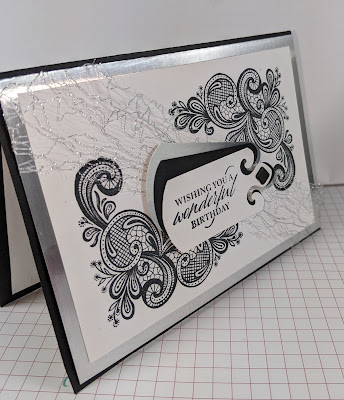
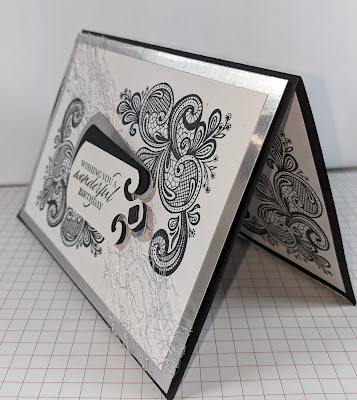
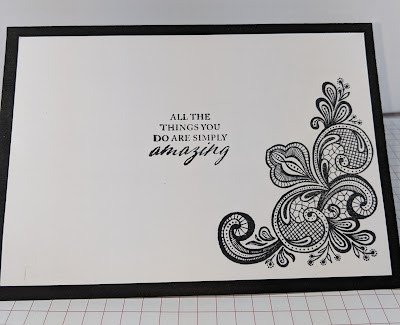
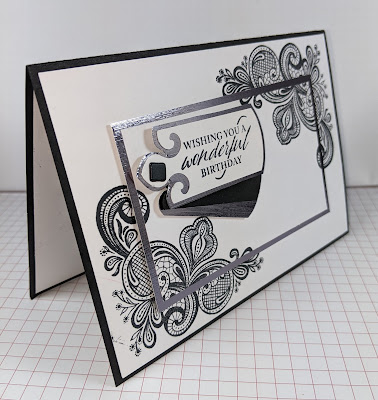
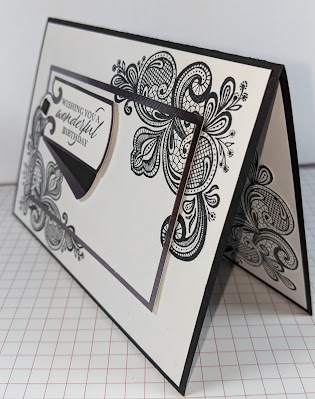
I have made only monochrome cards today. Very simple black and white cards. The first one I raised the whole of the front using foam shapes (dimensionals) and added the gorgeous Silver Metallic Mesh Ribbon. The second is where I cut out the centre and raised it onto a piece of the darker of the silver foils collection and the second I used the darker silver for. I have used the matching Elegant Tag punch. I love the fancy top of this punch which you can see on the message mats on the front. As I wanted the stamped images to be very crisp and sharp, I used the Stamparatus (Stampin' tool) so that I can re-ink the stamp and not have the images move. What an amazing tool that is!!


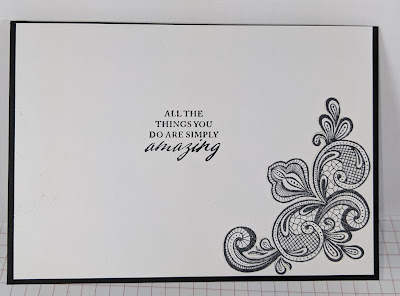
 Here is the second Birthday card.


Friday, 24 December 2021

Fun fold Friday Honeybee Home

 Happy Christmas eve 🎅🎅🎅 Tomorrow is the the big day and I'm  so fortunate to be able to spend it with my family. As I have an almost 4 year old grandson it's especially fun,  if not hectic to say the least!! But hey this Nanny loves it all 😁. In the new Honeybee Home stamp set there is the perfect sentiment for how I feel about them all... "So glad we're family" . So I had to use it today.

As it's  the final day of my week of inspiration for the blog it must be fun fold Friday.  My fold for today is one that the the lovely Monica Gale shared a few years ago called a box card. It looks great but is surprisingly easy to create and it folds flat and fits in a standard c6 envelope!!!

I started with a piece of cardstock measuring 10.5cm x 29.7cm.  I then scored it at 4cm, 14cm,  18cm and 18cm. I then scored it at 5.5cm along the short side. In the picture below I have marked the score lines...

Honeybee Home stampin up box fold card

In the next picture I show where to cut. The large pink area is to be removed.

Honeybee Home stampin up box fold card

Apply adhesive to the tab on the right and close to creat the box. Then all you need are 2 pieces of cardstock measuring 2cm x 12cm scored at 1cm and 11cm. These 2 pieces are then added into the inside of the box to create the layers onto which your decoration will go. 

To decorate my box I stamped and die cut the flowers from the Honeybee Home stamps.  I  also die cut the leaf die from the Honeybee Bloom dies which are the ones that coordinate with the stamps.

I used pattern paper to cover the outside of my box. The paper is called Heart and Home. I used the grey and white wood effect side . I  think this gives my card a wooden planter feel . 

Honeybee Home stampin up box fold card

I love the way the internal strips allow you to place the flowers in layers it has real depth 

Honeybee Home stampin up box fold card

The other great thing is that it folds flat for posting...

Honeybee Home stampin up box fold card

I  cut a mat of white cardstock measuring 10cm x 9.5cm and adhered it on the back so that there is some where to write your message.


 Well that's  it from me for this week .  Please join me next week as Gill will be sharing inspiration for the last week of 2021.

We wish you all a very Merry Christmas and may the peace and joy of the season be with you all.

Cary xxx


Thursday, 23 December 2021

Throwback Thursday Honeybee Home

 I love colour and bright colours especially 😍. The drab grey days of winter are just mehh to me. My antidote is to create bright bold cards 😁 . So for today's Throwback Thursday project I've  chosen bright bold colours and a new take on an old favourite the shaker card! Using the fabulous Honeybee Home stamps I set to work.

I started by die cutting an appature from a piece of bright green cardstock.  Called granny apple green it's such a bold happy colour. I then placed the mat ontop of my card base front and die cut it out again. I  saved the inner pieces to use later.

I then cut a mat of vellum the same size as the green mat. I used the new hive 3d embossing folder to emboss the vellum. I  also cut a piece of acetate the same size. 

Next I adhered the vellum over the appature on the card front.  I  then place strips of double-sided tape onto the edges of the vellum. Now for the fun bit adding the sprinkles. As this is going to be a flat shaker card it is best to chose flat sprinkles or sequines or glitter. I  chose to use the pretty Shaker shapes as they are flat and are such pretty colours 😍. I added a good pinch of them to the center of the vellum after removing the backing from the tape . Next I carefully placed the acetate on top creating a sandwich with the sprinkles as the filling.

With the sprinkles secured I placed the green mat over the shaker element. I used double sided tape again as it sticks well to the acetate. 

To decorate the front I die cut the appature again in white cardstock but this time I die cut a stitched rectangle from the center of it to create a frame. I  then placed this frame into the appature. Again I kept the die cut center to use later. I  then stamped and cut out some flowers from the Honeybee Home stamps as well as bees and a sentiment. 

I  love the way this card came together..

Honeybee Home stampin up flat shaker card

The colours are bold and bright and fun. The card is flat so good to post...


And the inside is where I used the left over die cut pieces.

Honeybee Home stampin up simple flat shaker bright colours card

All in all a fun card and here's a little video of it in action..


Wednesday, 22 December 2021

Watercolour Wednesday Honeybee Home

 Wednesday's are Watercolour Wednesday's here at 2 Big Girls Crafting and this Wednesday's is no different. As you will know if you follow us I love to make backgrounds !! Watercolour is a great way to make backgrounds but my purpose for creating a background for todays project was to die cut it up!!! The Honeybee Home stamps come qith coordinating dies called Honeybee Bloom dies.

It was the dies that I wanted to use in particular the 2 sprig ones. My mind went to creating a watercolour colour smosh background then to die cut from that to give the sprigs colour.

So to start I go out my inks, water spritzer, silicon mat and watercolour paper. I  spritzed the watercolour paper. Next I dabbed my ink onto the silicon mat. 

Watercolour smosh

Next I spritzed the ink on the silicon mat with plenty of water .


Now the fun begins.  Dab the wet side of your watercolour paper onto the ink smooshing it as you go.

Watercolour smooshing technique

This is the first layer of colour. Make sure you dry the layer before going in again...

Watercolour smooshing

And again...


I loved the way this colour combo of pale orange called pale papaya and pretty pink called polished pink turned out . 

I then die cut out my sprigs.  I used the coordinating Hive embossing folder for the card. I highlighted one spot by gently brushing a soft yellow called so saffron ink.

I kept the colour simple and used a white card base and a soft kraft ink called crumb cake for the sentiment.

Honeybee Bloom dies Stampin up hive embossing folder


I loved the effect the watercolour piece gave the die cuts. I  also didn't want to not use the rest of the piece sooo....


Honeybee Bloom dies Stampin Up watercolour background card

I love that when you tear a piece of the hive embossed card it follows the edges of the little hexagon shapes....

Honeybee Bloom dies Stampin up hive embossing background

These clean and delicately sweet coloured cards are so pretty 😍 

I thoroughly enjoyed creating today's projects and hope you like them as much as I do 😊

Honeybee Bloom dies Stampin up hive embossing folder watercolour smoshing background


Tuesday, 21 December 2021

Tips, Tricks and Techniques Tuesday Honeybee Home

 One of the great things about Stampin' Up! Is that they don't just produce great stamps they create coordinating suites of products. My stamp set of the week Honeybee Home is a part of a large suite that has not 1 but 2 stamp sets and coordinating dies, pattern paper, embellishments and an embossing folder!! Wow its a super cool super suite called Heart and Home and is on page 58 of the upcoming January to June mini catalogue!!

For today's inspiration I've chosen to use the pattern paper along with the Honeybee Home stamps. The papers are all double sided. On one side they are 6 different paterns in a variety colours. On the reverse are 6 different wood effects all in shades of grey and white.

It is the wood effect paper that inspired today's cards. I like to stamp onto pattern paper and the grey and white wood effects are perfect for this. 

So to start with I cut a piece of the paper 10.5cm x 14.85cm. I  then cut a 2.5cm x 14.85cm strip from it. I did this as I wanted to reverse the patern for the card front. 

On to the larger piece of pattern paper I stamped  in basic grey ink.  I used one of the floral images and the bee's. 

I adhered the stamped panel onto the right-hand side of my card base. I then adhered the narrow patterned side to the left-hand side. I used a blue coloured cardstock for my card base called misty moonlight as it coordinates with the pattern side of the paper 

I stamped and die cut out a sentiment from white cardstock as well as one of the little bees. The sentiment was adhered using 3d foam to give a little hight to the card.

Honeybee Home stampin up heart and home pattern paper dsp

Now as I was creating the first card I wondered what the floral images would look like if I coloured then in. Sooo I cut another piece of the same paper and gave it a go!!
I liked it and decided to use it in the same way as my first card.

Honeybee Home stampin up stamping and colouring onto pattern paper

Now I had a few scraps of pattern paper left over and I couldn't put them in the bin so I made a third card 🤪
This one is very simple but shows the beautiful misty moonlight cardstock off as well as the great stamps and pattern paper.

Honeybee Home stampin up simple easy pattern paper dsp cards


 Do you save your scraps of pattern paper? I do I usually pop them back in the packet for another project. I can't bear to be parted with such pretty paper 😉

Honeybee Home stampin up simple dsp cards