Wow what a great day we had Saturday.. it was our first Christmas class of the year!!! Ho Ho Ho 🎅🎅🎅 fun was had by all and it started the season of wonderfully 😁
So for this weeks inspiration I have decided to share projects using one of the most beautiful decorative acetates I've ever had the privilege to use....it's called Mercury Glass Acetate and is found on page 33 of the the Autumn Winter Stampin Up catalogue. Each pack contains 2 sheets of 2 designs of 12x12 acetate. Oh and top tip the sheets have a protective cover on the top side you have to peel off. It can be tricky to see but if you gently rub your nail in from one corner and it wrinkles you've found it😉
So for today's inspiration I've taken a piece of each design and on the reverse applied adhesive then dazzling diamonds glitter!!! Wow does it sparkle in real life!!! Sadly my photographic skills aren't up to making you able to see the beauty 😕
I do hope you like the cards and your imagination works on my photos 😂😂😂
Monday, 30 September 2019
Friday, 27 September 2019
#simplestamping
For the last sample of the week I have 2 cards to share. They are identical except for the way they are coloured in. I have used memento tuxedo black ink to stamp onto crumb cake cardstock with the oh so cute Christmas Crowd stamp . I have used water colour pencils to colour the image in. The nice thing about watercolour pencils is that they have a very saturated colour and applying them onto the crumb cake card the colours are still strong and true. On the other sample I have just used the white watercolour pencil to create a sepia look. Which do you prefer? Colour or sepia?
Thursday, 26 September 2019
#simplestamping
2 Big Girls Crafting have a wonderful team of fello Stampin Up demonstrator's called Larger Than Life Stampers. As a team we get together every other month for a fun afternoon of crafting, training, laughing and swapping. A swap is where you create multiples of a card and exchange yours for someone elses. It's a great way to gain inspiration 😊. For our last get together the theme for the swap was Frames. So I decided to take the theme and create a #simplestamping swap. One item I did use was the new fabulous Delicata metallic inks ! They come in Silvery Shimmer, Golden Glitz and Celestial Copper. And they a soooo shimmery and luscious!! I just stamped the snowflakes around the edge to create the frame for the sentiment. Easy peasy 😁
Wednesday, 25 September 2019
#simplestamping
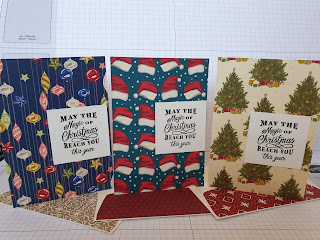
For today's samples I've decided to take part in the Stampin' Up! #simplestamping challenge for September. The challenge is to use designer series paper in a simple stamped card. Stampin Up have some beautiful patterned paper in their catalogues...so many it was hard to choose!!! Lol in the end I decided to use some of the Night before Christmas 6"×6" papers. There are 48 sheets, 4 each of 12 double sided designs.....all in all a lot to choose from!! Because the paper is so lovely I decidwd it should have the staring role. I covered the front of 6 note cards with different patterns. I then stamped the same sentiment for each card onto a simple mat of vanilla cardstock. I then used the left over paper to cover the flap on the envelopes to create a coordinating set of quick christmas cards. So why not get that pattern paper out of your stash and use it!!!
Tuesday, 24 September 2019
#simplestamping
One fun #simplestamping technique is to stamp your own pattern paper. And thats exactly what I did for today's inspiration. I used several stamps and different coloured inks on plain white card. I then cut part of it to put at the bottom of my card and the other part I turned into a gift tag. The stamps I used are called #Elfie and are a fun set that will appeal to all ages I chose to use traditional red and green as my colour palette. Simple, clean and fun 😁
Monday, 23 September 2019
#simplestamping
Welcome to todays inspiration. This week will all be about #simplestamping. As I look through the Autumn Winter catalogue I see so many gorgeous cards that inspire me. So for today's inspiration I've cased a card from page 50. The set is called Birds of a Feather and is a fun line are set perfect for colouring. This card isn't a #simplestamp card!!! So I decided to take the idea and create a simpler version. I'm really happy with the result and I hope you are too! It just goes to show that you shouldn't be put off by all the more complex samples shown in the catalogue if you're a beginner or looking for a cleaner look. Just take the bits you like and you'll be surprised by how simple they can become.
Friday, 20 September 2019
Colour - Day 5 Blackberry Bliss
Hello, for my last card this week I've used only a small amount of Blackberry Bliss.
I started by folding my piece of A5 differently to my usual way. Adding paper from the
Magnolia Lane Designer Series Papers to give a completely different colour. Lovely and soft with the colours of the Blackberry Bliss popping off the card.
I punched a 2,1/4" circle in Blackberry Bliss and a 2" one in Whisper White card.
Matting the 2 together, I then started stamping out flowers.
I used the lovely stamp set called Floral Essence at only £16, more information HERE
It comes with a punch as a Bundle flor only £29.50. More information HERE
One amazing beautiful bargain!!
I used the 2nd stamped image for this as the 1st ones are very strong.
A simple message onto Whisper White and a mat of Blackberry Bliss.
I placed the ends of the message into one side of a circle punch.
The mat for the inside is a piece of Pretty Pink Vellum from the
Perennial Essence pack of coloured Vellums.
Another flower and a beautiful message finishes this one off.
Thank you for joining me this week. Cary will be back on Monday with lots of exciting things to show you.
So please stop by and see what she has in store for you.
Gill XXX :)
Thursday, 19 September 2019
Colour - Day 4 Blackberry Bliss
Today's card is the fun one following on from yesterday's one.
This used to be Kate and I dancing around all of the time.
Great fun!
This time I made an A framed card in Whisper White and Blackberry Bliss mats. The stamp set is called Young At Heart and it really takes me back.....
For information on the stamp set, please click HERE
I stamped the image twice on the first mat and then a 2nd image onto a scrap of card.
Once coloured in with Stampin' Write Marker Pens, they were fussy cut with scissors and raised onto Dimensionals.
I know fussy cutting takes a little while but these images were so very easy to cut out.
I added 2 of the messages for the inside of the card and the YAY! here and there.
Wednesday, 18 September 2019
Colour - Day 3 Blackberry Bliss
Today I had the need for flowers.
So using the gorgeous To A Wild Rose stamp set and Birch for the background, I made this one.
For information on the stamp set, please click HERE
I don't like to blow my trumpet but I really like this one. So much so it's going to posted to
my best friend from my school days, as her serious card.
Yes, we always send 2 cards, one serious and 1 fun card!
I stamped the outer image of the flower twice onto a piece of Whisper White card.
This is a 2 step stamping set which is brilliant. As Blackberry Bliss is a very strong, rich colour,
I inked up the inside of the flower and stamped it onto grid paper to take some of the colour out.
This is what I got. Perfect I think!
Even the leaves are 2 step stamping although you don't have to do the 2 steps. The outer image can be coloured in with any colouring medium. I fussy cut all of the pieces out and then fixed the flowers with Dimensionals and the leaves using Tombow, wet glue.
This phrase sums Kate and I up perfectly.
Happy Birthday is from the Itty Bitty Birthdays, one of my go to stamp sets.
Tuesday, 17 September 2019
Colour - Day 2
Blackberry Bliss
Today's card was made using left over pieces of card that had been cut for other projects
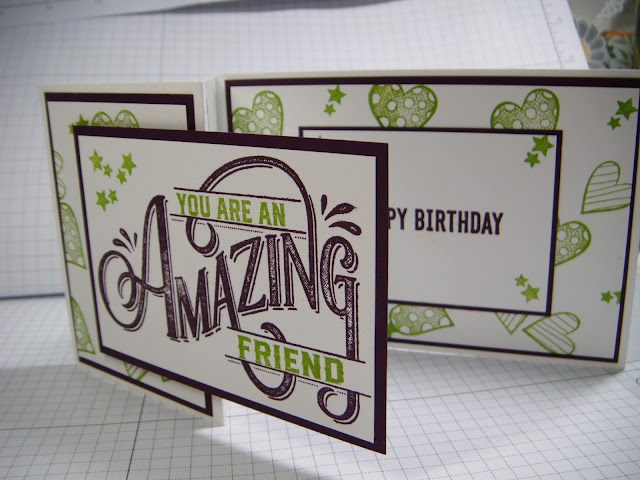
but never completed. I used the stamp set called Everything Amazing.
For more information, please follow the link HERE
At only £15.00 it really is a bargain!
We all have those bits and pieces left over and sometimes never use.
This time, I did! Using Whisper White for the card base and Blackberry Bliss for the mats and ink. I added some Granny Apple Green to break up the colour.
The front mat was raised one side with Dimensionals to add another dimension.
I finished off with a message from the Itty Bitty Birthdays.
Do you ever find a stamp set that you can go to for all of the day to day messages?
I do, this is one of mine.
Monday, 16 September 2019
Weekly Inspiration - Colour
Colour - Blackberry Bliss
Hello. This week is my week for choosing a colour to work with as you can see, I chose
the gorgeous, rich, warm Blackberry Bliss. I LOVE it!!
The first card I made was the one above. A simple Blackberry Bliss Card base at C6 size, landscape. I think its called an A frame card.
Anyway, I die cut the frame from the Frosted Frames Dies in Whisper White card and mounted it onto the card using a Foam Adhesive strip.
Then using the lovely #Elfie stamp set, I stamped a little elf that is leaning on a lamp post.
Once coloured in with Watercolour pencils, I fussy cut it out and lent it against the frame.
A simple message inside to finish off.
As you can see, the 2nd card was on a Whisper White card base and a Blackberry Bliss mat.
The mat was embossed using the lovely Brick wall folder after I heat embossed the message in White powder. I think it gives a really good effect.
So all in all, I made 3 different cards all slightly different.
Which is your favourite?
Subscribe to:
Comments (Atom)


