Friday, 30 April 2021

Fun Fold Friday Today's Tiles

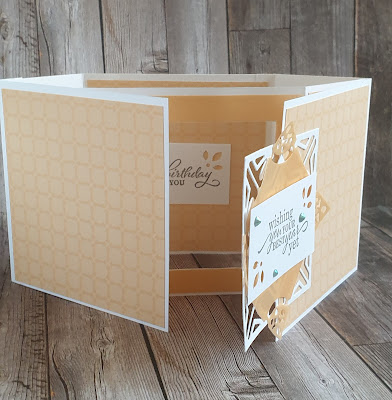
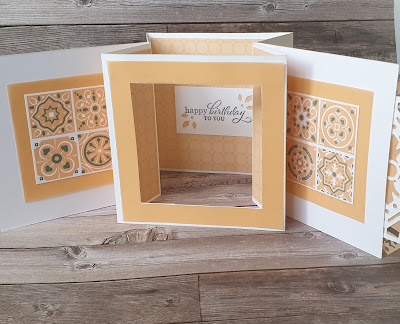
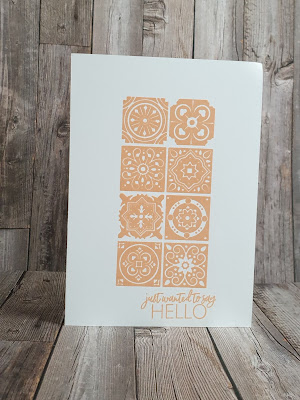
 So for the final card of the week using the retiring Today's Tiles stamp set and the new 2021-23 In-Colors I've made a fun fold that features the beautiful  pale peachy orange called Pale Papaya. And I  have to say it is the colour that jumped out at me when I first saw it ! Don't forget to comment to be in with a chance in our free giveaway 😉

Today's tiles Stampin up pale Papaya fun fold

The directions for this card come from a crafter by the name of Karin Hobelsberger on her Stempelpunktchen blog. She calls this fold a Frame Fold card. 

Pale Papaya today's tiles Stampin up frame fold card

I love the way it is a kinetic card with layers to look through.  

Top tip if you wish to have a go yourself  use standard basic white for the base not thick basic white. Then it will fold together beautifully 🙂

Frame fold card today's tiles Stampin up pale Papaya

This fold offers lots of surfaces to decorate although I've kept it clean and simple. I have used some of the new In-Color paper and the gorgeous specialty shimmer vellum to give it a little pizazz.  I  have also used some of the stunning In-Color Jewels they are just WOW!!

Stampin up Today's Tiles fun fold In-Color jewels

So that's it from me this week. Don't forget to leave a comment on any of this weeks posts to be in with a chance to win in our free Giveaway 😀 

Have a great weekend , it's  a long one here on the UK,  and please join us next week when Gill will be sharing her inspiration with us all.

Have fun 

Cary xx

Today's tiles Stampin up fun fold In-Color

Today's tiles Stampin up pale Papaya fun fold


Thursday, 29 April 2021

Throwback Thursday Today's Tiles

 Today I'm sharing a #simplestamping card that highlights how 2 step stamping works. There are quite a few 2 step stamping stamp sets around but the Today's Tiles set shows how it works beautiful. 

You start by deciding which stamp you're going to use first and what colour ink you're going to use. I typically use the most filled in stamp and use a light shade. But for today's sample I used the  dark shade of green called Evening Evergreen from the 2021/23 In-Colors.  I also recommend using a stamp positioning tool such as the Stamparatus. The reason will become clear 😉

Today's tiles Stampin up 2 step stamping evening Evergreen


Next I laid the infill stamp on top of my stamped image to line it up exactly.  Being photopolymer the stamps are clear so it's easy to do 🙂.  Close the plate so that it picks up the stamp and ink with an alternative colour. For my example I've used the pretty lilac Fresh Freesia.  For my card I used the other shade of green called Soft Succulent. Now stamp and the infill will work like a charm. 

Today's tiles Stampin up 2 step stamping

The result is lovely.  It gives your stamping another dimension. 

Today's tiles Stampin up 2 step stamping

I love the versatility that 2 step stamping offers. Most of my projects this week have just used the outline stamp which is fab. But by using the infill stamp it opens up a whole host of colour options 😀 I loved the delicate tonal look that I've achieved using the 2 shades of green. 


To finish my card I used a sentiment from the Today's Tiles set and die cut it out using the coordinating die set called Field Tiles.  

So if you'd like to take part in our giveaway this week please leave a comment below .

Today's tiles Stampin up 2 step stamping


Wednesday, 28 April 2021

Watercolour Wednesday Today's Tiles

 Now if you know me you'll know I love pink 💗 especially a bright shade 💖 so the new 2022-23 In-Color Polished Pink is just devine!! So for my card for today I just had to be made using it in all it's glory. I had the idea for the card Lmost as soon as I got the Today's Tiles stamp set out to play with.

It starts with a watercolour smoosh . Watercolour smooshing is a nice easy technique that uses ink mixed with water on a piece of plastic. I used a cello bag and swished the ink and water around then placed my piece of card ontop and smooshed it around. Once happy with the effect I left the card to dry.

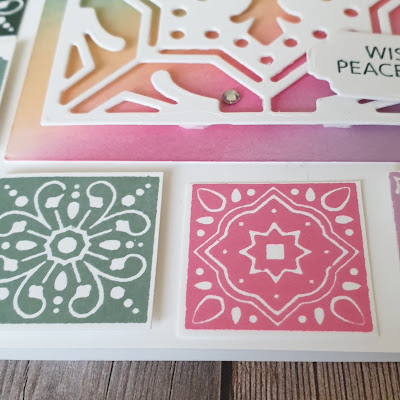
When dry I then stamped the tile image randomly over the edges . I stamped not once but twice before reinking my stamp so that it gave the piece depth and texture.


Today's Tiles Stampin Up watercolour smoosh


I then created a sentiment and focal point. I used a piece ribbon of the sheer ribbon cut into narrow strips to create the swoosh behind the sentiment.  I also used a piece of the oh sooo beautiful shimmer vellum that is available in all the new In-Colors as a background for the sentiment using a die from the set that coordinates with the Today's Tiles. 


Don't forget to leave a comment below to be in with a  chance to win in our give away.

Today's tiles Stampin Up watercolour smoosh


Tuesday, 27 April 2021

Tips tricks and techniques Tuesday Today's Tiles

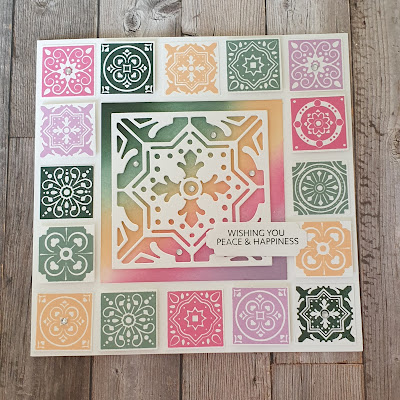
 These new In-Colors work together sooooo well 😍 and that is a great tip for when you're looking for colour combo's..... Stampin' Up! Brings out a new range of 5 trend setting colours every year and they all work well together making those hard to decide colour combinations so much easier!!!  And the Today's Tiles with it's  multiple image focal stamp is just crying out to be stamped then cut out!! 

My tip for cutting the squares out is to mount them on the same colour cardstock as you have stamped them on if you're cutting out isn't perfect . A far more forgiving way to work especially for beginners.

Today's tiles tips In-Colors Stampin up


To give the card another point of interest I used 3d foam to raise alternate squares on the out side edges.

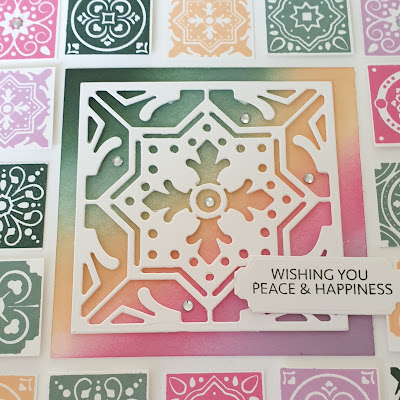
 I then die cut the center focal point and used 3D foam to raise  that too. I used all the In-Colors to create a blended background to go behind the white die cut piece.

In-Colors blending Today's Tiles Stampin up


A few sparkles and a sentiment and my card was complete.

Today's Tiles Stampin Up In-Colors


Don't forget to leave a comment to be in with a change of receiving the Today's Tiles stamp set in our giveaway!!!

What's your favourite In-Color? 


Monday, 26 April 2021

Make it simple Monday Today's Tiles

 This week is the last week of the 2020 /2021 annual catalogue from Stampin' Up! 😪 but.... what it does mean is that next week sees the launch of the new 2021/2022 annual catalogue from Stampin' Up! 😃 With that in mind this week I will be using a stamp set that hasn't been used at all and is retiring 😢 but I'm going to be introducing the new In-Colors for 2021/23!!! The stamp set is called Today's Tiles. ( read on to see how you can recieve your own set of the stamps in our give away this week!!)

Today's Tiles Stampin up

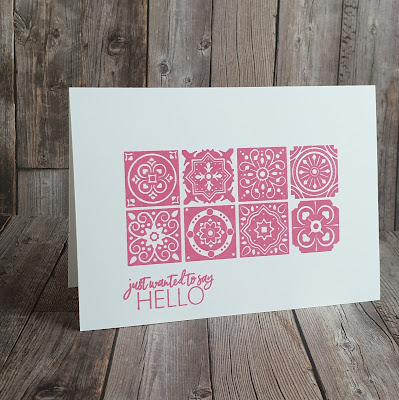
As always we start the week with a #simplestamping project. And this week is no different just stamps, ink and paper. I think the card for today really do show how you don't need a ton of "stuff" to create great cards.

Simple stamping todays tiles Stampin up

Don't they look good if I do say so myself!!

And the colours 😍 so gorgeous!!! So with out further adolet me introduce, in no particular order,  .... Evening Evergreen a beautiful rich dark green that will add a touch of elegance to any project.

In color evening Evergreen simple stamping stampin up

Next up we have the delicate and gentle shade of light purple.... Fresh Freesia.

Stampin up fresh freesia in color simple stamping

Now let me show you a subtle yet vibrant shade of peachy orange we like to call... Pale Papaya.

Pale papaya in color Stampin up simple stamping

Then there is the bright vibrant pink  called.... Polished Pink.

Polished pink in color Stampin Up simple stamping

And last but by no means least a fabulous dusky green that is called ... Soft Succulent.

Soft Succulent in color Stampin up simple stamping

Don't they all look fantastic?  But which one are you drawn too first? As a lover of pinks and greens in particular this selection is very tricky but I have to say that Pale Papaya is the one that drew my eye straight away!!

This week I'm running a give away!! If you'd like a set of the Today's Tiles for yourself all you have to do is leave a comment on any of the posts this week here on our blog. You can leave a comment every day to be in  with more chances to win 😉 The lucky winner will be randomly drawn on Saturday the 1st of May 2021. 


Friday, 23 April 2021

Fun Fold Friday - Hydrangea Haven

 Hello everyone, thank you for joining me for this fun fold Friday post. Do you ever feel that you take 2 steps forward and 5 steps backwards? That's me this week! Crazy isn't it? No matter how much you organise and plan...it all goes to pot! Out of the window! Oh well, it's Saturday tomorrow, I was going to say I'm going to enjoy a lovely day off! Nope! We have another all day class, so up early again. Never mind, I always enjoy our classes anyway. 

Today's card finishes off me using the gorgeous Hydrangea Haven stamp set for now. I have really enjoyed using these stamps, they are honestly worth considering to treat yourself to. We used the set for our retreat last month. It went very well and those who didn't have the stamps absolutely love them now. Brilliant!
I digress... Fun Fold Friday is sort of what I made. This is a very simple card but it is a pull tab, flip, card and the fun fold is on the front mat only. That's a mouthful! I used Blackberry Bliss and White card along with a flower cut from one of the Designer Series Papers, Hydrangea Hill DSP. They are double sided so you get double the effect and usage. I coloured in the small flowers using Stampin' Blends in Highland Heather and Blackberry Bliss. I added a little of my retired ribbon for the pull on the tag as it's one that I bought quite a lot of and I love it still. So waste not want not! If you have bought a product in the past, there is nothing to say that you can't keep on using it once it has been replaced with something else. For more information on any of the products from Stampin Up! please click HERE  It will open up a new window so you don't loose the page you were on.

I added a piece of the purple Acetate onto the Blackberrry Bliss mat and the slip strap hides nicely beneath it. To complete the card I added some messages to the inside front mat and the inside of the card then blinged the Hydrangea with Rhinestones. They look like little beads of dew on the petals.


Thank you for stopping by this week, I hope that you have managed to be insipired to make some cards of your own. 
Cary is back on Monday with her creations. Is she going to go cutsie again or not? Mmmmm!! Watch this space! :)
Until I come back, please take care, stay safe and keep well.
Gill xxxxx  😍😍😍


Thursday, 22 April 2021

Throwback Thursday - Hydrangea Haven


Hello and I must first apologise for missing the water colour Wednesday blog post this week. I now have the pleasure of looking after my grandson Theo now mummy and daddy are both at work. He is now 15 months old and as a rule a bundle of fun. Which he has been all week until Wednesday! Nothing could be done to console him! He has new teeth coming through and only wanted cuddles and playtime with nana. So guess who got nothing done at all? 😞

Here is yesterday's picture just after he had woken up. Along with the Bed Hair!

He is sooooo cute!!!

Never mind, I love him to bits! However today, now he's asleep, I have managed to make this card. Again using the Hydrangea Haven stamp set. It's just truly gorgeous! It stamps so well and the images are so precise and clear they could be real hydrangeas. Not quite but very close! 😁😁 The card was cut at 14.85cm along the length of the A4 card, so 29.7cm. I scored it at 14.85 in the centre and then on one side, at 7.4cm. It is a simple half gatefold card. (I think that's what it's called anyway)!

Using the gorgeous matching papers, I added 2 different designs to inside and out then stamped and die-cut the whole Hydrangea and lots of the little flowers. The little flowers all come out in one row so it's so simple to get them all at the same time. I even went crazy and added the gorgeous Rhinestones.  It's brilliant what you can make with a little card, paper and ink!


Fully open. When folded it fits in a 6" square envelope beautifully.


Tuesday, 20 April 2021

Technique Tuesday - Hydrangea Hill

Hello and welcome back to my sort of technique card. I used Hydrangea Haven stamp set but the message was from a free set that I got during Saleabration this February. This card has a single piece of the Hydrangea Hill Acetate for the front of the card, a flower and simple message. The acetate replaces the main card front apart from a 2cm strip at the top and bottom of the card just to add strength. That's it! The inside has become the extra decorated piece this time and the back of the card is for the message. Basically, a back to front card! The acetate is so beautiful. It comes is 2 colours, the gorgeous lilac/purple colour and a dusky rose pink. To protect it, the acetate has a clear film on the inside to stop it being scratched. You remove it before you add it to the card base. Brilliant idea!


Monday, 19 April 2021

Make It Monday - Hydrangea Haven

Hello, I hope you had a great week and enjoyed Cary's creations last week. Those little Hot Dogs are so, so cute aren't they? This week I've decided to play with the gorgeous Hydrangea Haven stamp set. I know it's not a cutesy set but I rather love this set. It takes me back to mum's garden when I was growing up. All of the beautiful flowers on the plants. Just beautiful. For a link to the stamp set, please click HERE   It will open up a new page for you so that you don't loose your place here.

Today's card is a very simple card. Just a few stamped images onto the white card mat and a lovely message to complete it. I always believe that less is more so today it's exactly that. #simplestamping all of the way! I used a White card base. a Pool Party card mat and the white mat that I stamped on to complete the card. The ink is Bermuda Bay. I love the way that the colours are lighter in different places.

Simple easy quick Hydrangea card stampin up


Simple quick easy monochrome hydranger haven card stampin up


Friday, 16 April 2021

Fun fold Friday Hot Dog

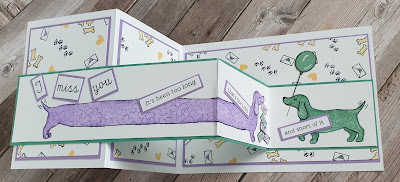
 For my final card this week all I have to say is that the sentiments led me to it!!! Hot Dog has made this a fun week to make cards!! And this fun fold card was perfect for my final card.

It's  a super simple fold. Take your standard card base, 10.5cm x 29.7cm . Then score at 14.85. Next  fold the front panel in half .

 Now cut a strip of card as long as your card base and score at the same points. 

I then decorated the panels of the card base. Then stamp your images along the narrower strip. Fix to the card and you're done. 

Simple fun fold hot dog stampin up

 This is the card folded up and this is the open view....

Fun fold easy hot fog Stampin up

Don't  these sentiments make you chuckle? The stamps in this fun set are such fun to work with. If you'd like to buy the stamp set just click Here

Well that's it from me please join us next week when Gill will be sharing her creations with us. 

Have a good weekend and have fun.

Cary xx 


Thursday, 15 April 2021

Throwback Thursday Hot Dog

 When I make backgrounds I don't waste them I just save them for that right project...  and today's card was just that project! I love the expressions on the dogs in the  Hot Dog stamp set. And the idea of them peeping out the window caught my mind.

I used a circle die to cut out 3 windows then embossed the panel. Using 3d foam I raised the panel up over the watercolour splash background I had left from yesterday's project.

Now the fun part I stamped and coloured  the 3 dogs then fussy cut them out.  I placed them peeping out the windows. A simple sentiment on one of the circles that I die cut out and the front of my card was done.

Fun easy peek-a-boo card hot dog stampin up

Now I don't leave the inside of my cards blank and today's no different I just had to stamp the Hot Dog's waggy tails 🤣

Cute fun easy peek-a-boo card hot dog stampin up


Wednesday, 14 April 2021

Watercolour Wednesday Hot Dog

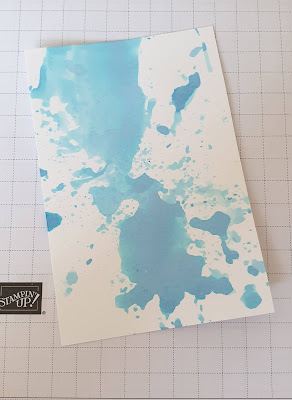
 Watercolour splashes / smooshes are great fun but don't always go the way you imagine. But boy when they do they are fab!!! And today's Hot Dog card has a background that went just right first time! 

So what how did I make this great background 🤔  well I took an acrylic blog and dabbed my blue ink pad on it. Then I added  drops of water and made it wet. Next I dropped the ink onto a plastic bag. I then took my cardstock and dabbed it onto the ink. 

Essy Watercolour splash background


I then took the small heart and paw print stamps from the Hot Dog stamp set and using the same blue ink and stamped randomly over it. 

Now for some colouring and cutting out fun 🙂 raising the dogs onto 3d foam a few mats and layers and voila a fun card that will bring a smile to anyones face. 

Hot dog stampin up watercolour splash background fun card

Hot dog stampin up fun cute watercolour background card