Wednesday, 31 May 2023

Watercolour Wednesday - Memories and More - Bright and Beautiful

 Hello again and thank you for stopping by. I haven't actually made a watercolour card today because the card bases actually look like they have been watercoloured. With the Bright and Beautiful Memories and More cards and the cards and envelope pack today, I have been able to make some more very simple cards. The first is the blue stripe. I took a piece from the coordinating 6" by 6" Designer Series Papers and chopped it into 1cm strips. I used a White card base on this one and added the strips all the way over the front and using the bits that I chopped off, I trimmed the edges of a white square with them before adding one of the sentiment strips from the card pack. As you can see in the centre stripe, I have added another strip from another piece over the top of the blue.

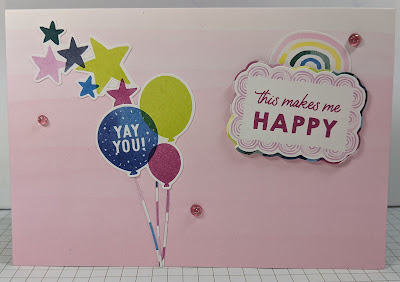
My second card is an extremely simple one. Using one of the washed pink cards, I have added several of the die cut elements from the pack. The sentiment was another of the small cards from the pack that I fussy cut out, added it to a scrap of the DSP again and repeated the scalloped edge. Very simple but I really like it. What do you think?

Below is a picture of the cards pack and the self adhesive die cut cards are on the left in the picture. 

 
Bright and Beautiful 6" by 6" Designer Series Paper and all of the gorgeous colours!


Card 1


Card 2


Tuesday, 30 May 2023

Technique Tuesday - Memories and More - Bright and Beautiful

 Today's cards there is a little more to do to make these and I used my favourite method of fussy cutting for all 3 cards. Using one of the Memories and More card pack and one of the card bases, I fussy cut a balloon out of the centre of one of the C7 cards. I used the balloon on another card. I placed a piece of card from one of the other cards to give some more interest behind it and placed some of the peel off, die-cut labels from the card pack. There are 4 die cut sheets in a pack.

The second card was made using a standard card base in Azure Afternoon and a piece of the DSP from the Bright and Beautiful DSP. I used one of the C7 card and cut off the 4 corners. I then cut out the Happy Birthday from another card and fussy cut it before adding it to the small card.

My third card is one of my favourites. There are 2 of the large cards which have balloons all across the front. I fussy cut all of the balloons out, added dimensionals to the reverse and added it to the soft pink card base.


Card 2


Card 3


Monday, 29 May 2023

Make It Simple Monday - Memories and More cards

 This week I will be sort of carrying on from where Cary left off. Cary's last project on Friday was using the Memories and More cards and my intention this week is to show you how you can make lots and lots of cards using less than half a pack of them! They aare called the Bright and Beautiful Memories and More Card pack and Bright and Beautiful Memories and More cards and envelopes. They are stunning. I did use the same stamp set as Cary too called Beautiful Balloons for the odd sentiment. The cards plus the cards and envelopes are so inexpensive. Together they are only £18.25 altogether. An absolute bargain! As it's #simplestamping Monday, here are my simple cards. 

I made both of these using a large M & M card and one of the smaller C7 cards.


Friday, 26 May 2023

Fun fold Friday Beautiful Balloons

 On Monday I mentioned that we had held an even using the fabulous Bright and Beautiful memories and more card pack and the coordinating Card's and envelopes. These are  amazing products that as the name say's are for more than memory making! They coordinate with the beautiful balloons bundle and pattern paper beautifully. 

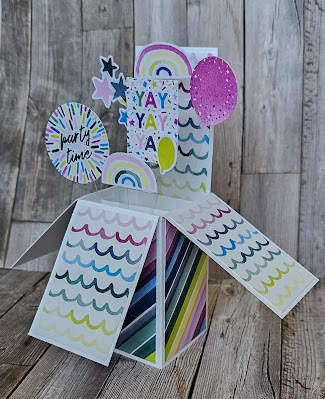
Bright and beautiful memories and more stampin up beautiful Balloons fun fold pop up box card

They make fantastic quick cards and can be used for fun folds too... as I'm sharing today!

My card today has no stamping!!! 😱😱 I know it was a shock for me too! 🤣 but it was just the way it happened. I don't know about you but sometime cards just come together with out me being in charge  😉 .

So what have I made for you today? Well it's called a pop up box card. There are many tutorials around but this is my metric version. 

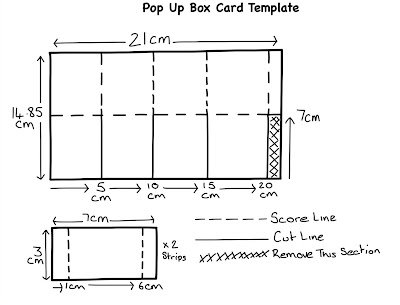
It all starts with a piece of cardstock measuring 14.85cm x 21cm scored at 5cm, 10cm, 15cm and 20cm. Then turn the cardstock and score at 7cm. You'll also need 3 pieces of cardstock measuring 2cm x 7cm each scored at 1cm and 6cm.

Bright and beautiful memories and more stampin up beautiful Balloons fun fold pop up box card


As you can see in the photo above you have to cut up the score lines and remove the bottom 1cm panel. The top part of this narrow strip becomes the tab which you adhere the sides together with. 
Now select 1 of the panels to be the back and fold the rest down. Now it's time to add the 2 strips on the inside. Do this by applying adhesive to the 2 narrow panels and gently folding them so that they slot into the inside of the box. These panels become the anchor points for your decorations.
The first thing I did was to decorate the panels on the outside at the bottom of the box and the flaps.


Bright and beautiful memories and more stampin up beautiful Balloons fun fold pop up box card

The great thing with this card is that it folds flat and fits a standard C6 envelope. 
Just make sure that your decorations don't go ourside the box area too much.

Bright and beautiful memories and more stampin up beautiful Balloons fun fold pop up box card

 Then the fun began as I used the stickers from the memories and more cards pack to decorate the inside. 
I used some acetate to act as the carrier for the fun parts. I used glue dots to adhere the ends of the acetate to the inner panels.

Bright and beautiful memories and more stampin up beautiful Balloons fun fold pop up box card

I love how the elements dance around.


I added a panel  on the back as an area to write on but had to decorate it with some more of the stickers 😄 


Bright and beautiful memories and more stampin up beautiful Balloons fun fold pop up box card

All in all this is fun card came together quickly and with lits of smiles... which is what I hope it does for the recipient and you, the reader.
Here's another shot of the card.

Bright and beautiful memories and more stampin up beautiful Balloons fun fold pop up box card

Well that's all folks... for this week from me that is. Please join me here next week when Gill will be sharing her inspiration with us all.
Have fun
Cary xxx
Bright and beautiful memories and more stampin up beautiful Balloons fun fold pop up box card


Thursday, 25 May 2023

This or That Thursday Beautiful Balloons

 Do you like your pattern paper full on or as a subtle peek? Well I think the Bright and Beautiful Pattern paper, that is part of the Beautiful Balloons suite, is amazing! And beacause it's so good I had to share 2 ways . I also wanted to showcase 2 particularly dies from the coordinating dies. The Beautiful Balloons dies I wanted to use are the ones circled below. 

Beautiful Balloons stampin up pattern paper cards

The smaller one die cuts out the little shapes and leaves a lovely peekaboo through a cardstock mat. I then placed some of the lovely bright and beautiful pattern paper behind it.

The second die is the long one. This one creates lots of thin slits. Now this can create lots of fringes. Which works great with the pattern paper.

So here's my first card...

Beautiful Balloons stampin up paper pattern card ideas

I chose to use 2 of the returning colours a dark shade of teal called pretty peacock and a lighter one called lost lagoon.

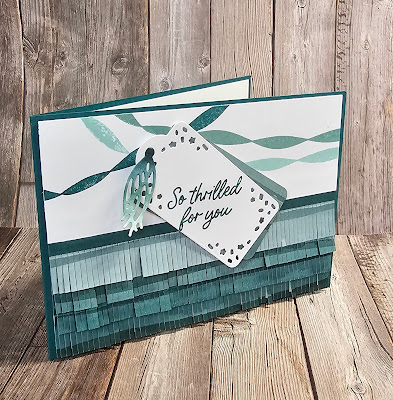
For the second card I used the fringe to make a flounce along the bottom of the card.

Beautiful Balloons stampin up paper pattern card ideas

So which do you prefer subtle peekaboo or full on flouncey? 

Beautiful Balloons stampin up paper pattern card ideas


Wednesday, 24 May 2023

Watercolour Wednesday Beautiful Balloons

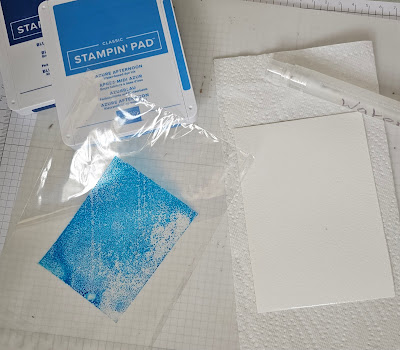
 Today I'm sharing a fun watercolour background.  The technique uses ink pads, watercolour paper, water and a cello bag! I wanted to created a background to show off some of the dies from the Beautiful Balloons bundle .

It all starts with spritzing a piece of watercolour paper with plenty of water. Next take an ink pad and dab it onto a cello bag. 

Beautiful Balloons stampin up watercolour background tequnique birthday card
 
Next pop your hand into the bag and scrunch it up a little.

Beautiful Balloons stampin up watercolour background tequnique birthday card

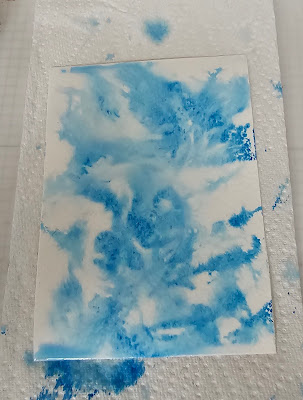
Then dab it onto the wet watercolour paper. 

Beautiful Balloons stampin up watercolour background tequnique birthday card

I do make sure that the area is well protected so that any mess is easily cleaned up.


Beautiful Balloons stampin up watercolour background tequnique birthday card

I then repeated the process using another shade of blue.  The 2 colours I used are called azure afternoon and blueberry bushel. 

Beautiful Balloons stampin up watercolour background tequnique birthday card

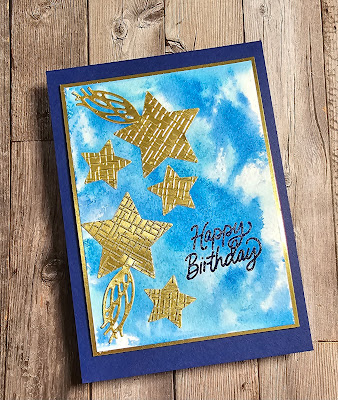
I then put the panel to one side to dry. Next I took some gold foil and die cut some of the stars and tassels from the Beautiful Balloons bundle. I then mounted the panel onto a gold mat and stamped a sentiment onto it.

Beautiful Balloons stampin up watercolour background tequnique birthday card

I used on of the 3 embossing folders in the Basics 3d embossing folder bundle to embosse the stars 🌟 I added the tassels to make the shooting stars 🌠 

As I had used a dark blue card base I decided to create an insert.

Beautiful Balloons stampin up watercolour background tequnique birthday card

I love the way this card came together. The colours are rich and enhanced by the gold and the texture is fab. And it was fun to make 😃

Beautiful Balloons stampin up watercolour background tequnique birthday card