Showing posts with label #joyfulflurry. Show all posts

Friday, 21 October 2022

Fun Fold Driday - Joyful Flurry

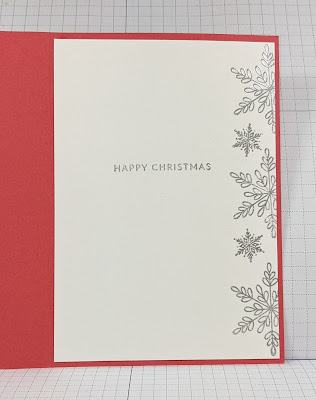
My fun fold this week is one that I was recently asked to make for a class. This is a version of the one that is for the class but for now I have made a Bay Window fold card with the Joyful Flurry stamp set. I started with a White card base 29.7cm by 105cm and scored it in half at 14.85cm. Basically half a sheet of A4 cut in half lengthwise. Once scored in half, I scored from the outside edge at 0.8cm, 5.3cm, 9.6cm and 13.9cm. I know they are silly measurements but it just works out that way. I added tear and Tape adhesive tape on the narrow scored edge in the centre and gave the card a 'book fold'. I have used the lovely soft green of Soft Succulent card for the mats of 4 x 10cm, and the Designer Series Paper is from the Santa's Express papers at 3.6 by 9.6cm. it leaves just a tiny border around the paper. 

Using some of the White Glimmer paper again, I die cut some of the various snowflakes from the Frosted Flurry dies and added a few basic Rhinestones to add a little more sparkle. The band on the inside right of the card was adhered using Dimensionals so that the small lip on the front, slides under it to make the Bay Window.


Thank you for stopping by this week.
 
Cary will be back with her stunning creations on Monday. 
Please join her to see what she makes. 

I will be back the week after as always so until I return, 

Please take care, stay safe but most of all...
 
😍😍 KEEP ON CRAFTING. 😍😍
 
 xx Gill xx


Thursday, 20 October 2022

This or That Thursday! - Joyful Flurry

 Cary and I have changed the Throwback Thursday to This and That Thursday. I rather think it's fun! So for this and that today, using the Joyful Flurry stamps and 2 dies from the Frosted Flurry dies, I made a card similar to one that I made several years ago. I used a piece of  White Glimmer paper and embossed it with the Wintry embossing folder. I found a piece of Window Sheet or acetate and cut it to a C6 sized mat and after wiping the embossing buddy across it, I used 1 of the snowflakes to stamp in Versamark ink along one edge and poured Silver Embossing Powder over it before heat setting it with the heat tool. You have to be careful with acetate, you don't want to make it too hot! I added the piece to white glimmer paper from the Real Red and White glimmer paper pack and embossed it using the Wintry Snowflakes folder. Then I added it to the Sweet Sorbet card base, I die cut a snowflake out of the Silver Foil Speciality pack, popped the spikes up and added that using Dimensionals. A sentiment or two and that is complete. 

Then as sit's This and That Thursday, I made another. Exactly in the same way but this time in Tahitian Tide, the gorgeous bright turquoise blue and instead of silver powder, I used the Copper embossing powder and copper foiled paper. 

Ok, so now it's a case of which do you all prefer? Please let me know?

First the Sweet Sorbet  


Now for the second card.


Now the side by side


So the question is ......Red with silver or Blue with copper???


Wednesday, 19 October 2022

Watercolour Wednesday - Joyful Flurry

I have had fun with today's card. I took a pot and added 3 drops ink refill of Gorgeous Grape a really rich purple, then added about a spoonful of water to it. While the ink was mixing, I took a piece of watercolour paper and using Versamark Ink Pad, I stamped several of the different snowflakes all over the piece. I poured Clear Heat Embossing Powder over it all and then heat set it. It was quite shiny. Then using a wide water brush, I dipped it into the inky water and washed the colour all over the piece. I stopped occasionally to wipe some of the ink off of the embossed images but didn't really need to as it doesn't stick to it. I continued to do this a few times until I was happy with the colour.

I then dry embossed a small mat using the Wintry embossing folder, die cut one of the snowflakes partially on one end and added a sentiment and piece of ribbon. When it came to a card base I tried several different colours including Rich Razzleberry and Basic Gray but the Gorgeous Grape won. 


 Gorgeous Grape card base  

    Rich Razzleberry card base  

Basic Gray card base


Tuesday, 18 October 2022

Technique Tuesday - Joyful Flurry

Today's card is a card that I cased from Donna Gray in Australia. She is soooo very clever and inspired me to make a card very similar to the one she made using the Joyful Flurry stamp set. I used a piece of white and stamped the snowflakes onto one side only. I then used pale blue of Balmy Blue, the light grey of Smoky Slate and the lovely in colour blue of Starry Sky. Once stamped, I embossed just the left hand side and tied a piece of the in colour ribbon in Starry Sky off centre to the left. All that was left was the sentiments on the front and inside. I added some more snowflakes on the inside too but I didn't heat emboss the images at all which Donna did. 


Monday, 17 October 2022

Make It SImple Monday - Joyful Flurry

It's almost that time of year again where crafter are busy making Christmas cards and gifts. It's my turn now so I am afraid it's Christmas on the cards for me from now and until further notice. I'm sorry if  you're not ready for this yet but many of us are. This week I am playing with Joyful Flurry stamp set. It's a very simple one with some lovely sentiments. 

My first card is a very simple pale blue ink on a white card. I did however add a little more card onto it which I had stamped the snowflakes in the softest blue of Balmy Blue.