I will quote both metric and imperial measurements with the imperial in brackets I hope you find this helpful. All folded lines are marked in the photos with a broken line ----- All cut lines are marked as a solid line.
So here we go......
To start you will need a piece of card stock measuring 14.85cm x 29.7cm (6" x12").
Score the card at 7.4cm and 14.85cm (3" and 6") along the long side. as below
next fold the top right hand corner down so that the top edge lines up with the first score line on the left as shown below
Next repeate the action folding the bottom right hand corner upwards so that the bottom edge lines up with the first score line on the left as shown below
So you now have a piece of card that has 4 scored/folded lines as below
On the right hand side mark the mid point 7.4cm (3")
Mark from the center point to the fold line top and bottom to create a diamond shape. Cut along this line.
For my sample Today I've used a piece of Sahara Sand card stock and will be decorating it wit blushing bride and patterned paper from the Falling in love papers in the Stampin Up spring summer catalogue.
For the mats cut 2 pieces of card at 10cm x 10cm (4" x4") , 1 piece 14.4cm x 7cm ( 5 5/8" x 2 2/3")
and 3 pieces 14.4cm x 7cm (5 5/8" x 2 3/4") on these pieces mark the center point at the top and draw a line to the bottom corners as below
Cut along the marked lines to remove the shaded areas to create 3 triangles. With 2 of the triangle cut them down the center from the top point to create 4 smaller triangles as below
Now use 1 square, the rectangle and the four smaller triangles and attach as shown to the card as shown below
Now turn the card over and using the remaining square and large triangle decorate as shown below
turn back to the front side and apply your pattern paper. I cut mine 1/2 a cm ( 1/8") smaller than the coloured card mats I chose not to use pattern paper on the back and stamped my greeting etc here later. I also applied adhesive, red tape as it is nice and strong , as shown below
To create the spring action fold the rectangular piece on the left as shown over the adhesive
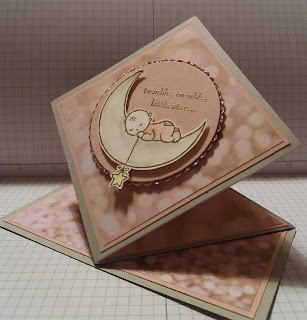
Now fold the left hand portion under and squeeze the small triangles together and the diamond piece will pop up as below
The back will look as shown below
Now decorate as desired.
I've used the Stampin' Up! stamps from the oh soooo cute set called Moon Baby from the spring summer catalogue which you can find by clicking the link on the left hand side of this page. you will find the link to our online shop on the right.
I hope you find this quick tutorial helpful and questions please comment below
Here is how my sample turned out


Cute and fun! What size envelope will the finished card require? Thanks for sharing.
ReplyDeleteHi sorry for the delay in responding 😶 the card will fit in an envelope for a 15cm x15cm card or a 6"x 6" card ☺ hope this helps have fun ☺ x
DeleteYour photo step by step tutorial is fabulous. Thank you for taking the time out to do this and posting it on your blog for us to share.
ReplyDeleteYour card is lovely
Thank you my photos aren't great but sometimes a picture speaks a thousand words ! 😉 lol
Delete