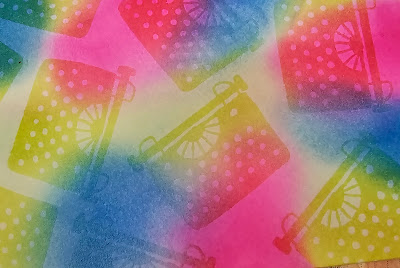
Today I've got a fun and somewhat messy watercolour background tequnique to share. Now don't be put of by the word messy it's only as messy if your name's Cary and you don't think it through first 🤣 Don't panic I'll give you my top tips to a tidier session 😉 I've uses the typewriter from the Just My Type stamp set as it's a solid image, you'll get way as we go along.
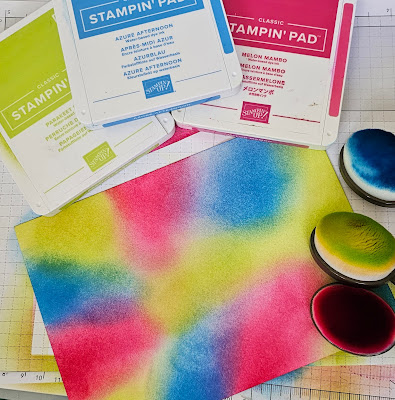
The background starts with waterbased ink pads, blending tools (I use brushes) and watercolour paper. My top tidy tips start here use scrap paper over your work area.
I chose 3 bold colours of ink and blended them randomly over the entire piece of watercolour paper. Don't be to worried that it doesn't look amazing trust the process.
Now once all the powder has been heat set the real fun begins. To start with the images may bot be very obvious but hang tight.
So more top tidy tips... use a wipe clean mat or cover the area with a piece of parchment/ baking paper. Have plenty of kitchen paper or absorbant cloths to hand. Have a bin to hand for wet stuff
Keep applying the water and blotting it until you're happy. Now I do think if I'd used lighter colours the effect would have been different but that's for another day. Top tidy tip put your used paper towel in a bin straight away the colour can be transferred elsewhere 😉
The panel needs time to dry but not too long as you will have blotted up most of the moisture already.
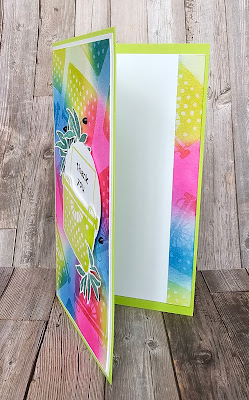
To decorate I simply stamped the typewriter image again in the green ink. I stamped over it again using versamark and heat embossed it with clear powder. This is made easier because the stamps are photopolymer so they are easy to position. I then fussy cut the image out. I also stamped and fussy cut 3 of the leaves images.
Next I used a 2" punch to cut a circle out of basic white cardstock. I then stamped the paper edge and thank you sentiment positioning it so that the typewriter lined up.
I adhered all the bits together using 3d foam. Itrimmed the watercolour panel and then matted it onto a piece of basic white then onto a green card base.


No comments:
Post a Comment