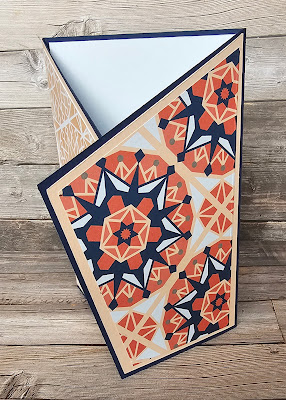
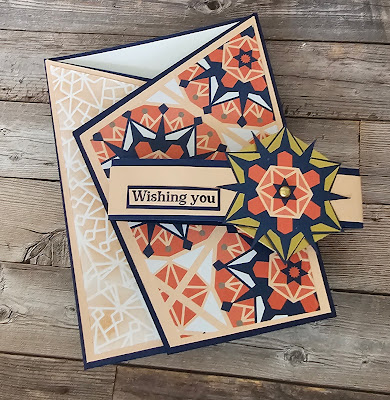
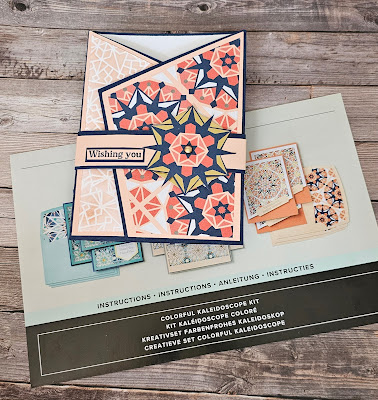
Yesterday I kept it simple today I'm stepping it up a little and using the kit to create new and interesting features. The fold is called an angled gatefold.
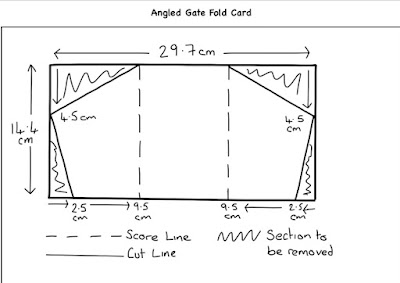
The card starts life as a piece of cardstock measuring 14.4cm x 29.7cm.You then score from both ends at 9.5cm in. Next mark at 4.5cm down from the top on both sides and 2.5cm across from the bottom on both sides. Now cut from the 2.5cm mark to the 4.5cm mark. Then cut from the 4.5cm mark across to the scoreline. Repeat for the other side. Below is a cutting and scoring template that might explain it better 😉
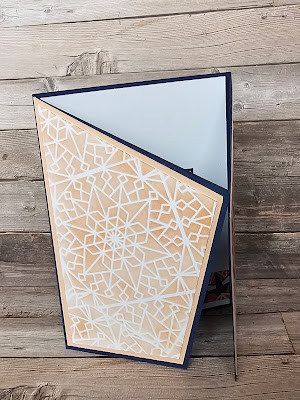
To decorate the card I used the inside of one of the gorgeous envelopes and one of the beautiful intricate diecut layers. Firstly you need to cut yourself 2 layering mats in a contrasting coloured cardstock. These measure 9cm x 14cm . To create the angled edges mark and cut as you did for the card base on one side of each mat. Cutting to the opposite top corner instead of the fold.
Next using the inside of the the envelope cut a panel that measures 8.5cm x 13.5cm. Decide which side this panel is going to be on, I chose the right hand side , and cut your panel accordingly.
For the other side cut a piece of white cardstock measuring 8.5cm x 13.5cm and cut the opposite to the pattern paper panel. Now take one of the beautiful diecut panels from the kit and gather a coordinating ink and a blending brush /tool. Place the diecut over the white cardstock and blend the ink through it. Be careful not to move the panels as you work and remember to start blending from off the side and work over on small circles. Work in layers. You can always add more but can't take it away 😉
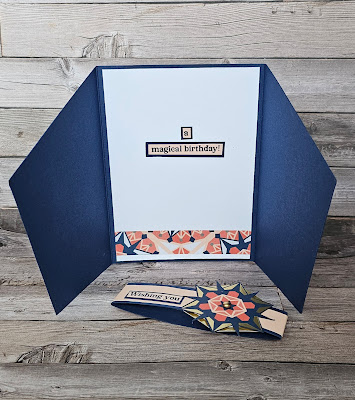
Now just adhere you mats onto the front panels . Cut a white mat measuring 14cm x 10cm for the inside of the card and decorate as desired. Then adhere to the inside of the card.
To keep the card closed I chose to create a belly band. I did this with a strip of the same colour cardstock as the card base measuring 2.5cm x 29.7cm and one from the contrasting coloured cardstock at 2cm x 29.7cm. I then adhered them together. Next I folded the strip around the closed card starting from the middle of the front making sure that it wasn't too tight as it will need to slip on and off. I trimmed the end that crossed over allowing a good area to adhere them together. For the band decoration I fussy cut a start from one of the gold foiled card fronts from the Kit's . I then adhered it to the band. Next I took one of the hexagonal gold foiled sentement panels from the kit and adhered that behind the star so that the gold edges were visible . A gold gem in the center and the sentiment and all was done.

.jpeg)
.jpeg)
No comments:
Post a Comment