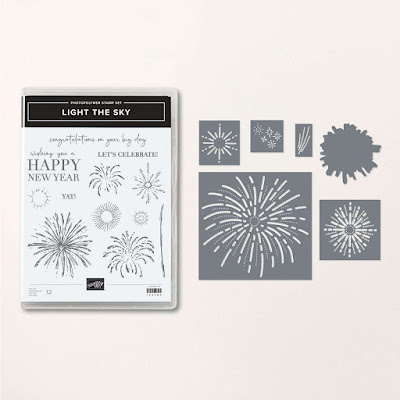
For my final card for this week...and year in fact! I am sharing a fun card that features the amazing Light the Sky bundle. The dies in this set are amazing.
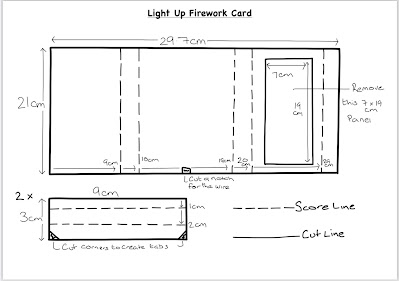
It all starts with a piece of cardstock measuring 21cm x 29.7cm, a whole sheet of A4 cardstock. I then scored it at 9cm , 10, 19cm , 20cm and 29cm. I then cut a rectangle out of the 3rd large panel that measures 7cm x 19cm. I call this gutting the center of the panel. It leaves a 1cm border on all 4 sides of the panel effectively making a frame.
I then created 2 end panel from 2 pieces of cardstock each measuring 9cm x 3cm. Score each at 1cm and 2cm. On the 3rd panel cut the edges so that it creates a tab.
On the bottom edge of the middle large panel snip a small divot out.
Now adhere along the non tabbed edge one to the top and one to the bottom along the center panel of the card base.
Next I took a panel of silver glimmer paper measuring 8.8cm x 20.8cm and adhered it to the center large panel.
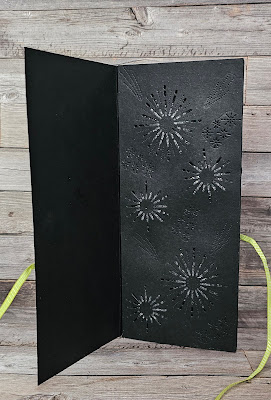
Cut a piece of cardstock measuring 9cm x 21cm and die cut the gorgeous firework details from the piece.
Then fold the card base up to create the box card. I adhered the long small panel by lining it up to the first score line. Then I folded the top extra panel in and adhered that. Next I threaded my micro led fairy lights through the divot in the bottom panel before closing the tab at the bottom of the card.
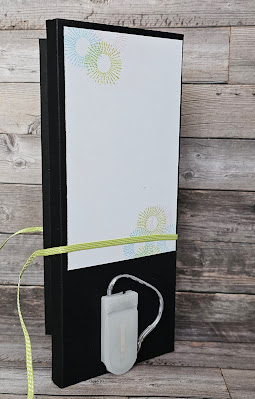
I used glue dots to arrange the fairy lights inside the card ontop of the silver glimmer paper. The battery pack I adhered to the back of the card with strong tape making sure the switch was easy to use.
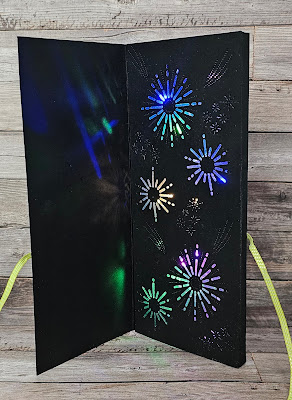
Now adhere the die cut panel over the front of the frame turn the fairy lights on and watch them twinkle ✨️ 😍
To decorate the front I took a panel of card measuring 7cm x 19cm ans stamped in versamark my sentiment. I then heat embossed it with silver embossing powder.
I then used the firework stamps and stamped again using versamark all over the panel. This time I used white embossing powder and heat embossed the images. I then took my alcohol markers and coloured the white embossed images. I love the effect this gives on the dark card base!
I then took another panel of cardstock measuring 8.5cm x 20.5cm and adhered the coloured panel on it. I then took a length of ribbon and adhered it around the card base so that it will tie the card shut. I adhered the colourful panel over top on the front of the card front using 3d foam.
On the back I adhered a white panel measuring 8.5cm x 13.5cm so that a message can be written.
And finally the card was made! Here is the inside in daylight with the lights off..
The silver glimmer sparkles throught the die cuts. But then turn the lights on and it look way more colourful...
And here it is in the dark...
So with this card I wish you a Merry Christmas and all the very best for this holiday season.
Have a great weekend and please join me next week as we see what wonderful creations Gill will be sharing with us.
Have fun
Cary xx



No comments:
Post a Comment